
第1步,打开Word2013文档窗口,切换到“页面布局”功能区。在“页面背景”分组中单击“水印”按钮,并在打开的水印面板中选择“自定义水印”命令,如图1所示。
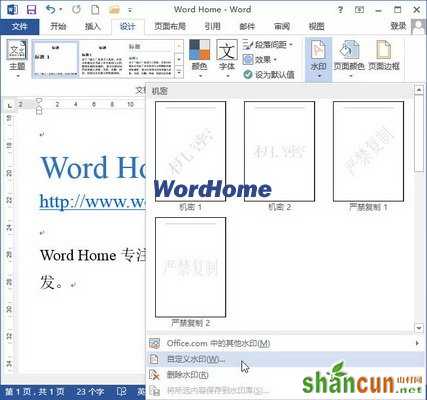
图1 选择“自定义水印”命令
第2步,在打开的“水印”对话框中,选中“图片水印”单选框,并单击“选择图片”按钮,如图2所示。
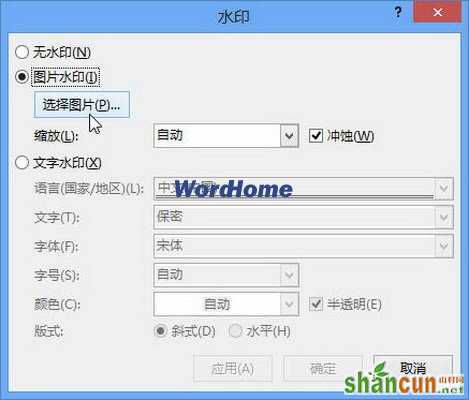
图2 选中“图片水印”单选框
第3步,打开“插入图片”对话框,查找并选中作为水印的图片,并单击“插入”按钮,如图3所示。

图3 插入作为水印的图片
第4步,返回“水印”对话框,选中“冲蚀”复选框,这样可以使图片呈现比较模糊的显示效果,从而不影响正文阅读。在“缩放”下拉列表中可以选择图片水印的缩放比例(如50%、200%等)。设置完毕单击“确定”按钮即可,如图4所示。
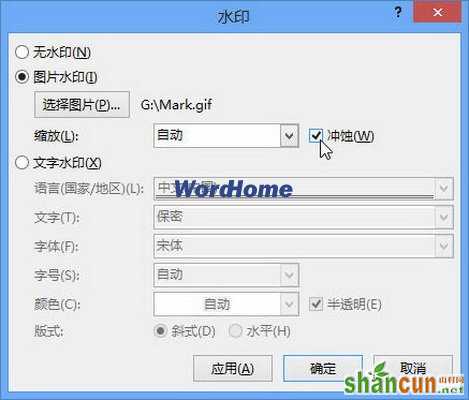
图4 选中“冲蚀”复选框
在Word2013文档中插入图片水印后的效果如图5所示。

图5 插入图片水印后的Word文档效果


