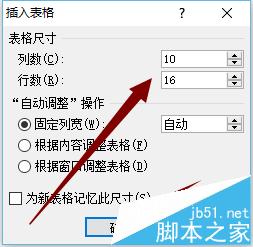
1、首先,打开Word在工具栏中点击插入,在插入下方选择表格——插入表格。

2、再插入表格界面根据自己的需要进行选择行、列的多少。在这里选择10*16的进行演示。
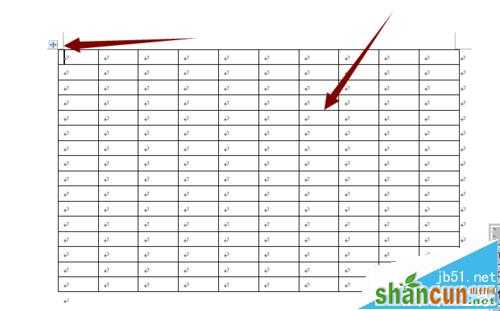
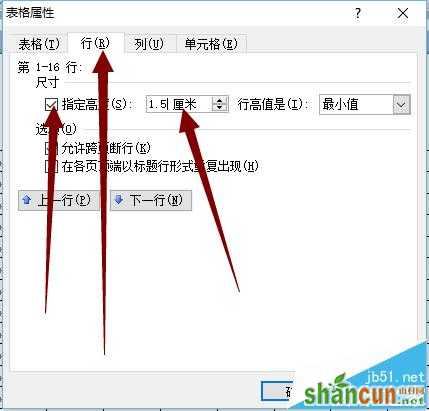
3、输入后确定,在表格左上角小符号右键,选择表格属性。
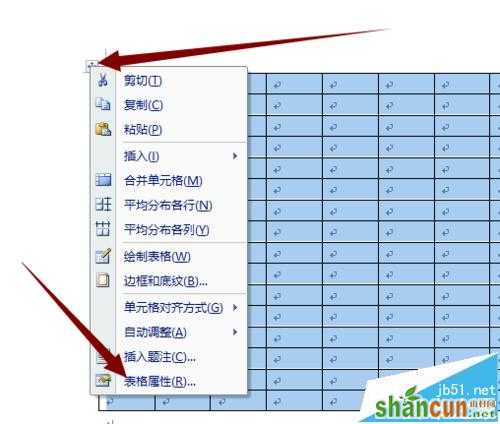
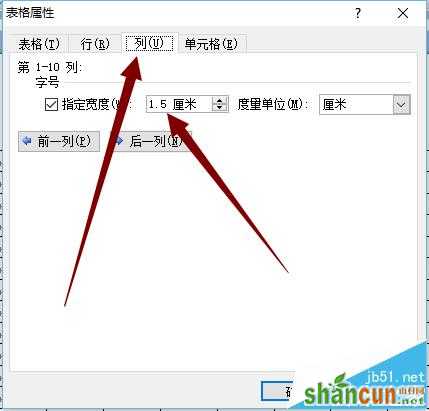
4、在表格属性对话框中设置行、列,在指定高度与宽度对话框前打勾,方格、田字格、米字格都是正方形的,在这里保证高度与宽度设置相同即可,根据自己的 需求设置格子的大小。
5、点解确定,方格就制作完成,接着方格往下制作田字格。
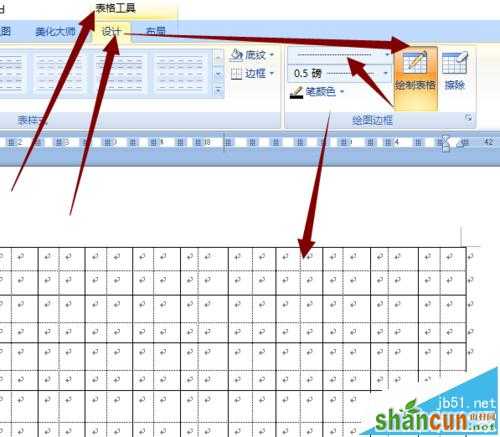
6、在制作表格时上面会出现“表格工具”栏选择“设计——绘制表格——在选择线的形式(虚线、实线、粗细等)。在每行和每列中进行划线。
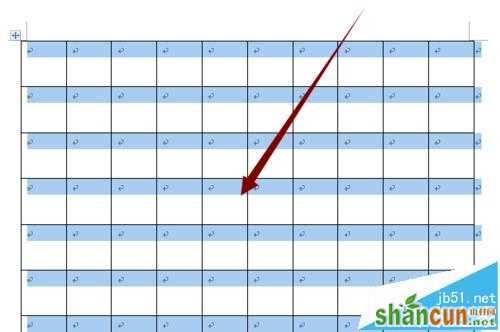
7、画完行与列的虚线后,先保存,在选中全部表格右键,先后选择平均分布各行与 平均分布各列,这时田字格制作完成。

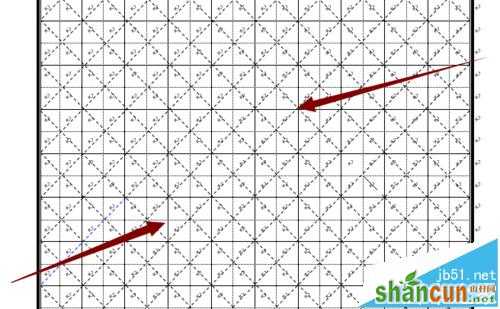
8、在田字格的基础上制作米字格,在从上方的工具栏插入——形状——线条——直线,沿着田字格对角线开始画线。
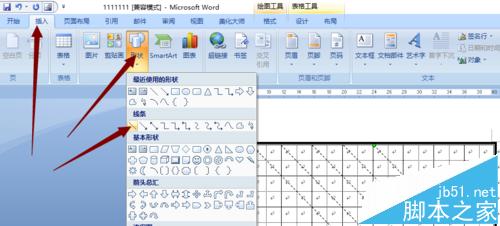
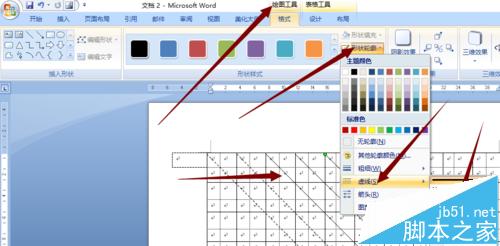
9、画完一条线后,从上面的形状轮廓中选择颜色和线的种类。一直重复这样划线。
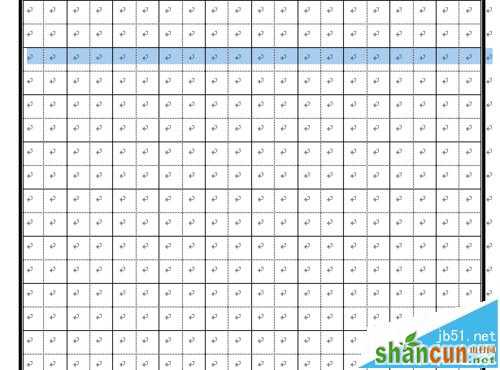
10、 把所有对角线画完,米字格就完成。