打印条形码的步骤如下:
步骤一:为Word添加“开发工具”选项卡
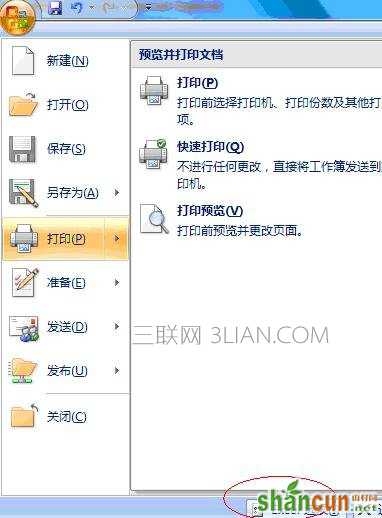
步骤二:初始状态下,在菜单栏中是没有“开发工具”这个菜单项的。这时候,可以单击office图标(Office系列软件左上角),然后选择“Word 选项”或“Excel 选项”,在“常用”标签中选择“在功能区显示”开发工具”选项卡”,就可以看到了。
步骤三:插入条形码控件,Microsoft Barcode控件9.0
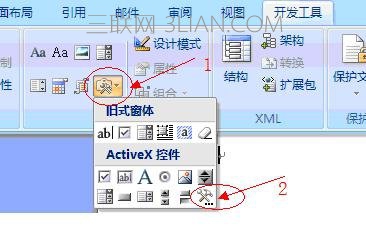
步骤四:单击‘开发工具’-‘旧式工具’-‘其它控件’,如下图所示:
步骤五:选择条形码控件Microsoft Barcode控件9.0,单击‘确定’按钮

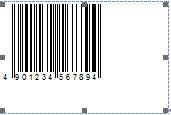
步骤六:插入条形码控件后,Word中就出现了条形码,接下来是设置条形码的属性,主要包括:1、条形码的码制类型,2、条形码的内容,3、条形码的大小。
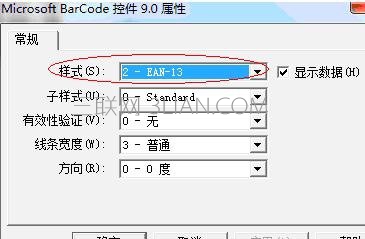
步骤七:设置条形码的码制类型:
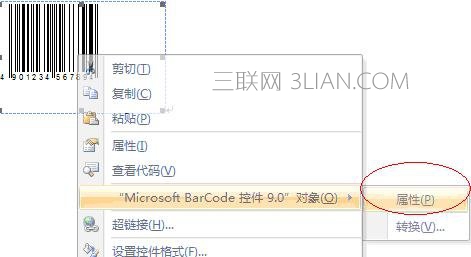
步骤八:右键条形码-‘Microsoft Barcode控件9.0对象’-‘属性’
步骤九:在下面对话框,样式中可以设置条形码的码制类型
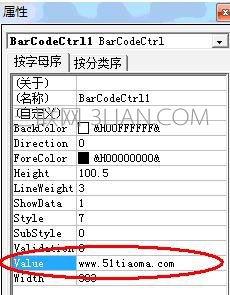
步骤十:4、设置条形码的内容
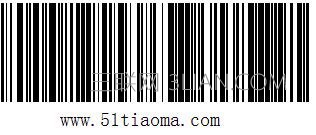
步骤十一:右键条形码--‘属性’,弹出‘属性’对话框,在value属性中,输入条形码的内容,如:www.51tiaoma.com
步骤十二:单击‘开发工具’--点击‘设计模式’,该按钮是‘设计模式’和‘非设计模式’的切换按钮,
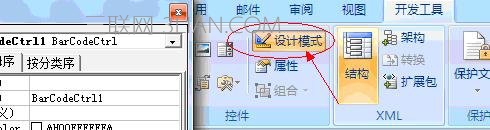
步骤十三:随后,您就看到条形码的内容发生了变化,如下图