word在背景图片上添加文字的步骤如下:
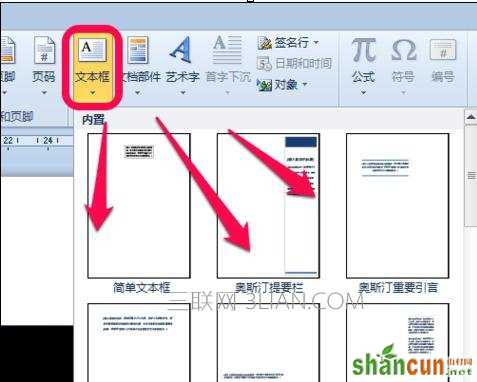
步骤一:打开word,插入图片,点击插入——》文本框,我们通过文本框来插入文字,如图。

步骤二:在文本框的下拉菜单里,选择你需要的文本框格式,如图。
步骤三:插入后,如图所示,把文本框拖到图片上面。

步骤四:然后修改成你需要的图片文字说明,如图。

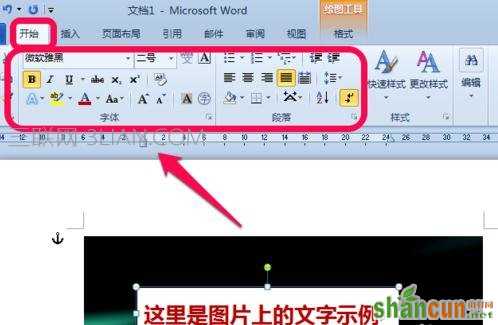
步骤五:接下来我们可以对其基本的字体和颜色的调整,如图,选择文本框,点击导航选项卡的开始,这里有基本的文字调整,如图,我设置为微软雅黑、二号字体、加粗等。你可以根据你的需要设置。
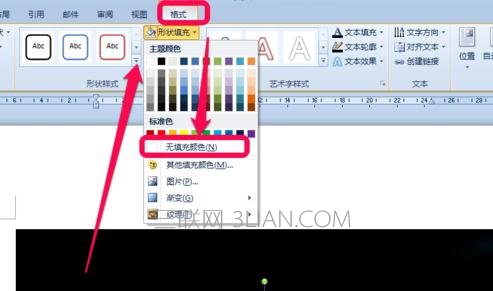
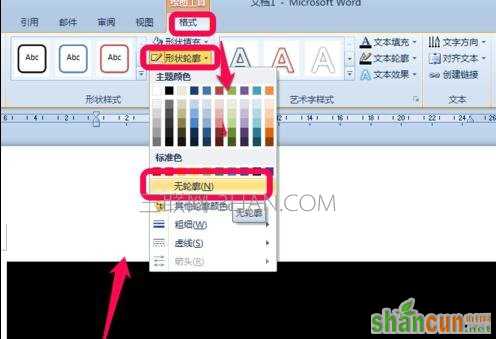
步骤六:大家看到这个白色的背景挺不舒服的,怎么去掉呢,还有更多的设置在格式里设置,如图,选中文本框,点击上方导航选项卡里的格式,这里有很多的基本设置和漂亮格式。
步骤七:选中后,点击格式的形状填充,选中无填充颜色,如图。
步骤八:同理,形状轮廓,也可以选择无轮廓,这样就只留下文字,会比较好看点,如图。
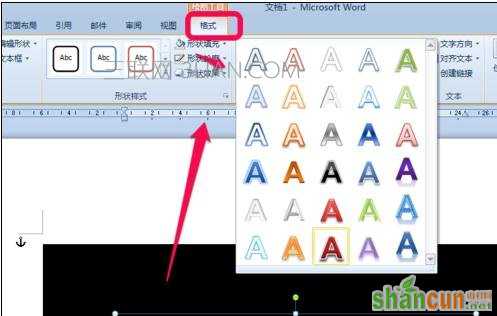
步骤九:同时,为了更好看,你还可以选择使用艺术字体,如图,选择你喜欢的艺术字体。