
分段设置页码步骤如下:
步骤一:我们在实际使用word的过程中经常会遇到第一页封面不需要页码,而要从第二页开始需要页码的情况

步骤二:首先,将光标置于首页的尾部。然后依次选择“页面布局”-“分隔符”,在下拉菜单中选择“分节符”里面的“下一页”。这样子,就将文档分成了两节,这个时候格式有可能出现偏差,可以通过删减空格来调整

步骤三:双击第二页页面的底部,然后出现页眉页脚,注意到页脚的右边有“与上一节相同”字样,说明第二节的页脚和第一节的页脚是连续的。选择“页眉和页脚工具”,取消选择“链接到前一条页眉”

步骤四:取消选择“链接到前一条页眉”之后,可以看到页脚右边已经没有“与上一节相同”字样,这样第二节的页脚就是单独的了

步骤五:然后选择“插入”- “页码”- “设置页码格式”

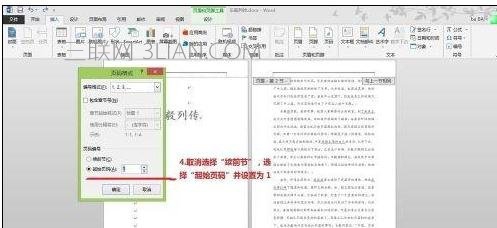
步骤六:在“页码格式”对话框中,取消选择“续前节”,选择“起始页码”并设置为 1
步骤七:之后选择“插入”-“页码”

步骤八:即可完成分段页码的设置


