word设置自动翻页的步骤如下:
步骤一:首先打开Word文档,在菜单栏上找到工具选项,在弹出 的下拉菜单栏中选择宏命名,宏命令还有子菜单,继续选择宏命令:
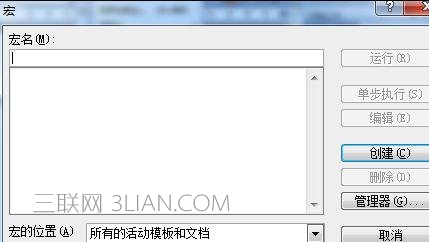
步骤二:点击宏命令之后弹出宏对话框(当然你也可以使用快捷方式【Alt】+【F8】):
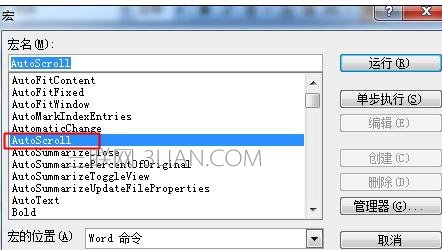
步骤三: 在“宏的位置(A)”栏我们点击下拉选择“word命令”
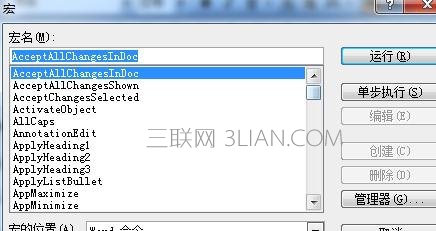
步骤四:然后再命令中我们找到“AutoScroll”命令,点击运行即可。要停止自动翻页只要随便按下键盘或鼠标即可,
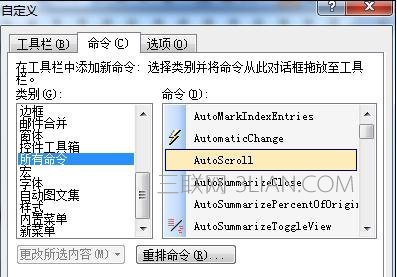
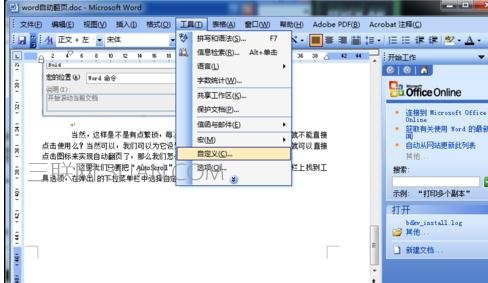
步骤五:这里我们只要把“AutoScroll”命令调出来即可,操作方法是在菜单栏上找到工具选项,在弹出 的下拉菜单栏中选择自定义命名:
步骤六:在弹出的对话框中我们找到“命令”选项卡:
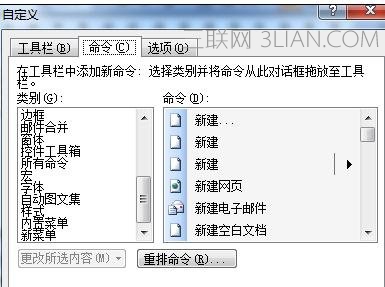
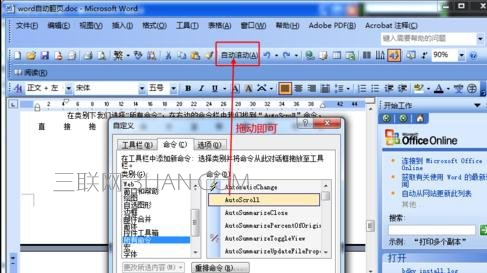
步骤七:在类别下我们选择”所有命令”,在右边的命令栏中我们找到“AutoScroll”命令,直接拖动命令至快捷图标处。