ppt2013分割图片的方法
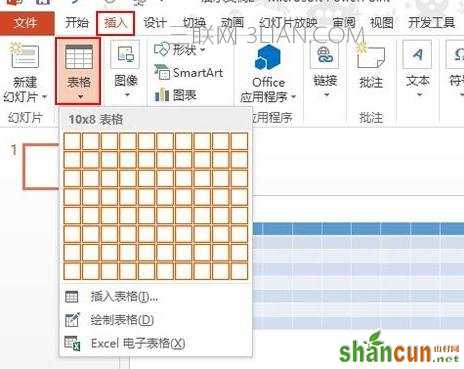
首先启动PowerPoint2013,单击菜单栏--插入--表格,插入一个10×8的表格。
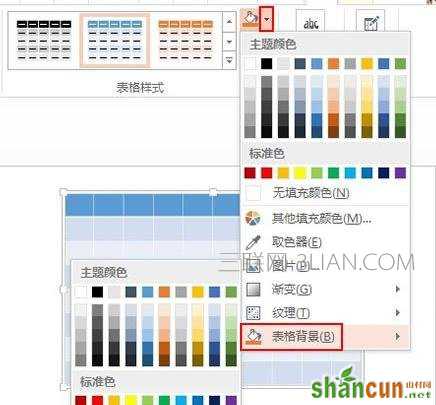
设置表格图片背景填充
选中表格,单击设计选项卡里面的填充按钮,从下拉的菜单中依次选择"表格背景"--"图片"。
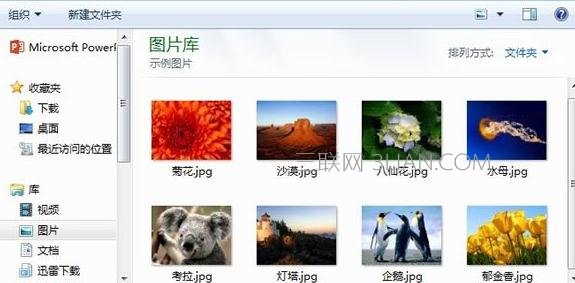
在本地素材库中选择一张精美的图片,双击插入到表格中。
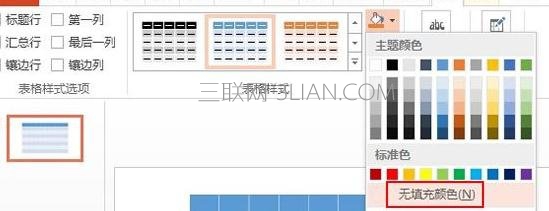
此时我们并没有看到图片,大家别急,这里需要单击填充按钮旁的小三角符号,选择无填充颜色。
这个时候图片就添加到表格中,做为背景了。
添加网状边框
单击设计选项卡下绘图边框--笔颜色,选择白色,背景1,深色15%选项。
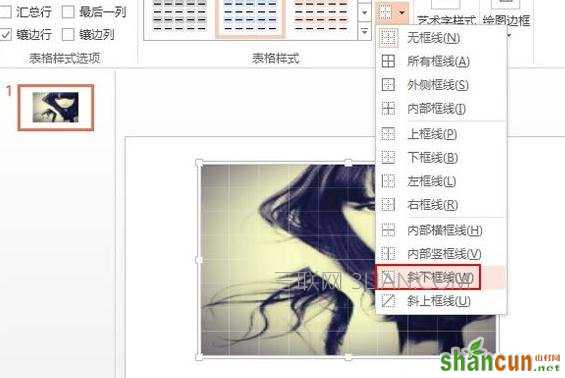
然后单击边框按钮,先设置为无边框。
在设置为斜下边框,如图所示。
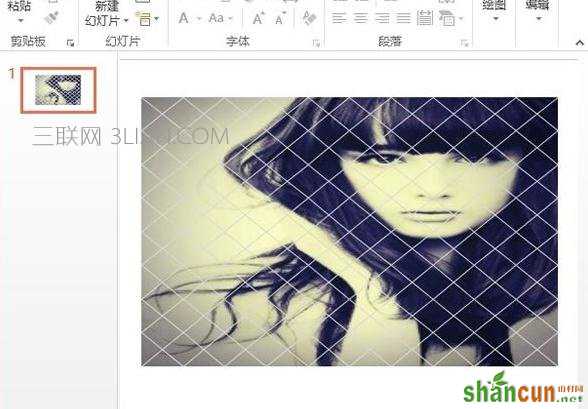
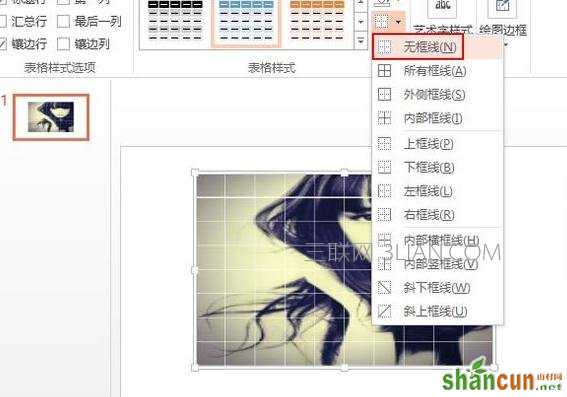
最后一步,设置为斜上边框,最终的效果如下图所示: