
ppt绘制自由曲线的方法:
打开ppt,内容版式 ——空白,自选图形—— 线条—— 直线。按住shift键拖动鼠标画出一条水平线,右键点击线条,编辑顶点。
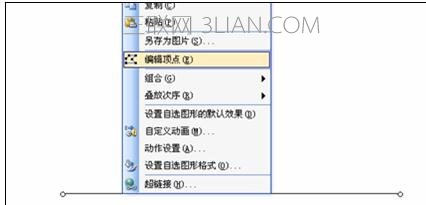
2右键点击左边的端点,选择角部顶点。
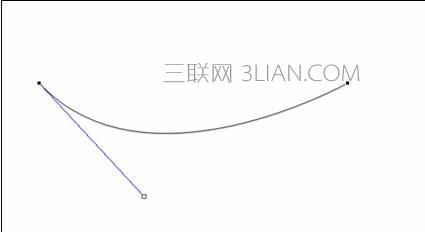
3这时出现了一条蓝色线条,蓝色线条的一段连接直线左边的端点,一段是黑色边框、内部白色的正方形为端点,鼠标单击该正方形不松手,向右下方向拖动。由于下面多次要说线条,我们这里说蓝色调节的线叫调节线,这里的线条是指原本我画的那个直线。
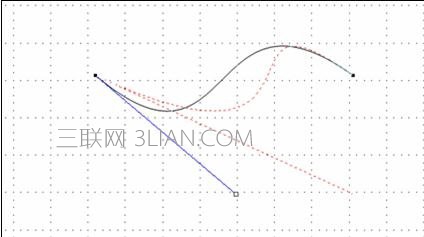
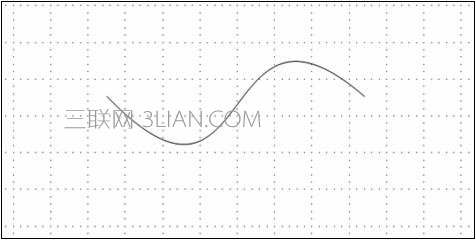
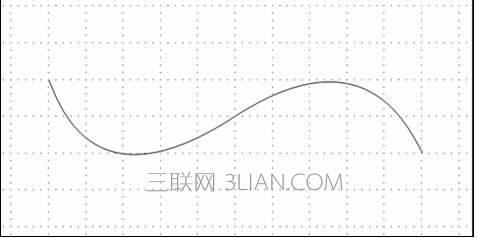
4同样,对线条右边的端点进行角度顶点编辑,如下图,左上方向拖动。我们得到一条曲线。

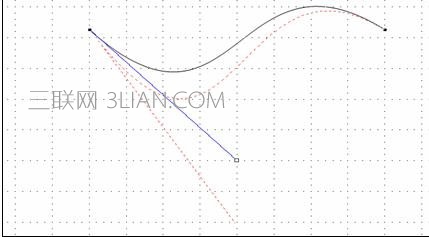
5下图中我们对调节线拖动,在我们没有松手的时候,存在着红色直点线,还有一条红色的曲点线。红色直点线表示这时我们松开鼠标后,调节线所要变化到的位置,也就说是所蓝色的调节线将要被我们调节到此处,红色曲点线表示线条被我们所调节后的形状,当我们看到线条的效果满意时就可以松开鼠标。
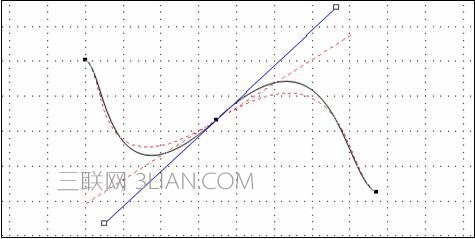
6如下图,一样是在调节线条的左边端点,蓝色调节线向左水平拉伸,左边弧度的中心向左超越了线条的左端点,红色的调节线向右水平拉伸,红色的曲线表示了原本左边的弧度。
7换个方法来做一下,画一条直线,倾斜度跨垂直三个网格,如红色箭头所示,右键单击线条,编辑顶点,在红色圆圈内(也就是线条中心)右键添加顶点。

调节好弧度,这时应该注意到线条的两端,弧度不协调。
试着调整线条的端点,使它整体协调,尽量的把调节线缩短,并向着线条拖动。

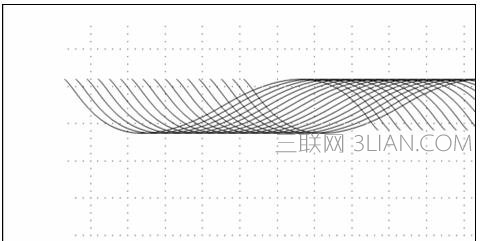
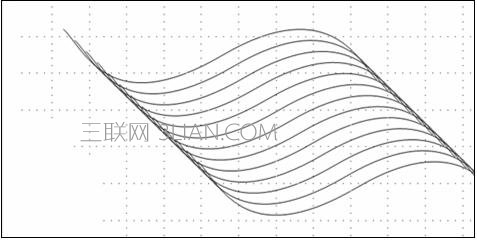
选中线条,ctrl+d进行复制,多按几次。使用wps的朋友,ctrl+c复制,然后连续按ctrl+v。
撤销返回一步,顶端对齐的效果如图:
在下图中,我们先把白色正方形拖动到一条竖立的网格线上,松开鼠标,然后继续拖动该端点,沿着该网格线向下平滑,注意保证我们既没有向左偏离也没有向右偏移,我们看到左边弧度中心向下移动了,但是中心的水平位置和原来的保持一致。

由以上得知,调节线向上下拖动,弧度的中心垂直移动,调节线左右移动时,弧度的中心水平移动,当然我们拖动时一般都是具备两个方向的,比如即向下还向右,
在本例中,假如我们拖动的时候,弧形的垂直深度够了,但是弧度中心的左右有偏离,就需要我们水平方向移动调节。

添加后在该点上右键单击,选择直线点,调节方法和上面基本类似,不同的是直线点的调节线是两个端点,调节其中一个端点,另一边的端点也会跟着移动,弧度同时出现两个,并相应的变化,如下图:
右键单击其中的一个端点,选择平滑顶点。
调整后的效果如下:

ctrl+a全部选中,绘图>对齐和分布,左对齐效果如下:


