欢迎来到山村网

PowerPoint2013怎么去掉背景(抠图)

2019-03-06 04:20:47浏览:206 来源:山村网   
核心摘要:  1、打开powerpoint2013;添加图片:单击插入-图片。  2、弹出对话框,选择要处理的图片,单击插入。  3、选中图片,出现

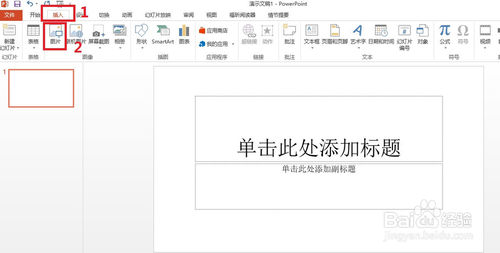
  1、打开powerpoint2013;添加图片:单击插入->图片。

PowerPoint2013怎么去掉背景(抠图) 山村

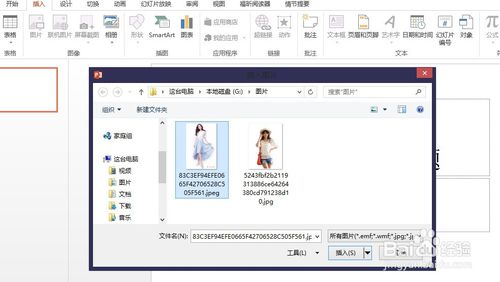
  2、弹出对话框,选择要处理的图片,单击‘插入’。

用PowerPoint2013去掉背景(抠图)的方法讲解

  3、选中图片,出现‘图片工具’菜单。

用PowerPoint2013去掉背景(抠图)的方法讲解

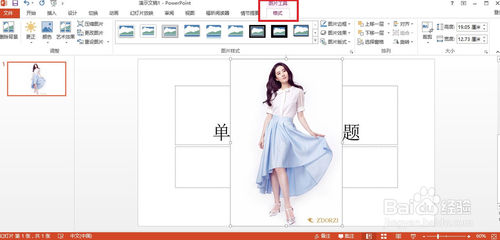
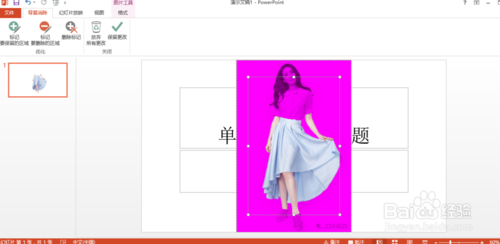
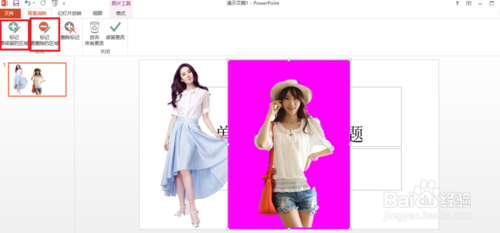
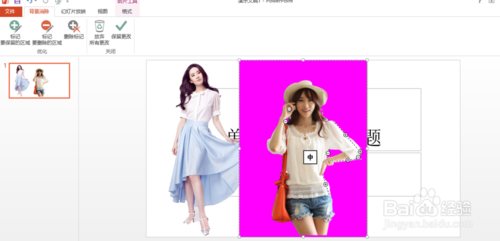
  4、接下来,单击‘删除背景’(见图一),效果如图二(玫红色区域代表要删除的部分,可调整图片上的框来调整要保留或是删除的区域)

用PowerPoint2013去掉背景(抠图)的方法讲解

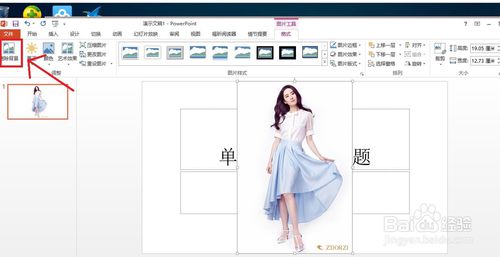
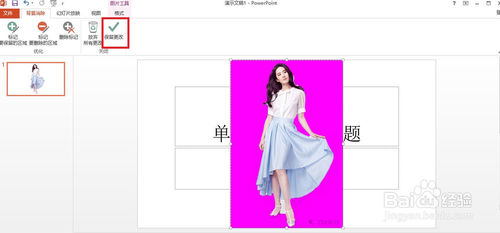
  5、调整之后,单击‘保留更改’(见图一),效果见图二。
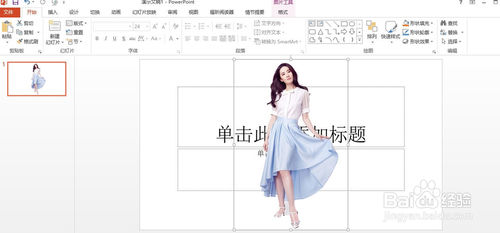
用PowerPoint2013去掉背景(抠图)的方法讲解

  6、接下来,再换一张图片。

用PowerPoint2013去掉背景(抠图)的方法讲解

  7、调整框之后,效果还是不太好。所以要用到图中框起来的两个功能。

用PowerPoint2013去掉背景(抠图)的方法讲解

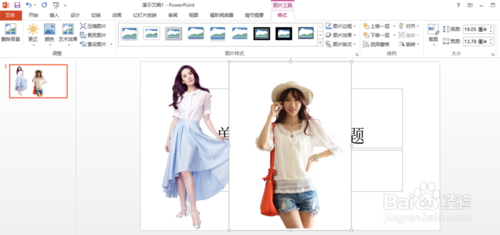
  8、用笔直接画或是单击要保留或是删除的区域即可(自己尝试之后,便能理解了)。

用PowerPoint2013去掉背景(抠图)的方法讲解

  9、最后,看一下效果图吧。

用PowerPoint2013去掉背景(抠图)的方法讲解
(责任编辑:豆豆)
下一篇:

诚实守信学做人手抄报图片

上一篇:

2016全国爱耳日黑板报设计图

  • 信息二维码

    手机看新闻

  • 分享到
打赏
免责声明
• 
本文仅代表作者个人观点,本站未对其内容进行核实,请读者仅做参考,如若文中涉及有违公德、触犯法律的内容,一经发现,立即删除,作者需自行承担相应责任。涉及到版权或其他问题,请及时联系我们 xfptx@outlook.com