
win7系统怎么安装windows xp
1、下面进入安装阶段:为xp划分一个单独的分区,一般8G或者10g.(这里,因为我用的是虚拟机模拟操作,所以只为xp划分了一个大小为6.34g的E盘);

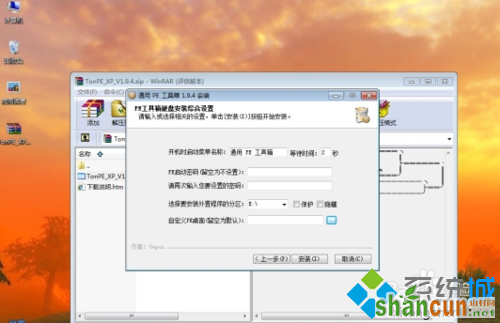
2、在win7下安装TonPE_XP_V1.9.4。通用PE工具箱下载双击桌面上的 tonPE_XP 图标;
3、安装成功,进入下一步。重启机器,会发现一个双系统选择菜单 ,这里选择进入PE;

4、运行桌面上的 "GHOST一键备份还原”,选择“简易模式-----”“恢复操作”;

5、找到之前ghostxp的解压文件,选择'windowsxp sp3.gho",打开;


6、在选择要恢复的分区 窗口上选择,恢复 到你之前为xp划分的分区 ,这里,我选择的是E盘;
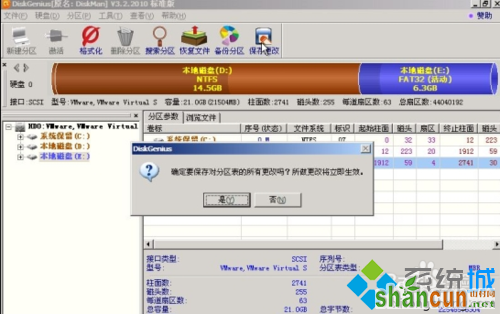
7、待ghost操作结束后,运行,开始-程序中,找到 ‘Diskgenius’工具,运行;
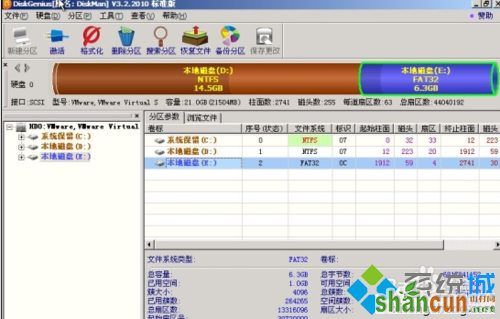
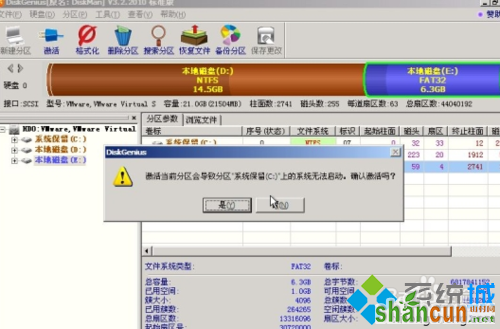
8、然后把找到你的xp目标盘,这里我的是e盘,选中,然后,鼠标右键,在弹出的菜单 里选择“激活当前分区”,“保存更改”;
9、确定后,重启机器,就会自动进入Ghost xp的安装;
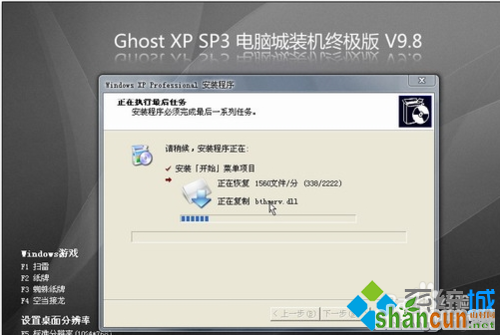
10、安装完成;

11、这时,xp的安装已经完成 了。
不过xp的安装虽然完成 了,win7的启动菜单却没有了,这时,我们要在xp下运行一个修复 小工具“NT6启动菜单自动修复工具” 修复工具大家百度,网上多的是。
按任意键自动 修复
12、这时,win7和xp的双系统启动菜单 已经配置完成 了。重启,就会看到下面的菜单 ,那个early version of windows 就是我们安装的xp了。


