
一、绘制灯笼
1、画灯笼主体
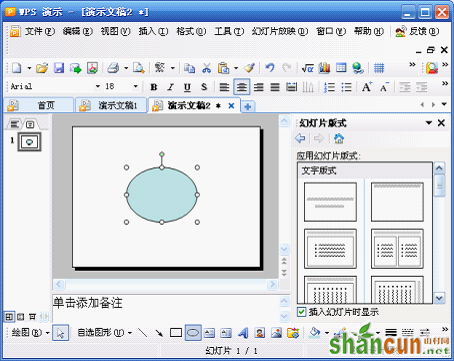
1)新建一个空演示文稿,内容版式:“空白”
2)绘制一个椭圆
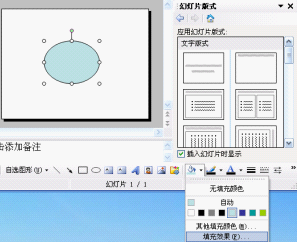
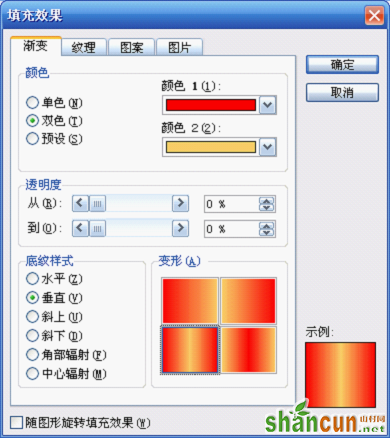
3)选中椭圆——点击填充按钮旁边的倒三角——填充效果
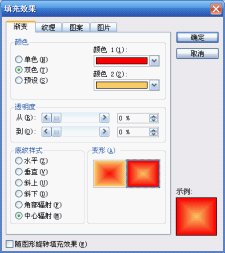
4)颜色:双色——颜色1:红色;颜色2:橙色——底纹样式:中心辐射——变形:第2列——确定
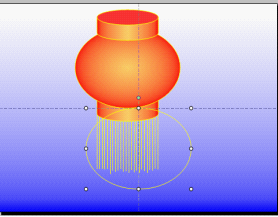
5)自选图形——基本形状——圆柱形——拖动黄色句柄改变弧形
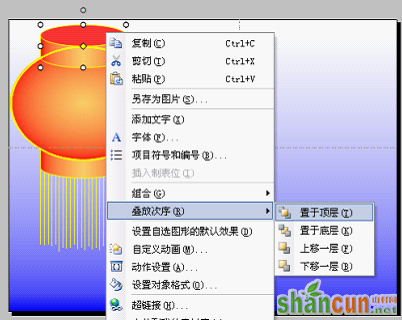
6)填充颜色——渐变——颜色:双色——颜色1:红色,颜色2:橙色——底纹样式:垂直——变形:第2行第1列——确定
7)复制一个圆柱形——放到灯笼底部——右击——叠放秩序:置于底层
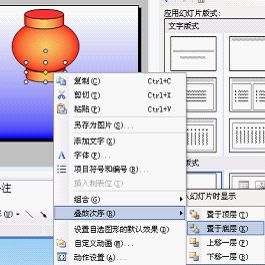
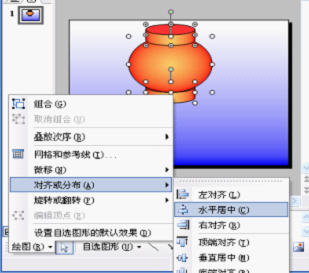
8)全选——绘图——对齐或分布——水平居中
9)点击“线条颜色”按钮旁边的倒三角——其它线条颜色——颜色:黄色(或橙色)
10)点击“线型”按钮——根据所画的椭圆选择线形大小

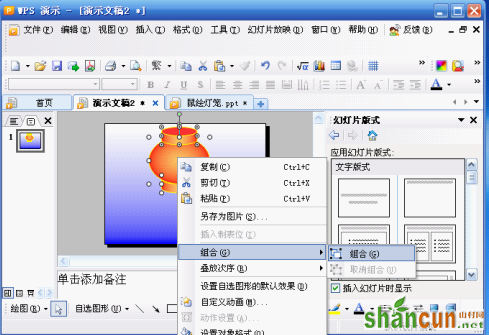
11)右击——组合——组合
2、装饰
1)直线工具随意地画一些直线
2)左右两边的直线分别对齐底座,选中全部灯穗——绘图——对齐或分布——横向分布
3)全选直线——右击——组合——组合
4)选中组合后的直线——线条颜色——黄色
5)右击组合后的直线——叠放秩序——置于底层
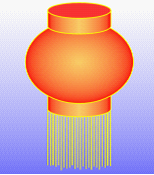
灯笼画好了!
二、让灯笼动起来
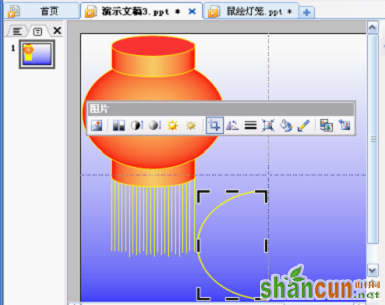
1、画灯骨线
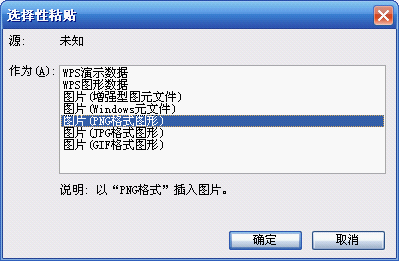
1)复制一个椭圆——填充色:无——右击——剪切——编辑——选择性粘贴——图片(PNG格式图形)——确定。
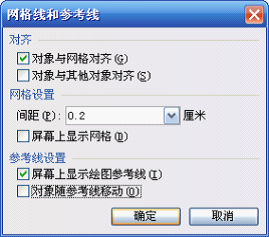
2)视图——网络和参考线——屏幕上显示绘图参考线打上勾——确定
3)将椭圆与竖直参考线为中线对齐
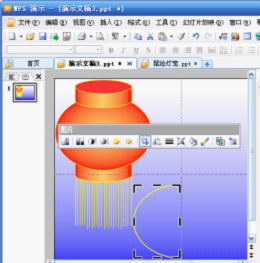
4)选择图片工具栏中的裁剪工具裁一个半圆弧出来。
5)复制一个半圆弧——选中两个半圆弧——以参考线为基准——绘图——对齐或分布——水平居中——绘图——对齐或分布——垂直居中
6)选中上面的半圆弧——绘图——旋转或翻转——水平翻转——以参考线为基准用方向键移到右边与左边的半圆弧凑成一个圆。
2、设置动画效果
1)选中右边的半圆弧——幻灯片放映——自定义动画——添加效果——退出——其它效果——层叠——确定
2)开始:之前——方向:到左侧——速度:中速
3)右击动画列表中的动画——计时——延迟:0.5——重复:直到幻灯片末尾——确定
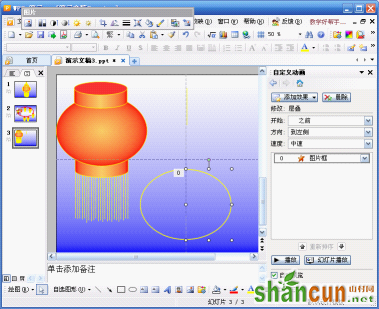
4)选中左边的半圆弧——添加效果——进入——其它效果——伸展——确定
5)开始:之后——方向:自右侧——速度:中速
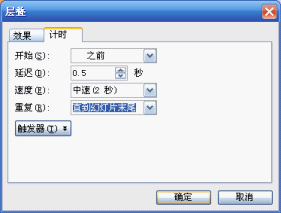
6) 右击动画列表中的第二项——计时——延迟:0.5——重复:直到幻灯片末尾——确定
7)选中两个半圆弧——复制3个
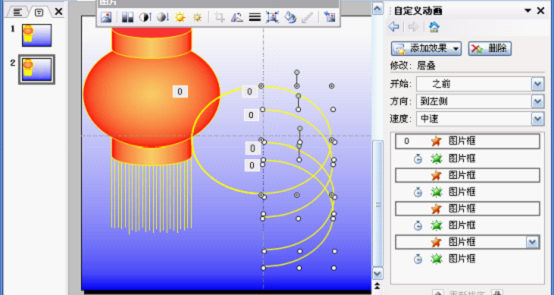
8)选中左边的半圆弧水平居中、垂直居中——选中右边的半圆弧水平居中、垂直居中
9)全选设置好动画后的灯骨移至灯身重叠
10)将上面的灯顶置于顶层
三、用灯笼装饰幻灯片


