
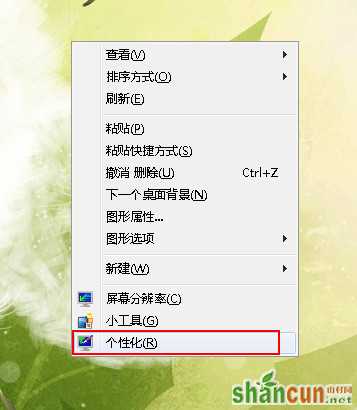
1、在win7系统桌面空白处右键点击,在弹出的选项中,选择“个性化”,如下图所示:
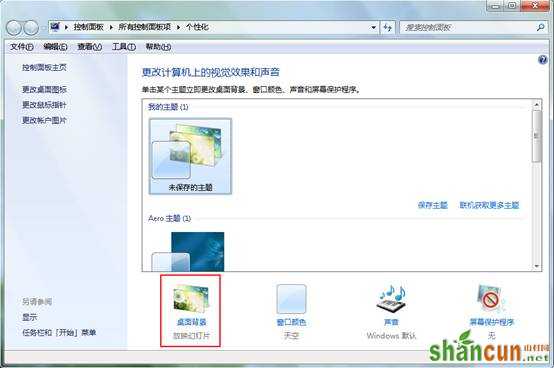
2、在计算机的个性化设置中,我们可以看到上面大框框中的是主题,在它下面有个桌面背景设置选项,点击它,如下图所示:
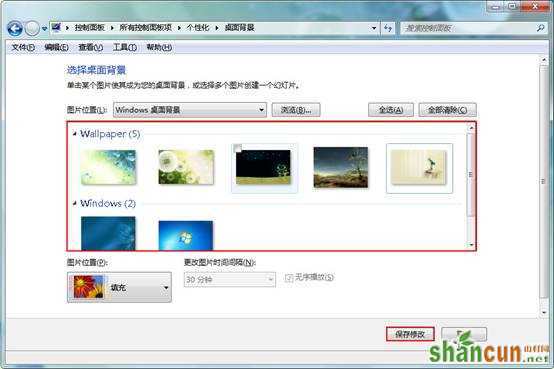
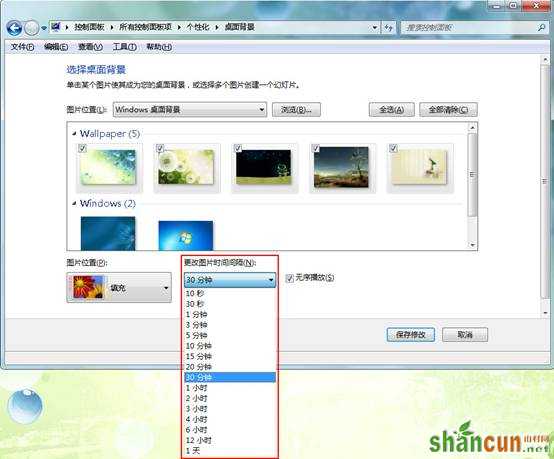
3、进入到桌面背景设置窗口后,我们可以选择系统自带的图片,然后点击“保存修改”按钮即可,如下图所示:
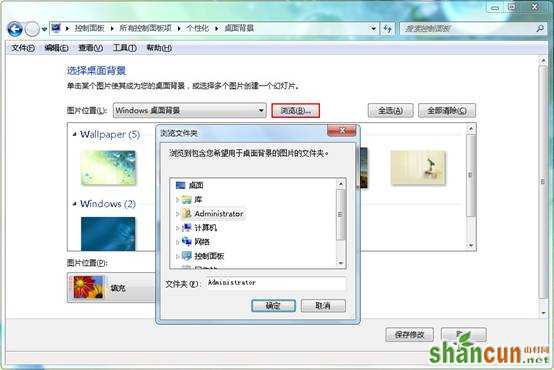
4、有些朋友会认为系统自带的都不好看,想用自己的图片,那么我们就点“浏览”按钮,然后找到自己的图片路径选定就好,如下图所示:
5、在桌面背景设置窗口下方有一个“更改图片时间间隔”选项,当我们选了多张图片的时候就可以设置时间间隔来更改图片显示,如下图所示:
看到这边我们都学会了更换桌面背景的操作,赶紧去挑选自己喜欢的图片做背景吧。


