在wps文字中设置倒影字体的方法:
1、在“插入”栏找到“插入艺术字”,然后在艺术字框内输入你想要输入的文字,这里就以“WPS字体倒影”来示范。

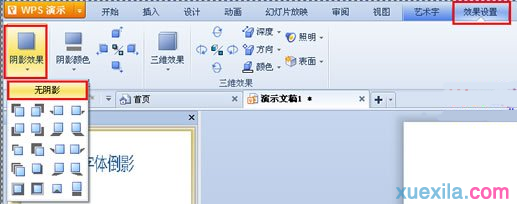
2、选中艺术字,选择“效果设置”,找到“阴影效果”,将阴影效果设置成无阴影。
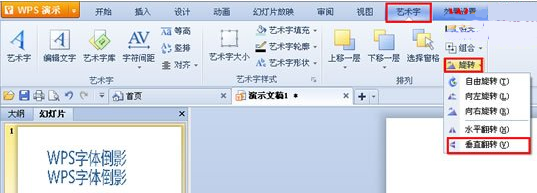
3、复制并粘贴“WPS字体倒影”字样,然后点击“艺术字”、“旋转”、“垂直旋转”,将文字垂直旋转。
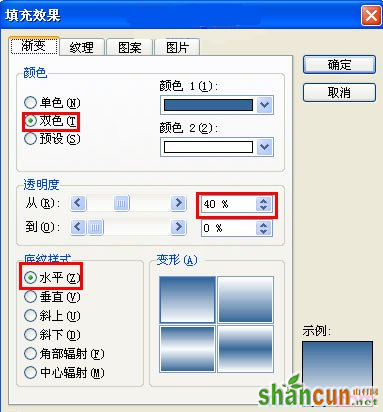
4、单击右键,选择“设置对象格式”。接着,填充颜色效果就可以啦。填充效果的相关参数:颜色——“双色”(颜色1不变,颜色2设置成白色),透明度——40%,底纹样式——“水平”。
5、其实最重要的一步就是取消艺术字的阴影效果哦。这是最后出来的成果图: