
电脑在日常使用过程中,有可能在连接有线网络的同时也处于无线网络的环境中,这个时候就涉及到网络优先级连接的问题。我们该如何设置才可以让电脑优先选择我们想要的网络呢?下面就教给大家设置方法,一起来学习吧。
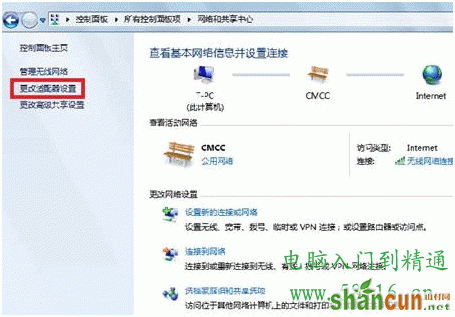
1、打开控制面板,选择“网路和共享中心”选项。

2、打开“更改适配器设置”选项。
3、按“Alt”键调出菜单栏。

4、点击“高级”选项,并选择“高级设置”。

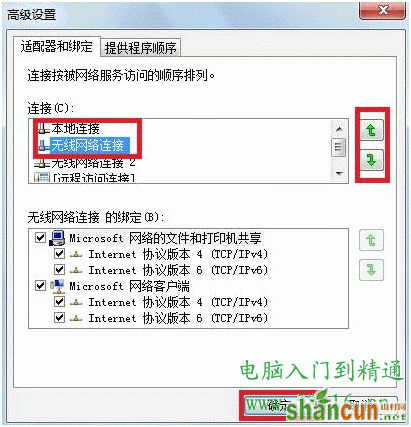
5、在“适配器和绑定”菜单下,选择网络并点击右边的绿色箭头设置优先级,再点击“确定”保存设置。
好了,这样设置后就可以按照你设置的顺序进行网络链接了。


