
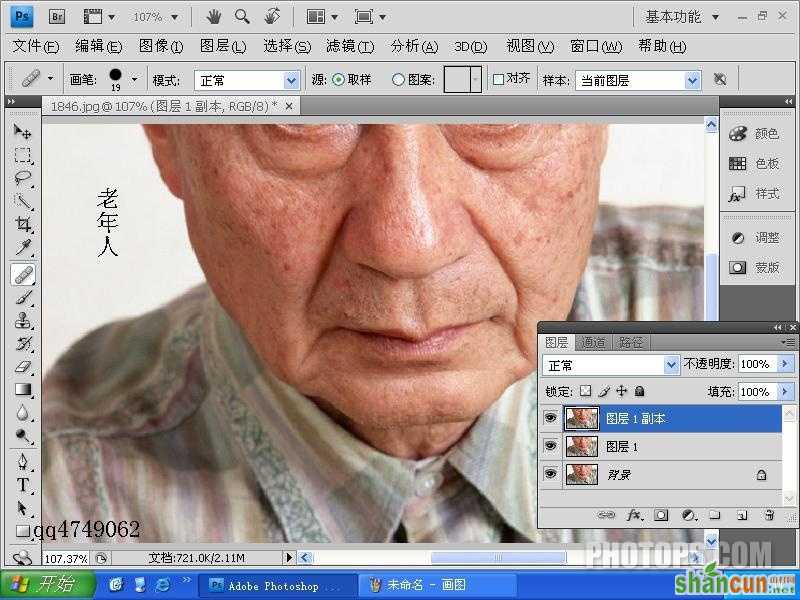
打开原图 复制两层,
 nmousewheel="return bbimg(this)" onload="javascript:resizepic(this)" border="0"/>
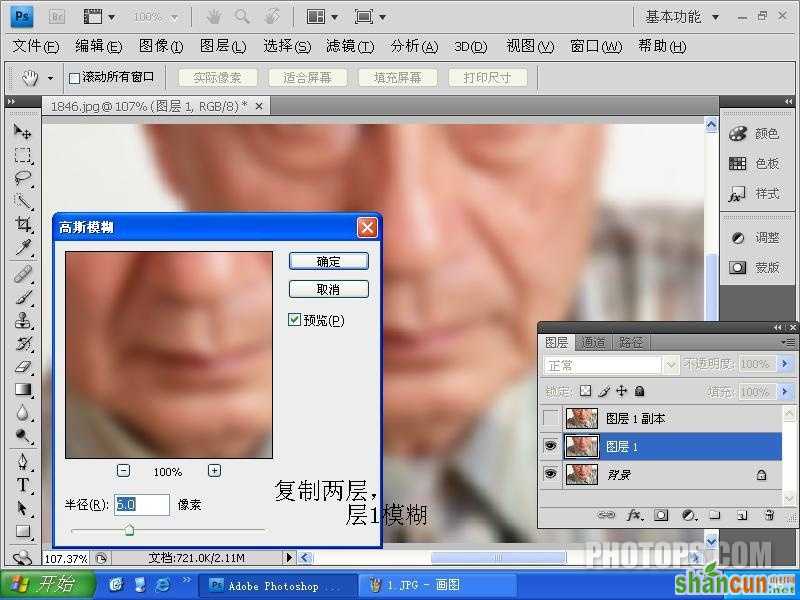
二 对图层1执行滤镜<模糊<高斯模糊
 nmousewheel="return bbimg(this)" onload="javascript:resizepic(this)" border="0"/>
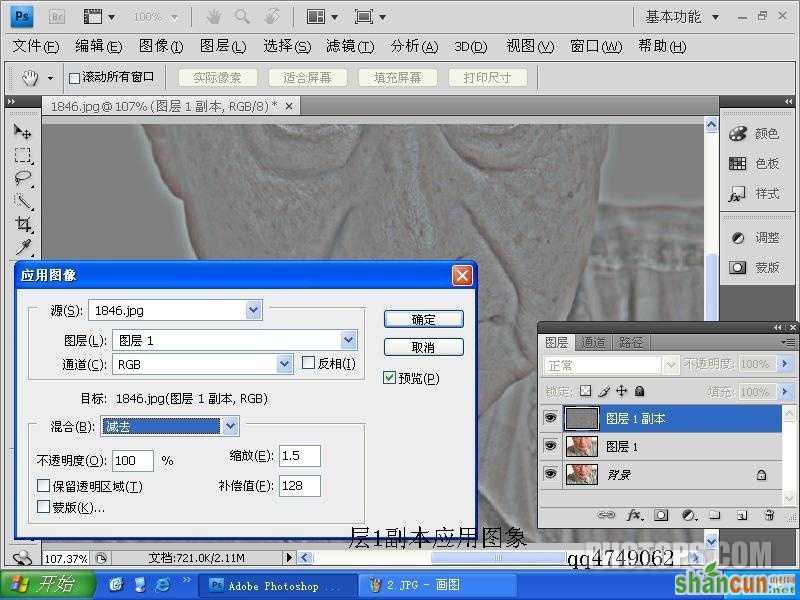
三 对图层1副本执行图像<应用图象
 nmousewheel="return bbimg(this)" onload="javascript:resizepic(this)" border="0"/>
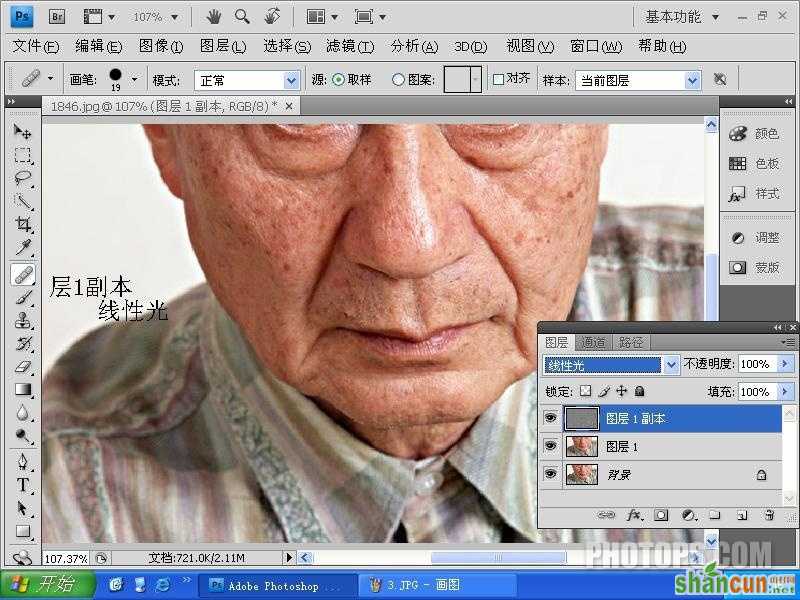
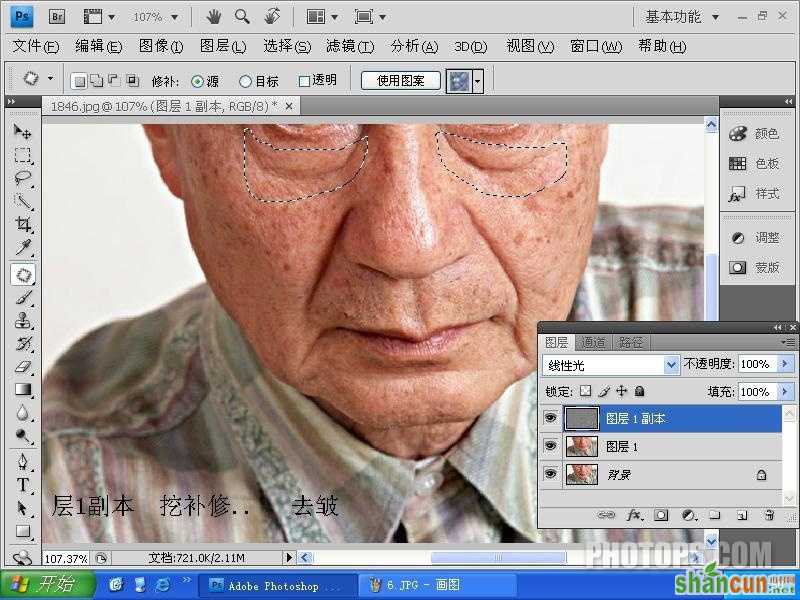
四 把图层1副本图层模式改为线性光
 nmousewheel="return bbimg(this)" onload="javascript:resizepic(this)" border="0"/>
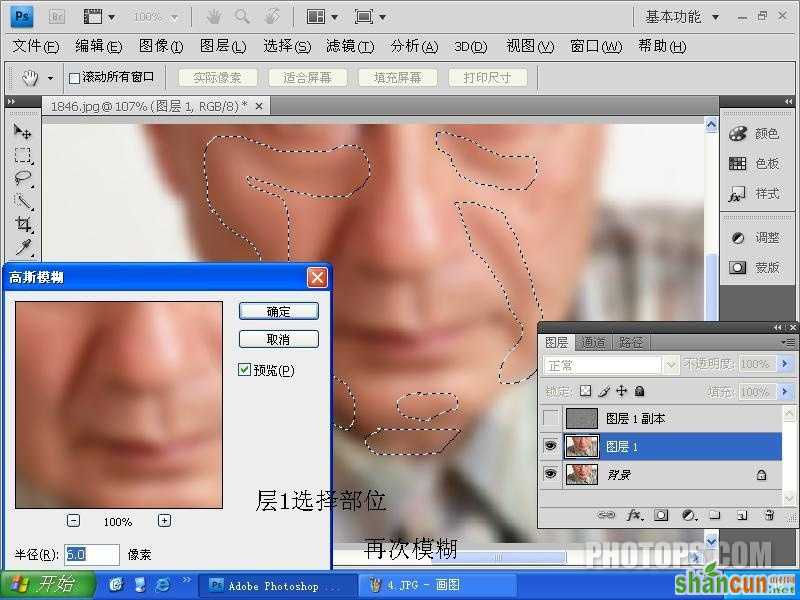
五 对图层1的选择部位再次执行滤镜<模糊<高斯模糊
 nmousewheel="return bbimg(this)" onload="javascript:resizepic(this)" border="0"/>
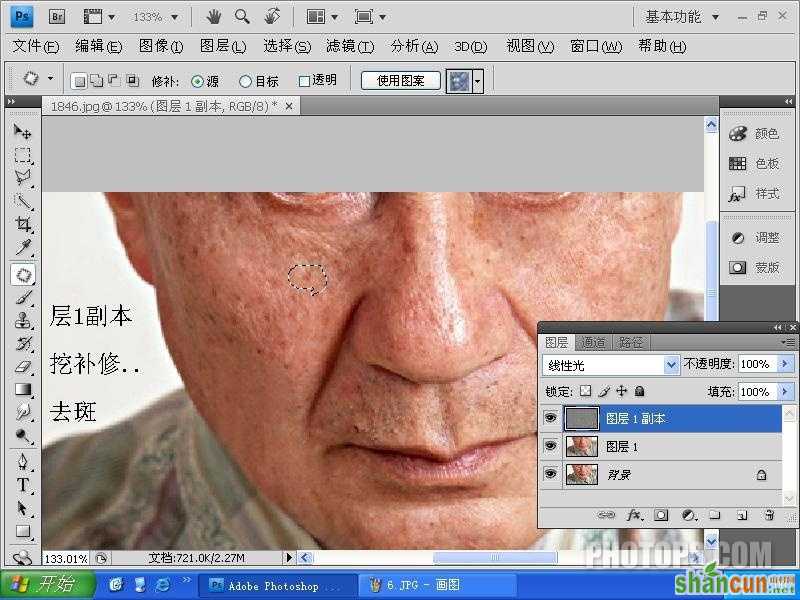
六 层1副本挖补修..去皱(3lian.com)
 nmousewheel="return bbimg(this)" onload="javascript:resizepic(this)" border="0"/>
 nmousewheel="return bbimg(this)" onload="javascript:resizepic(this)" border="0"/>
好啦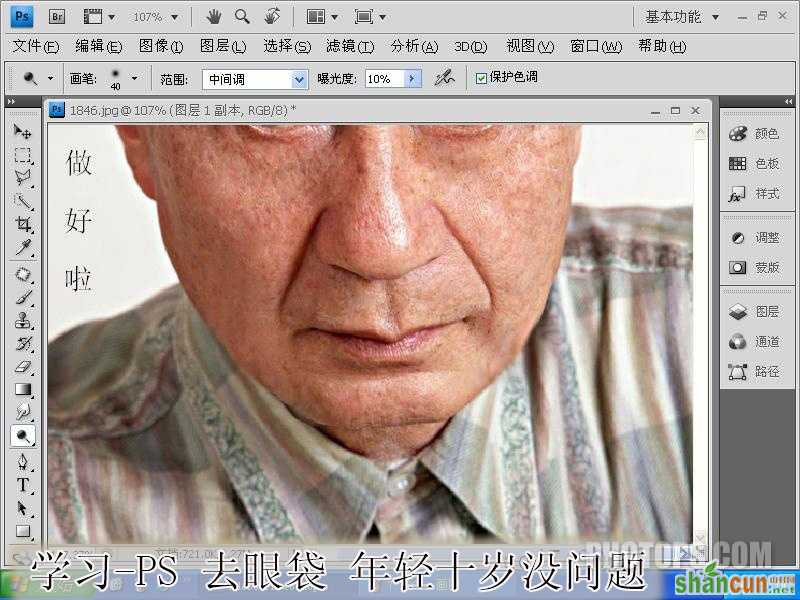 nmousewheel="return bbimg(this)" onload="javascript:resizepic(this)" border="0"/>


