
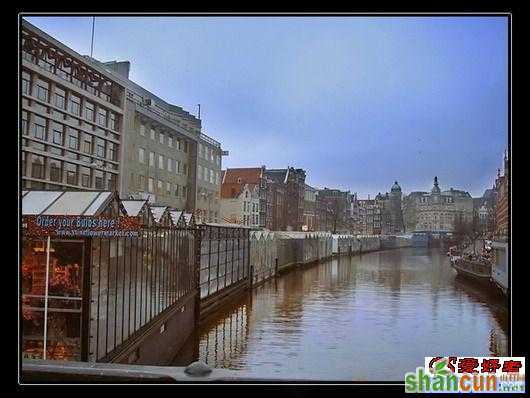
原始图 nmousewheel="return bbimg(this)" onload="javascript:resizepic(this)" border="0"/>
效果图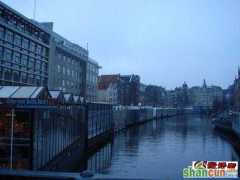 nmousewheel="return bbimg(this)" onload="javascript:resizepic(this)" border="0"/>
教程步骤如下
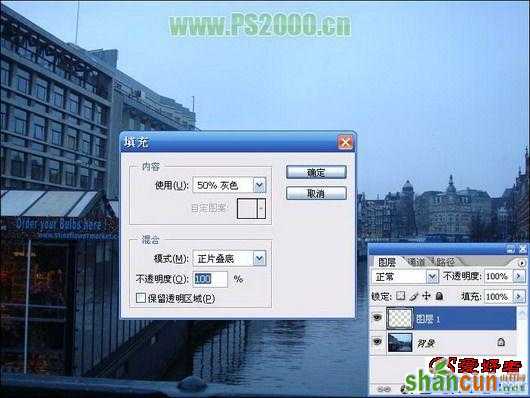
1、打开原图,新建图层,shift+F5填充50%灰色
 nmousewheel="return bbimg(this)" onload="javascript:resizepic(this)" border="0"/>
2、将填充的灰色图层改为“差值”混合模式
 nmousewheel="return bbimg(this)" onload="javascript:resizepic(this)" border="0"/>
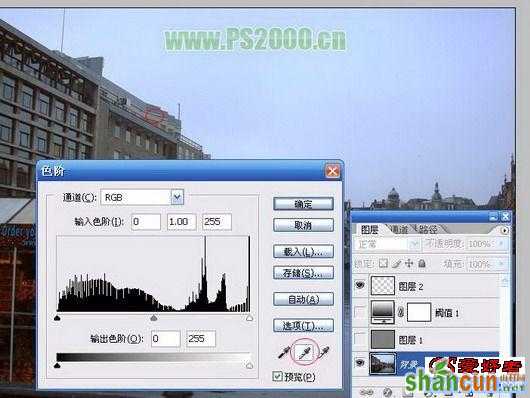
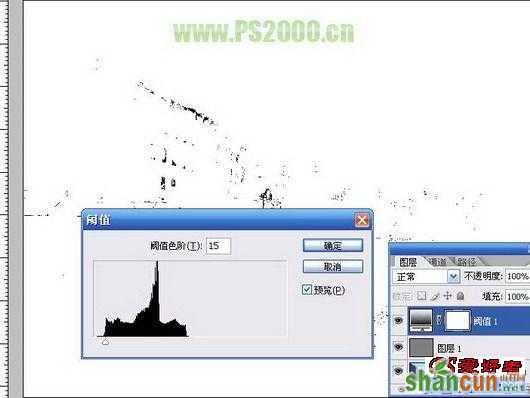
3、添加一个图层<新建调整图层<阈值调整图层,调整滑块,直至图中黑色块变少
 nmousewheel="return bbimg(this)" onload="javascript:resizepic(this)" border="0"/>
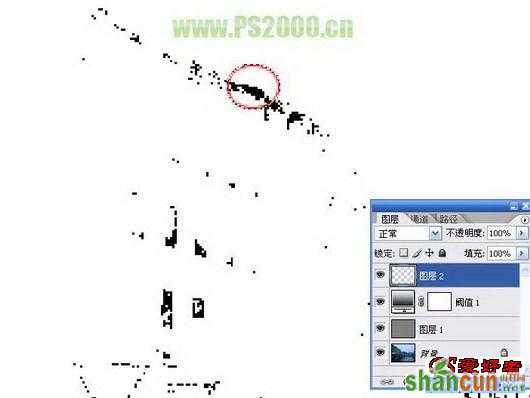
4、图中黑色部分即是灰场,新建一个图层,用红圈作出记号
 nmousewheel="return bbimg(this)" onload="javascript:resizepic(this)" border="0"/>
5、隐藏灰色和阈值图层,回到背景层
 nmousewheel="return bbimg(this)" onload="javascript:resizepic(this)" border="0"/>6、ctrl+打开色阶,选中灰点吸管,点击图中红圈部分,图像色彩基本恢复
 nmousewheel="return bbimg(this)" onload="javascript:resizepic(this)" border="0"/>
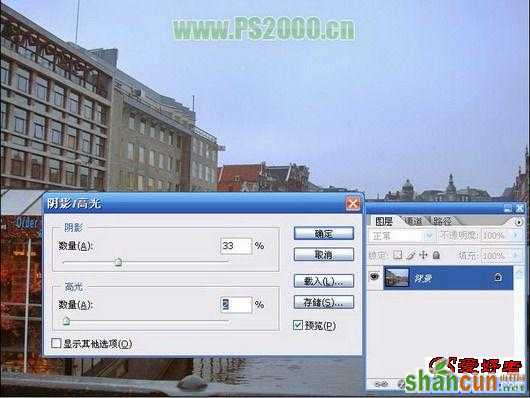 nmousewheel="return bbimg(this)" onload="javascript:resizepic(this)" border="0"/>
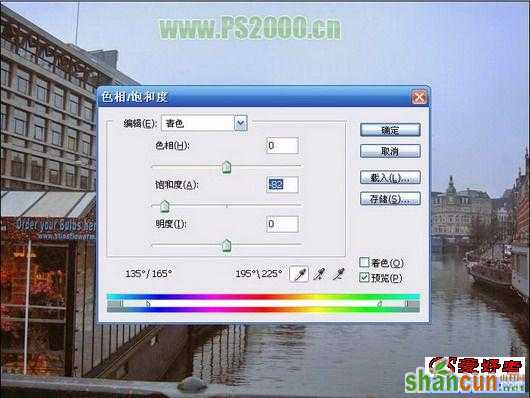
8、ctrl+U,选“青色”通道,降低其饱和度
 nmousewheel="return bbimg(this)" onload="javascript:resizepic(this)" border="0"/>
所有参数并非一成不变的,在处理时应根据原图实际情况进行调整和美化,祝大家学习愉快!
最终效果
nmousewheel="return bbimg(this)" onload="javascript:resizepic(this)" border="0"/>


