
照片清晰处理教程,
模糊的人像图片处理起来比较费时间,如果单纯的用磨皮及锐化工具处理的图片色彩不均匀,而且容易失真。如果要更好的处理需要有一定的鼠绘基础。处理的重点在人物轮廓处理。
原图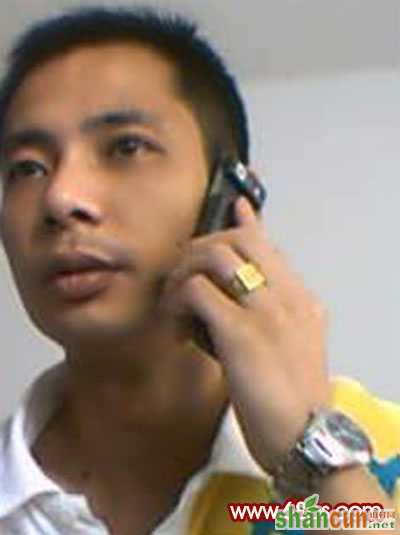 nmousewheel="return bbimg(this)" onload="javascript:resizepic(this)" border="0"/>
最终效果 nmousewheel="return bbimg(this)" onload="javascript:resizepic(this)" border="0"/>
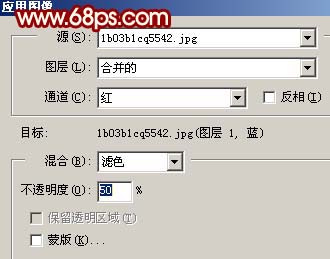
1、打开原图,按Ctrl + J复制一层,执行:图像 > 应用图像,参数设置如图1,效果如图2。
 nmousewheel="return bbimg(this)" onload="javascript:resizepic(this)" border="0"/>
<图1>
 nmousewheel="return bbimg(this)" onload="javascript:resizepic(this)" border="0"/>
<图2>
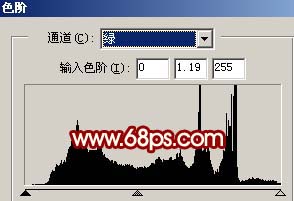
2、创建色阶调整图层,参数设置如图3,4,效果如图5。
 nmousewheel="return bbimg(this)" onload="javascript:resizepic(this)" border="0"/>
<图3>
 nmousewheel="return bbimg(this)" onload="javascript:resizepic(this)" border="0"/>
<图4>
 nmousewheel="return bbimg(this)" onload="javascript:resizepic(this)" border="0"/>
<图5>
3、新建一个图层,按Ctrl + Alt + Shift + E盖印图层,执行:滤镜 > 模糊 > 高斯模糊,数值为3,确定后加上图层蒙版,把蒙版填充黑色,然后用白色画笔在人物脸上有杂色的地方涂抹,简单的给人物磨皮,效果如图6。
 nmousewheel="return bbimg(this)" onload="javascript:resizepic(this)" border="0"/>
<图6>
4、新建一个图层,盖印图层,执行:滤镜 > 模糊 > 高斯模糊,数值为3,确定后把图层混合模式改为“柔光”,效果如图7。
 nmousewheel="return bbimg(this)" onload="javascript:resizepic(this)" border="0"/>
<图7>
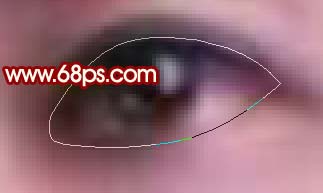
5、新建一个图层,盖印图层,选择钢笔工具把人物右眼的内轮廓抠出来,按Ctrl + Enter转为选区,然后用加深工具把边缘部位加深,有杂色的地方稍微用模糊工具处理一下,眼珠部位使用用减淡工具把高光部位加亮。
 nmousewheel="return bbimg(this)" onload="javascript:resizepic(this)" border="0"/>
<图8>
6、再用钢笔工具勾出右眼上双眼皮的轮廓,稍微勾大一点,然后用加深工具把内边缘加深,然后按Ctrl + Shift + I反选,把外缘部位用减淡工具涂亮一点,同样的方法处理下左眼,效果如图10。
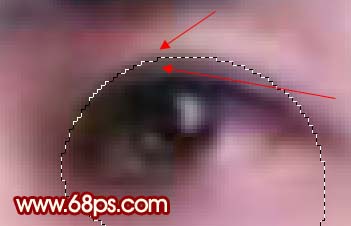 nmousewheel="return bbimg(this)" onload="javascript:resizepic(this)" border="0"/>
<图9>
 nmousewheel="return bbimg(this)" onload="javascript:resizepic(this)" border="0"/>
<图10>
7、新建一个图层,填充颜色:#F9F3BD,然后把图层混合模式改为“正片叠底”,效果如图11。
nmousewheel="return bbimg(this)" onload="javascript:resizepic(this)" border="0"/>
<图11>
8、新建一个图层,盖印图层,点通道面板,选择绿色通道,按Ctrl + A全选,按Ctrl + C复制,点蓝色通道按Ctrl + V粘贴,效果如图12。
 nmousewheel="return bbimg(this)" onload="javascript:resizepic(this)" border="0"/>
<图12>
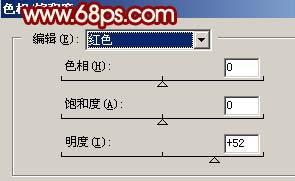
9、创建色相/饱和度调整图层,参数设置如图13,效果如图14。
 nmousewheel="return bbimg(this)" onload="javascript:resizepic(this)" border="0"/>
<图13>
 nmousewheel="return bbimg(this)" onload="javascript:resizepic(this)" border="0"/>
<图14>
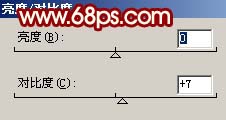
10、创建亮度/对比度调整图层,参数设置如图15,效果如图16。
 nmousewheel="return bbimg(this)" onload="javascript:resizepic(this)" border="0"/>
<图15>
 nmousewheel="return bbimg(this)" onload="javascript:resizepic(this)" border="0"/>
<图16>
11、新建一个图层,填充颜色:#30D9F4,然后把图层混合模式改为“柔光”,图层不透明度改为:20%,效果如图17。
 nmousewheel="return bbimg(this)" onload="javascript:resizepic(this)" border="0"/>
<图17>
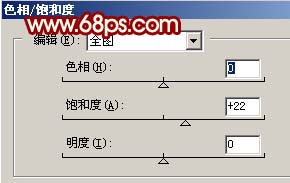
12、创建色相/饱和度调整图层,参数设置如图18,效果如图19。
 nmousewheel="return bbimg(this)" onload="javascript:resizepic(this)" border="0"/>
<图18>
nmousewheel="return bbimg(this)" onload="javascript:resizepic(this)" border="0"/>
<图19>
13、创建色彩平衡调整图层,适当的调红一点,效果如图20。
nmousewheel="return bbimg(this)" onload="javascript:resizepic(this)" border="0"/>
<图20>
14、新建一个图层,盖印图层,使用Topaz滤镜锐化一下,效果如图21。
 nmousewheel="return bbimg(this)" onload="javascript:resizepic(this)" border="0"/>
<图21>
15、最后整体调整下色彩,修饰下细节,完成最终效果。
nmousewheel="return bbimg(this)" onload="javascript:resizepic(this)" border="0"/>
<图22>


