
人物美化——亮唇彩和水晶指甲制作教程
原图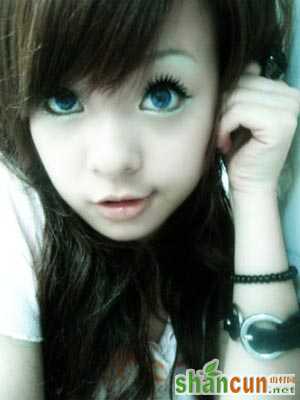 nmousewheel="return bbimg(this)" onload="javascript:resizepic(this)" border="0"/>
最终效果 nmousewheel="return bbimg(this)" onload="javascript:resizepic(this)" border="0"/>
1. 文件-打开-选择你要ps的照片。
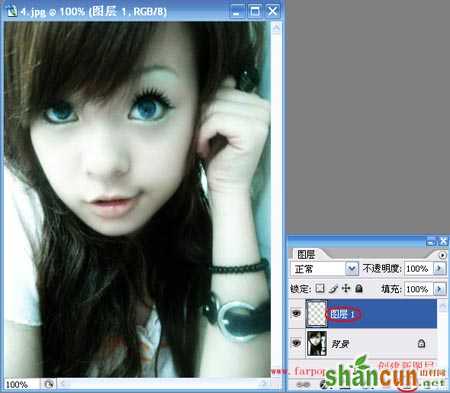
2.在图层面板上点击创建新图层。你会看到多了一个图层1。
 nmousewheel="return bbimg(this)" onload="javascript:resizepic(this)" border="0"/>
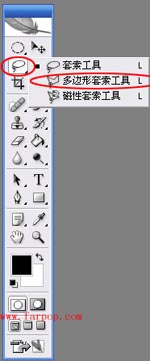
3.在工具箱上选择多边形套索工具
 nmousewheel="return bbimg(this)" onload="javascript:resizepic(this)" border="0"/>
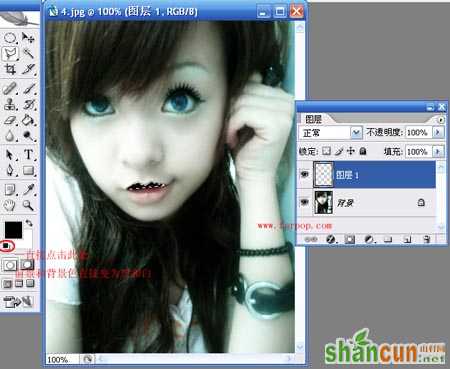
4.用多边形套索工具 给 本图 美M 的上嘴唇 圈起。 在工具栏上羽化值为1px
 nmousewheel="return bbimg(this)" onload="javascript:resizepic(this)" border="0"/>
5.设置前景色为黑色,在图层1中 填充前景色,快捷键是Alt+Delete
 nmousewheel="return bbimg(this)" onload="javascript:resizepic(this)" border="0"/>
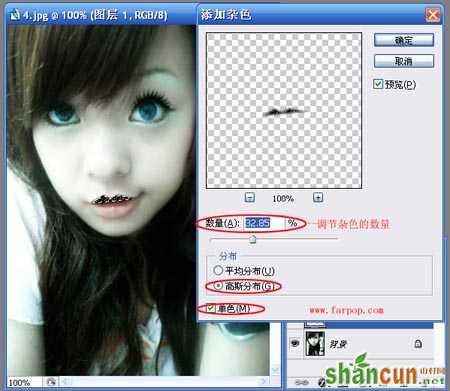
6.菜单栏 滤镜à杂色à添加杂色 数值如下(可根据个人喜好)
 nmousewheel="return bbimg(this)" onload="javascript:resizepic(this)" border="0"/>
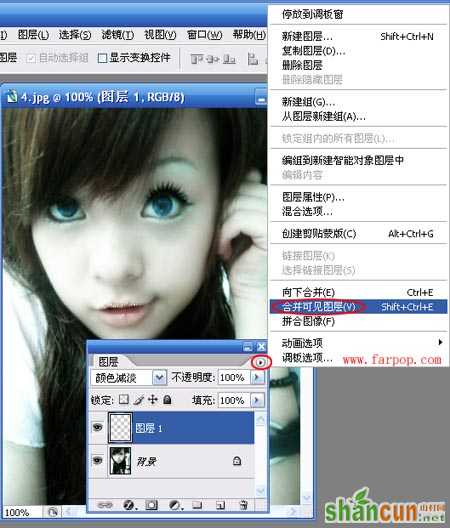
7.取消选区,快捷键 Ctrl+D.在图层面板上的属性栏将图层1更改为 颜色减淡。
 nmousewheel="return bbimg(this)" onload="javascript:resizepic(this)" border="0"/>
8.将所有图层合并起来
 nmousewheel="return bbimg(this)" onload="javascript:resizepic(this)" border="0"/>
9.以相同的方法做出下嘴唇,动手试试吧
 nmousewheel="return bbimg(this)" onload="javascript:resizepic(this)" border="0"/>
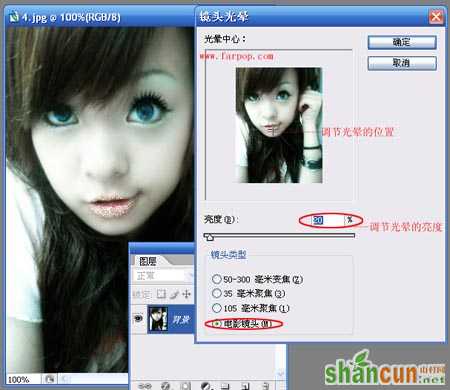
10. 菜单栏 滤镜à渲染à镜头光晕 镜头类型为 电影镜头 此照片数值如下(可根据个人喜好)
 nmousewheel="return bbimg(this)" onload="javascript:resizepic(this)" border="0"/>
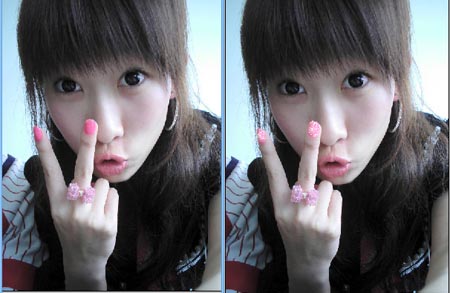
最终效果图
nmousewheel="return bbimg(this)" onload="javascript:resizepic(this)" border="0"/>
制作水晶指甲的步骤与闪亮唇彩的步骤相同。
看看水晶指甲的效果图吧。
 nmousewheel="return bbimg(this)" onload="javascript:resizepic(this)" border="0"/>


