
照片特效——PS制作雪景效果教程
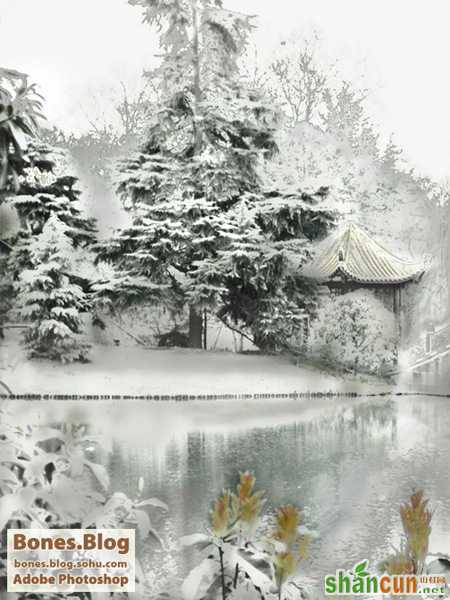
最终效果图
 nmousewheel="return bbimg(this)" onload="javascript:resizepic(this)" border="0"/>
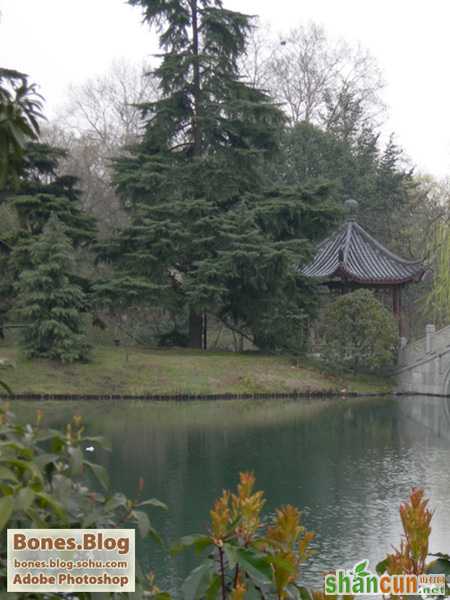
原图
 nmousewheel="return bbimg(this)" onload="javascript:resizepic(this)" border="0"/>
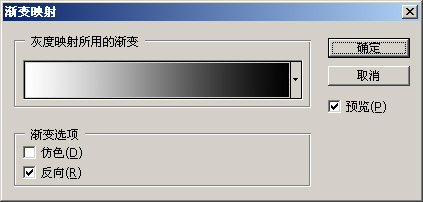
1、首先,给图像添加一个“渐变映射”的调整图层,就用黑色跟白色的渐变,注意,将“反向”选项选中。
 nmousewheel="return bbimg(this)" onload="javascript:resizepic(this)" border="0"/>
 nmousewheel="return bbimg(this)" onload="javascript:resizepic(this)" border="0"/>
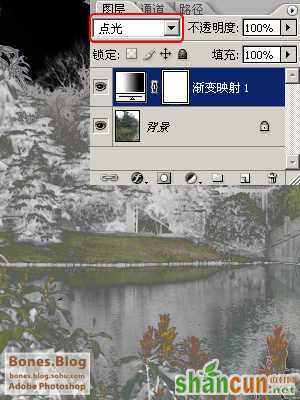
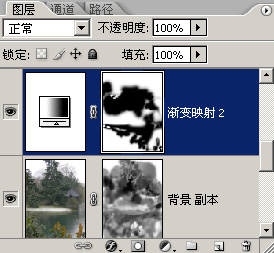
3、将“渐变映射”调整图层的图层混合模式改为“点光”。
 nmousewheel="return bbimg(this)" onload="javascript:resizepic(this)" border="0"/>
4、按快捷键Ctrl(Windows操作系统)/Command(Mac OS X操作系统)+E合并图像,并执行Ctrl(Windows操作系统)/Command(Mac OS X操作系统)+I(“图像>调整>反相”命令 ),将图像反相。
 nmousewheel="return bbimg(this)" onload="javascript:resizepic(this)" border="0"/>
 nmousewheel="return bbimg(this)" onload="javascript:resizepic(this)" border="0"/>
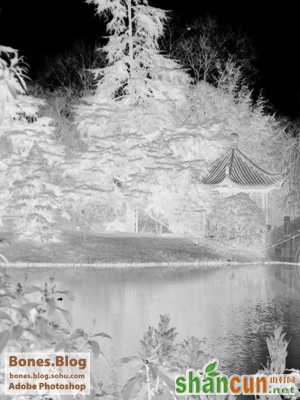
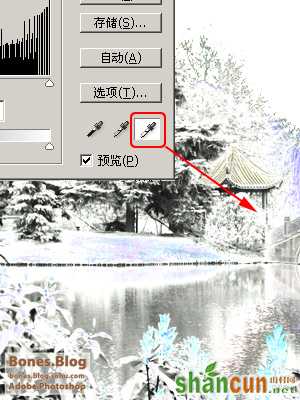
6、单击“确定”按钮,雪景基本上就呈现在我们眼前。
 nmousewheel="return bbimg(this)" onload="javascript:resizepic(this)" border="0"/>
7、现在开始分析一下,在画面中有很多刺眼,很鲜艳的颜色要怎么给它去除,这是一个很麻烦的问题。不过对付这样的问题,Photoshop还是有很多方法的。前面的步骤可以适合很多画面来打造雪景的效果,但从这以下的方法,就是要根据不同的图片,要有不同的应对方法。我将这个问题分成了两个部分分别来解决。
首先,既然“花”的部分那么刺眼,那么想在你眼前“弹”出来,我就让它出来——
新建一空白图层,使用“历史记录画笔”工具进行恢复“花”的图像。当然,也可以用不透明度较低的画笔恢复一些场景中的景物的颜色,让画面有一些颜色偏向
 nmousewheel="return bbimg(this)" onload="javascript:resizepic(this)" border="0"/>
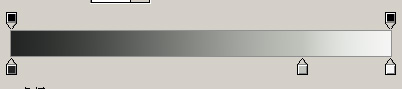
添加“渐变映射”调整图层,渐变条设定如下图所示。(关于渐变设定的方法,稍后奉上教程)
 nmousewheel="return bbimg(this)" onload="javascript:resizepic(this)" border="0"/>
10、单击两次“确定”按钮,得到如图所示结果:
 nmousewheel="return bbimg(this)" onload="javascript:resizepic(this)" border="0"/>
11、在蒙版上做一些修改。
 nmousewheel="return bbimg(this)" onload="javascript:resizepic(this)" border="0"/>
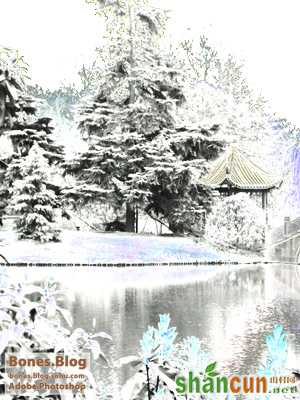
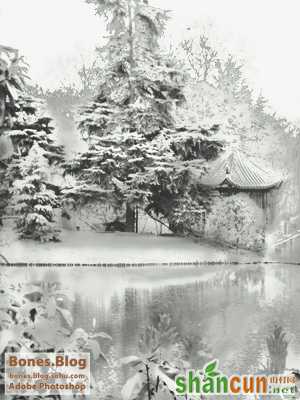
最后结果如下图:
nmousewheel="return bbimg(this)" onload="javascript:resizepic(this)" border="0"/>


