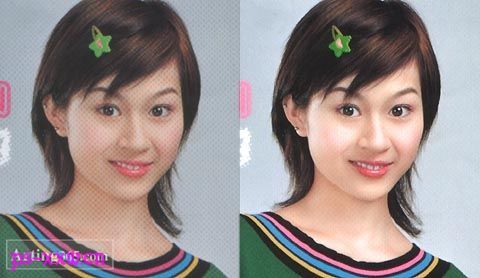
去掉了网格的图片看起来会比较清晰,而且网格也不会挡住图片上这位MM漂亮的脸蛋。
 nmousewheel="return bbimg(this)" onload="javascript:resizepic(this)" border="0"/>
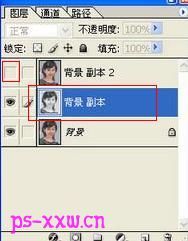
先要打开一张带有网格的图片,再把背景图层复制两层,得到副本和副本2,把副本2前面的小眼睛去掉,再用鼠标选中副本图层。
 nmousewheel="return bbimg(this)" onload="javascript:resizepic(this)" border="0"/>
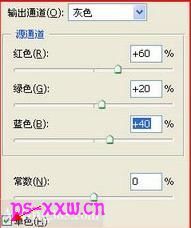
再执行图像-调整-通道混合器,勾选单色,再把红色、绿色和蓝色分别设为+60、+20、+40。
 nmousewheel="return bbimg(this)" onload="javascript:resizepic(this)" border="0"/>
再用鼠标选中副本2图层,把该层的混合模式设为颜色。
 nmousewheel="return bbimg(this)" onload="javascript:resizepic(this)" border="0"/>
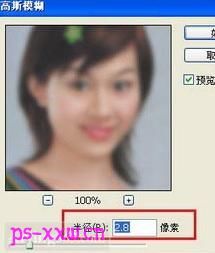
再执行滤镜-模糊-高斯模糊,把半径设为2.5个像素左右,合并所有图层,再对图片的细节作一些处理就可以OK啦。
 nmousewheel="return bbimg(this)" onload="javascript:resizepic(this)" border="0"/>


