
本教程涉及到图层混合选项,影像调整,滤镜效果和灯光渲染技术。本教程本身很简单,但最后的结果看起来很不错!
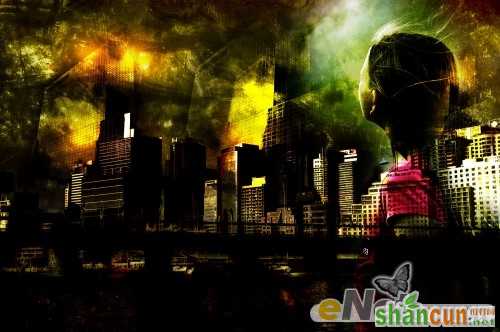
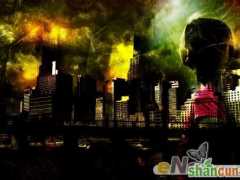
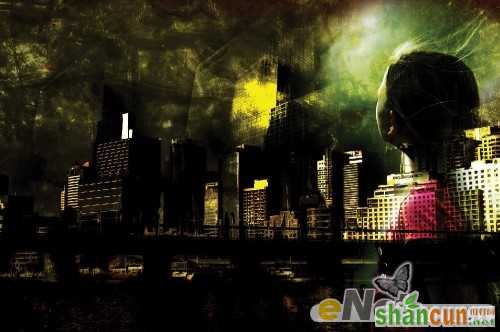
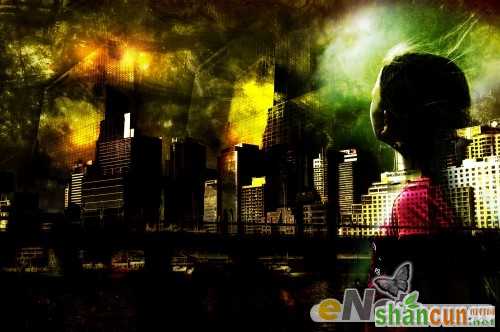
下面是最后的结果预览:
 nmousewheel="return bbimg(this)" onload="javascript:resizepic(this)" border="0"/>
最终效果1
 nmousewheel="return bbimg(this)" onload="javascript:resizepic(this)" border="0"/>
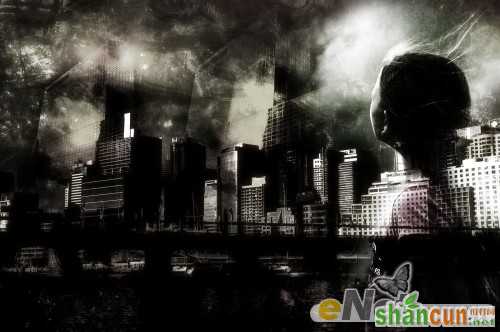
最终效果2
黑白版本:
 nmousewheel="return bbimg(this)" onload="javascript:resizepic(this)" border="0"/>
最终效果3
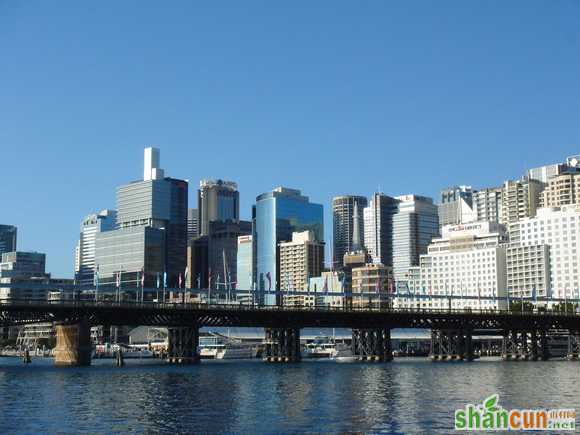
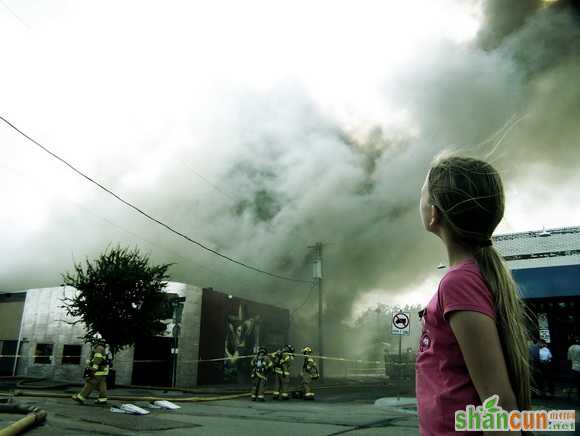
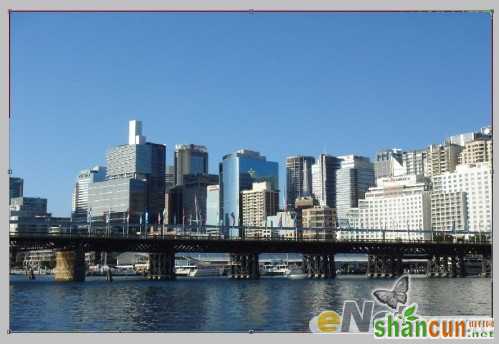
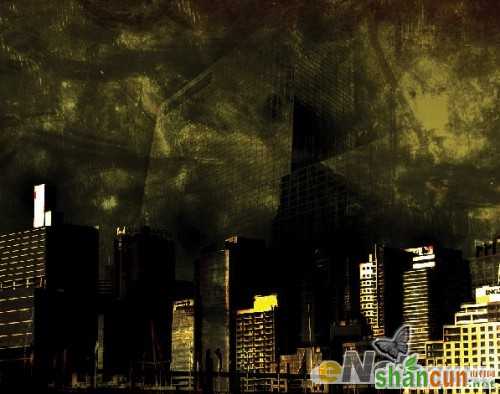
1.下面是四张素材图片:
 nmousewheel="return bbimg(this)" onload="javascript:resizepic(this)" border="0"/>
素材1
 nmousewheel="return bbimg(this)" onload="javascript:resizepic(this)" border="0"/>
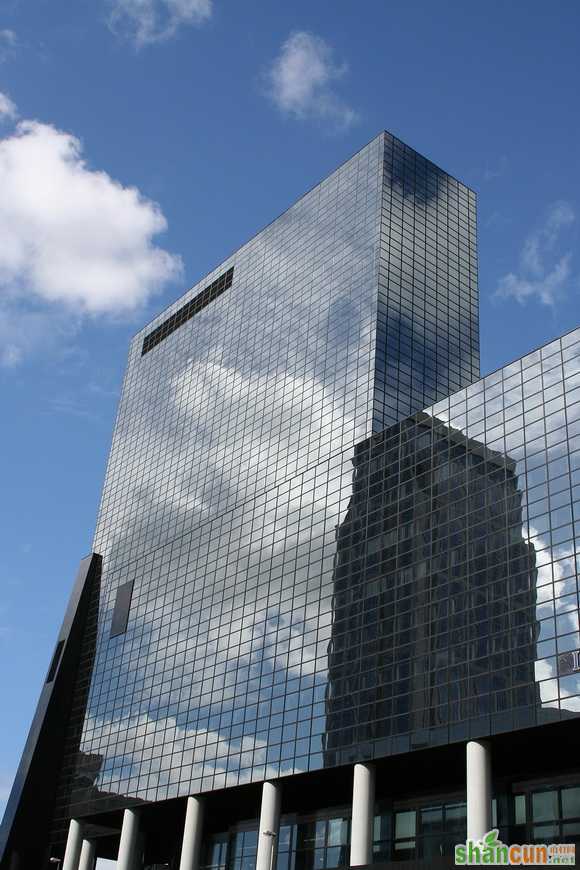
素材2
 nmousewheel="return bbimg(this)" onload="javascript:resizepic(this)" border="0"/>
素材3
nmousewheel="return bbimg(this)" onload="javascript:resizepic(this)" border="0"/>素材4
加载到Photoshop的“素材1”的图片,复制一次,背景层的混合模式设置为“正片叠底”:
保存这个文件到一个新的PSD文件并命名为“城市”。
 nmousewheel="return bbimg(this)" onload="javascript:resizepic(this)" border="0"/>
保存这个文件到一个新的PSD文件并命名为“城市”。
2. 加载到Photoshop中的“素材”,拖到文件中,整个图像使用自由变换工具(按Ctrl + T)的调整,直到它符合画布大小:
 nmousewheel="return bbimg(this)" onload="javascript:resizepic(this)" border="0"/>
命名此层为“市”,改变图层混合模式“亮光”。您将得到以下效果:
 nmousewheel="return bbimg(this)" onload="javascript:resizepic(this)" border="0"/>
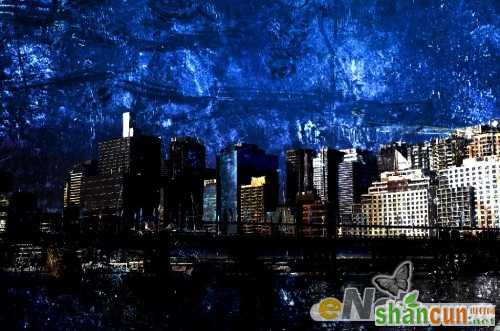
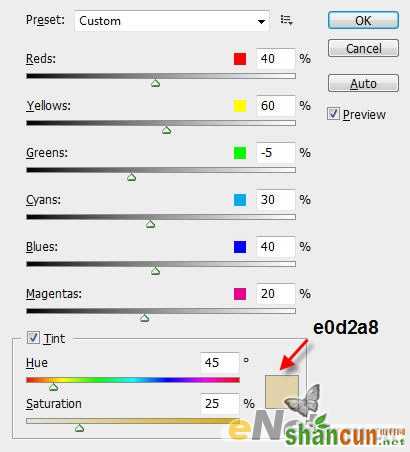
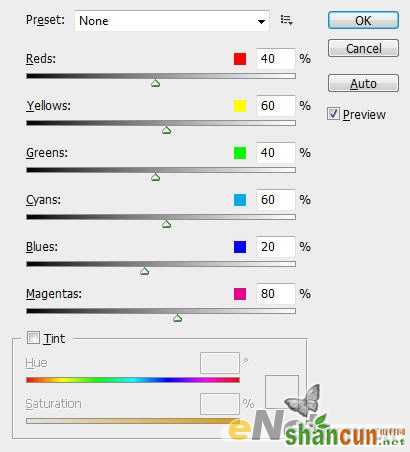
3. 在“城市”层,按Ctrl +Alt + Shift + B建弹出黑白调整工具(尽量使用单色通道混合器选项),应用以下设置:
 nmousewheel="return bbimg(this)" onload="javascript:resizepic(this)" border="0"/>
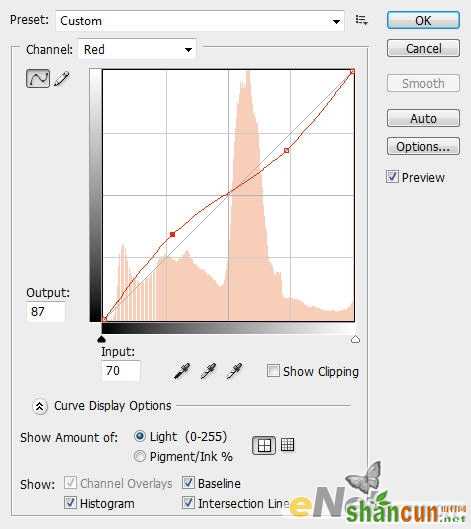
 然后按Ctrl + M键弹出曲线工具,调整红色通道:
 nmousewheel="return bbimg(this)" onload="javascript:resizepic(this)" border="0"/>
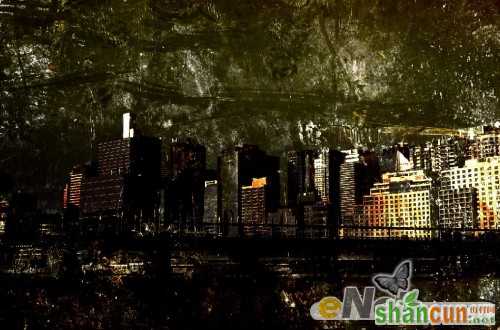
下面是设置后的效果:
 nmousewheel="return bbimg(this)" onload="javascript:resizepic(this)" border="0"/>
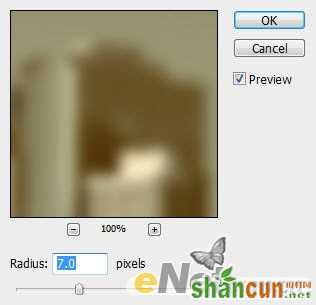
4. 复制“城市”层后,采用下列“高斯模糊”设置复制层:
 nmousewheel="return bbimg(this)" onload="javascript:resizepic(this)" border="0"/>
复制这一层,并再次把它们合并起来,然后将合并后的图层混合模式为“变暗”。您将有以下效果:
 nmousewheel="return bbimg(this)" onload="javascript:resizepic(this)" border="0"/>
5. 加载到Photoshop“素材2”的图像,拖到我们的画布上,调整整个图像和擦除(大软刷)图片上除了楼房所有的图像。 (请注意,您可以使用图层蒙板来实现这个功能)图层名称设置为“高层”。
我们再次运用黑白调整这层,采用与前层相同的设定:(请确保您设置为RGB颜色模式)
 nmousewheel="return bbimg(this)" onload="javascript:resizepic(this)" border="0"/>
设置后的效果:
 nmousewheel="return bbimg(this)" onload="javascript:resizepic(this)" border="0"/>
6. 改变混合模式为“叠加”,可以看到如下效果:
 nmousewheel="return bbimg(this)" onload="javascript:resizepic(this)" border="0"/>
要使图像具有动态和深度,我们可以复制“高层”层多几次,调整大小和位置得到下面所示图像:
 nmousewheel="return bbimg(this)" onload="javascript:resizepic(this)" border="0"/>
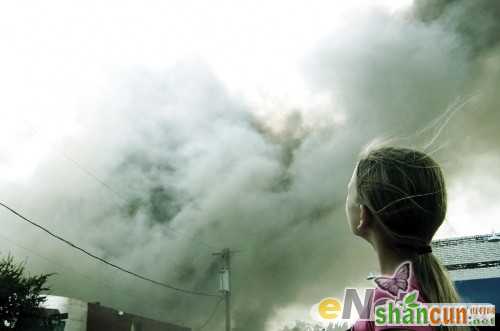
7. 加载“素材3”的形象到Photoshop。我们再次将整个图像拖到我们的画布,但是这一次我们不调整其大小。
 nmousewheel="return bbimg(this)" onload="javascript:resizepic(this)" border="0"/>
擦除天空部分,软笔,并改变图层混合选项“强光”。
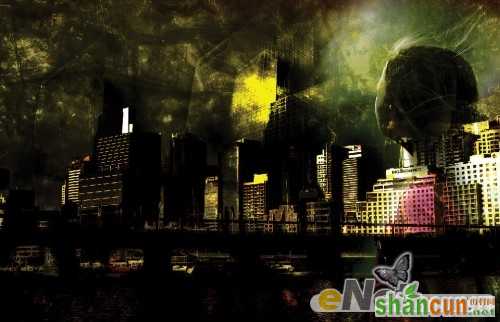
到目前为止,3lian素材,效果如下所示:
 nmousewheel="return bbimg(this)" onload="javascript:resizepic(this)" border="0"/>
命名此层为“小女孩”并复制这层一次,设置重复的图层混合模式“叠加”,您将有以下效果:
 nmousewheel="return bbimg(this)" onload="javascript:resizepic(this)" border="0"/>
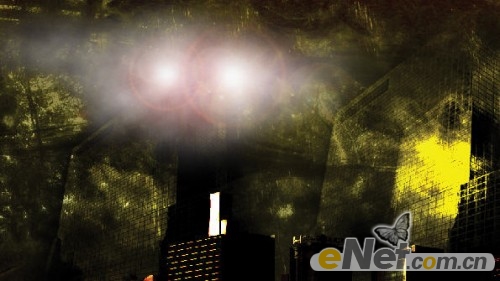
8.最后,我们可以添加效果的光辉形象,这样就不会看起来有点沉闷。为此,创建一个新的层称为“灯光效果”,使用一40px像素的套索工具,在图像顶部(我选择了一个选区,它与这个女孩的眼光有成线)渲染云彩和镜头光晕:
 nmousewheel="return bbimg(this)" onload="javascript:resizepic(this)" border="0"/>
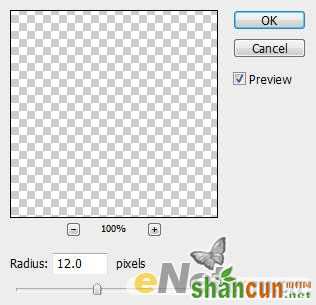
更改图层混合模式为“颜色减淡”,适用下列“高斯模糊”设置:
 nmousewheel="return bbimg(this)" onload="javascript:resizepic(this)" border="0"/>
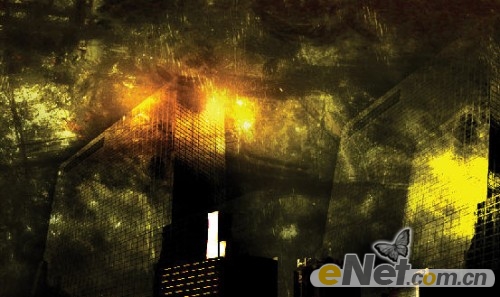
您将有以下效果:
 nmousewheel="return bbimg(this)" onload="javascript:resizepic(this)" border="0"/>
复制层几次并拖动到选区,你会得到这样的效果:
 nmousewheel="return bbimg(this)" onload="javascript:resizepic(this)" border="0"/>
调整图像色调,得到这样的效果:
nmousewheel="return bbimg(this)" onload="javascript:resizepic(this)" border="0"/>黑白效果:
 nmousewheel="return bbimg(this)" onload="javascript:resizepic(this)" border="0"/>
当然你也可以进一步运用一些滤镜效果,或合并一些背景纹理,那是完全取决于你自己:)
希望你喜欢本教程,请给我发表评论,如果您有任何问题,我会尽我所能来帮助你。希望您有一个愉快的一天!


