
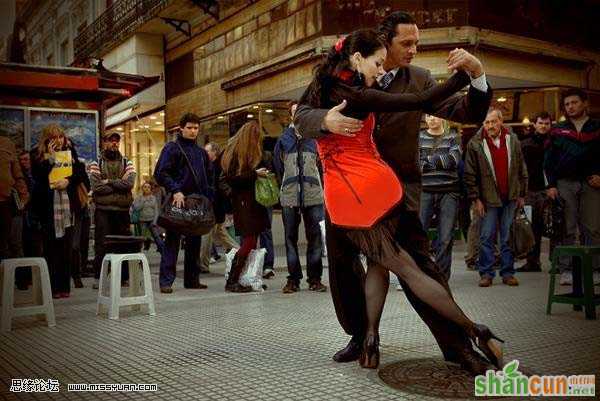
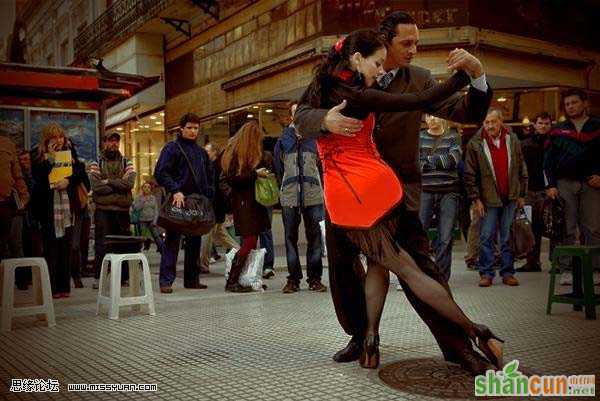
原图素材可能是傍晚的街道拍摄的,照片的光线还比较充足。为了体现出夜晚的味道。作者把图片的光线压暗了很多,局部的色调也换上了灯光的色调。总体感觉是在夜色下的场景,非常不错。
原图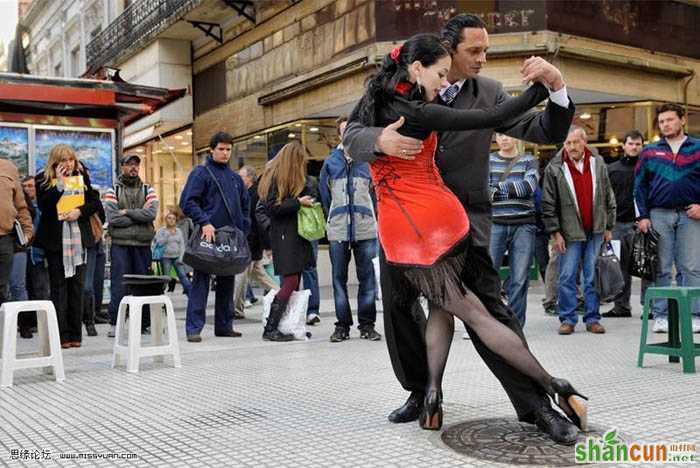 nmousewheel="return bbimg(this)" onload="javascript:resizepic(this)" border="0"/>
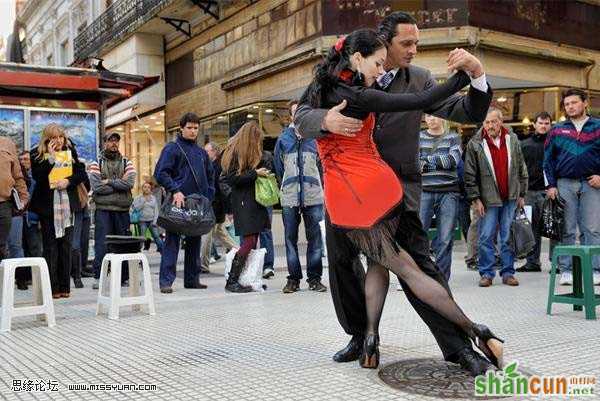
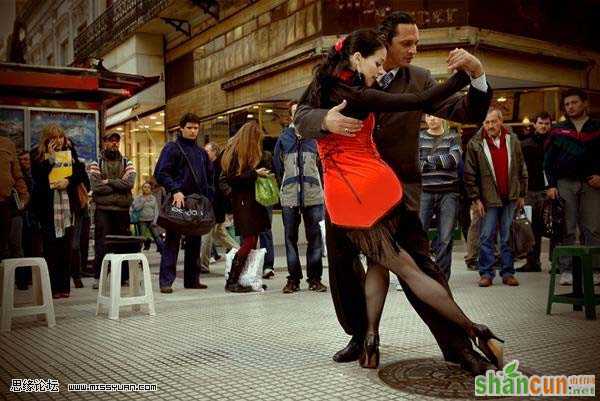
最终效果
 nmousewheel="return bbimg(this)" onload="javascript:resizepic(this)" border="0"/>
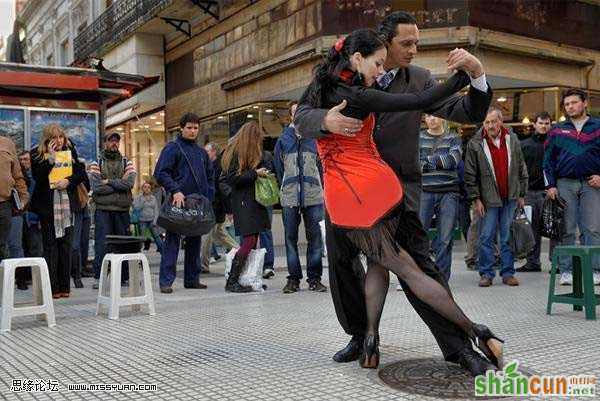
1、打开原图素材,复制一层,用自己在行的修复手法,修理女主人红裙上的白斑,让整体上一档次。如图:
 nmousewheel="return bbimg(this)" onload="javascript:resizepic(this)" border="0"/>
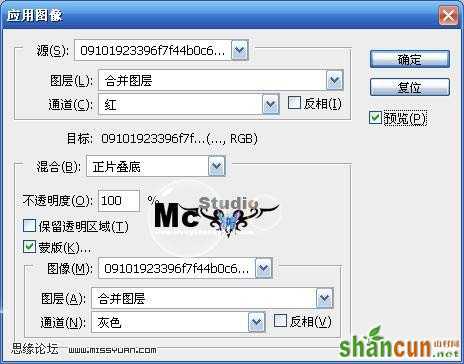
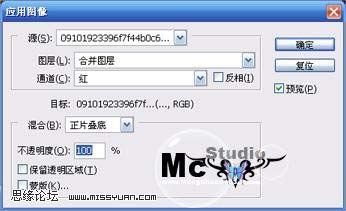
2、执行菜单命令,图像 > 应用图像,效果图与设置如下:
 nmousewheel="return bbimg(this)" onload="javascript:resizepic(this)" border="0"/>
 nmousewheel="return bbimg(this)" onload="javascript:resizepic(this)" border="0"/>
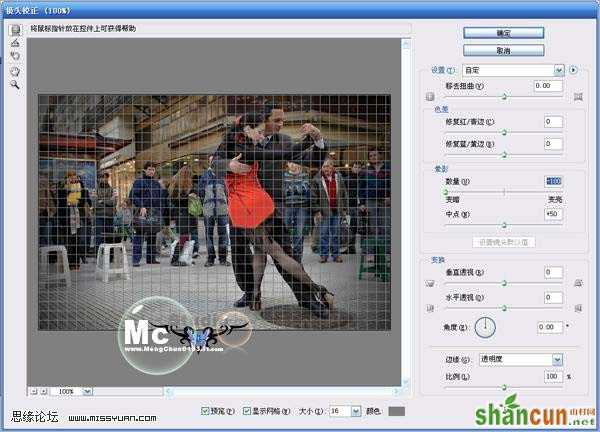
3、盖印图层,执行菜单命令,滤镜 > 扭曲 > 镜头校正,效果图与设置如下:
 nmousewheel="return bbimg(this)" onload="javascript:resizepic(this)" border="0"/>
 nmousewheel="return bbimg(this)" onload="javascript:resizepic(this)" border="0"/>
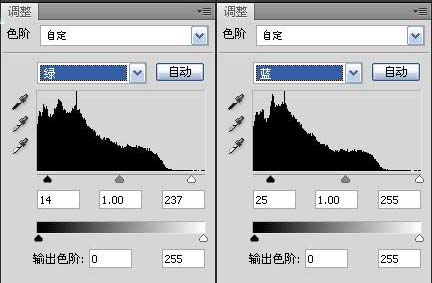
4、盖印图层,创建“色阶”调整图层,效果图与设置如下:
 nmousewheel="return bbimg(this)" onload="javascript:resizepic(this)" border="0"/>
 nmousewheel="return bbimg(this)" onload="javascript:resizepic(this)" border="0"/>
nmousewheel="return bbimg(this)" onload="javascript:resizepic(this)" border="0"/>
5、盖印图层,执行菜单命令,图像 > 应用图像,效果图与设置如下:
 nmousewheel="return bbimg(this)" onload="javascript:resizepic(this)" border="0"/>
3lian素材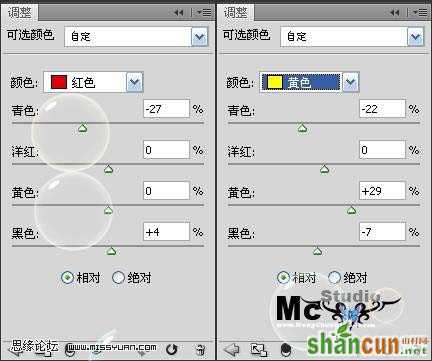 nmousewheel="return bbimg(this)" onload="javascript:resizepic(this)" border="0"/>
6、上操作,只是为了压暗场地,其他没必要压暗,所以,添加蒙版,得到以下效果:
 nmousewheel="return bbimg(this)" onload="javascript:resizepic(this)" border="0"/>
7、创建“可选颜色”调整图层,效果图与设置如下:
nmousewheel="return bbimg(this)" onload="javascript:resizepic(this)" border="0"/>
 nmousewheel="return bbimg(this)" onload="javascript:resizepic(this)" border="0"/>
8、用加深减淡对整体处理(人物衣物、旁观者、建筑)进行处理,塑造立体感(光效)。再建立选区,将人物头部周围建筑,提亮,不要太曝,到位就行。只是为了做出一种气氛,并没有什么风格、什么色调可言,后期的色调,大多在于前期。
后期可以沿用前期的色调,也可以在原有的色调上,加以处理。此教程,只对这张图有效。方法就是这些。最近很忙,忙毕业设计,所以没时间写,加上冷,吹吹风,就感冒了。再加上,并没有多少人愿意写教程,没多大干劲。写此教程,献给心地善良的PS爱好者。
nmousewheel="return bbimg(this)" onload="javascript:resizepic(this)" border="0"/>


