
原图
 nmousewheel="return bbimg(this)" onload="javascript:resizepic(this)" border="0"/>
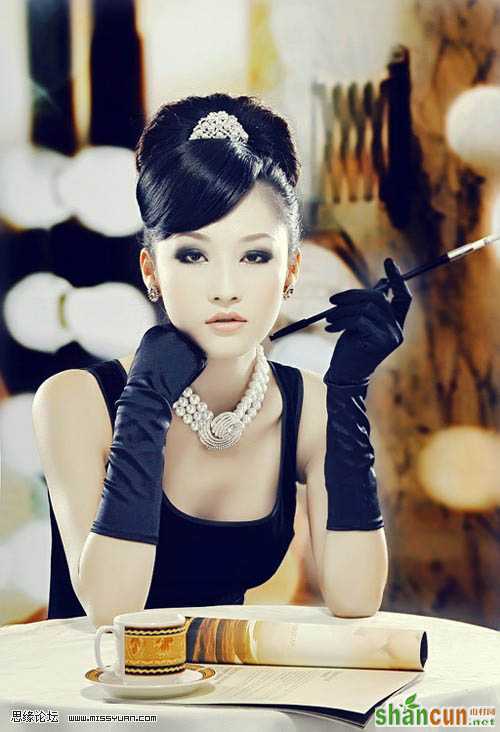
最终效果
 nmousewheel="return bbimg(this)" onload="javascript:resizepic(this)" border="0"/>
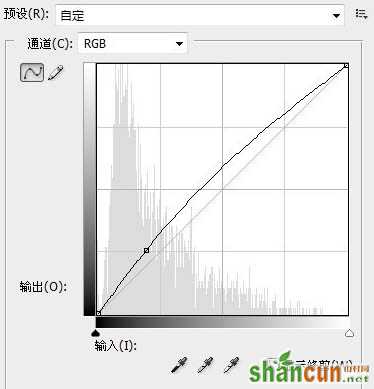
1、用PS打开原图,复制一层然后得到图层1,然后自动色阶,自动对比度,自动颜色先简单的处理一下,然后建立曲线调整层,参数如图:
PS:处理好之后需要在图层蒙版使用用不透明度比较低的画笔在上面把周围原本暗色的区域擦拭一下,擦拭的部位看最后图层截图。
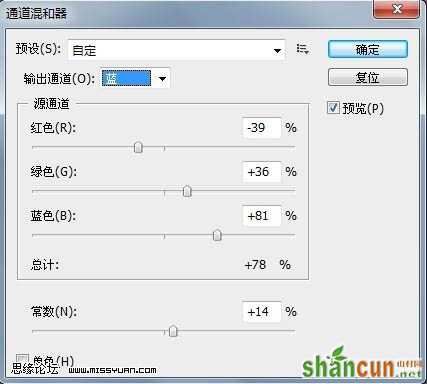
参数中红色线和蓝色线分别为红通道和蓝通道下面的调整。
 nmousewheel="return bbimg(this)" onload="javascript:resizepic(this)" border="0"/>
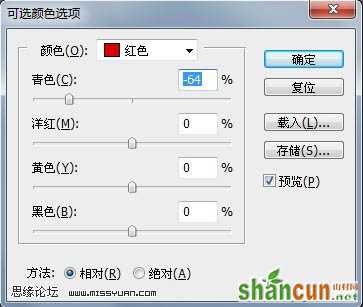
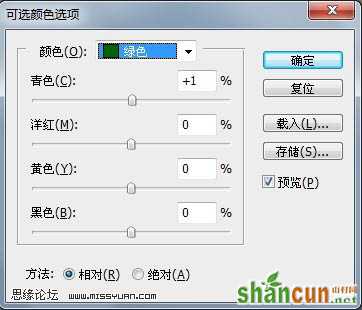
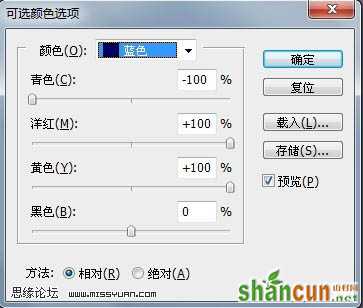
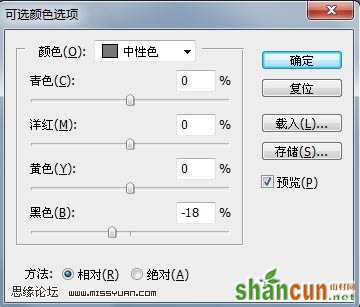
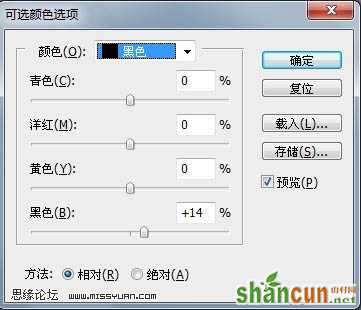
2、然后建立可选颜色调整层,本别对红色,黄色,绿色,蓝色,白色,中性灰,黑色进行调整,参数如图:
PS:和上一步一样,操作完之后要用画笔工具来擦拭一下图层蒙版,除了人物部分其他地方都需要擦拭一下。擦拭的部位看最后图层截图。
 nmousewheel="return bbimg(this)" onload="javascript:resizepic(this)" border="0"/>
 nmousewheel="return bbimg(this)" onload="javascript:resizepic(this)" border="0"/>
nmousewheel="return bbimg(this)" onload="javascript:resizepic(this)" border="0"/>
 nmousewheel="return bbimg(this)" onload="javascript:resizepic(this)" border="0"/>
 nmousewheel="return bbimg(this)" onload="javascript:resizepic(this)" border="0"/>
 nmousewheel="return bbimg(this)" onload="javascript:resizepic(this)" border="0"/>
 nmousewheel="return bbimg(this)" onload="javascript:resizepic(this)" border="0"/>
3lian素材
nmousewheel="return bbimg(this)" onload="javascript:resizepic(this)" border="0"/>
3、新建一个图层,按Ctrl + Alt + Shift + E 盖印图层得到图2,下面我们来把眼睛调亮,使用套索工具选择眼睛部分,然后建立曲线调整层,参数如图:
 nmousewheel="return bbimg(this)" onload="javascript:resizepic(this)" border="0"/>
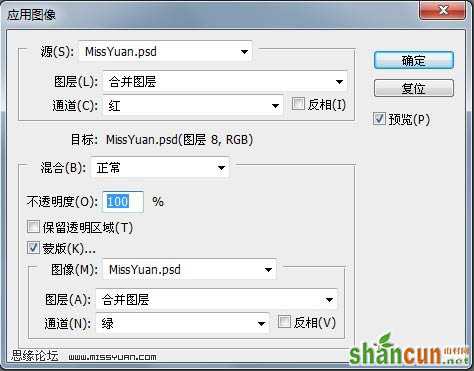
4、新建一个图层,盖印图层得到图层3,执行图形-应用图像,参数如图:
 nmousewheel="return bbimg(this)" onload="javascript:resizepic(this)" border="0"/>
5、然后在图层3上面建立图层蒙版,使用画笔工具来把背景擦拭一下,擦拭的部位看最后图层截图。处理完后效果图:
 nmousewheel="return bbimg(this)" onload="javascript:resizepic(this)" border="0"/>
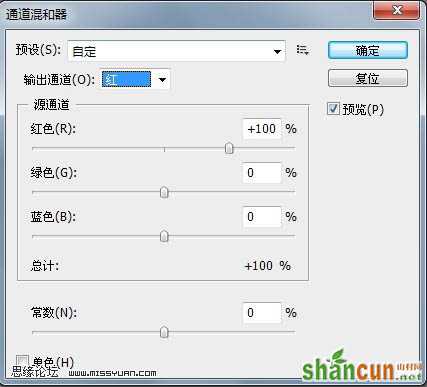
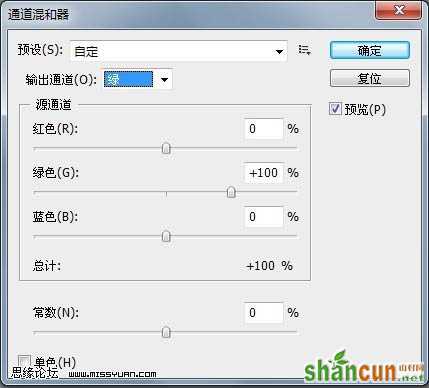
6、新建一个图层,盖印图层得到图层4,建立通道混合器图层,分别对红、绿、蓝三通道进行调整,参数及效果如下图:
 nmousewheel="return bbimg(this)" onload="javascript:resizepic(this)" border="0"/>
 nmousewheel="return bbimg(this)" onload="javascript:resizepic(this)" border="0"/>
nmousewheel="return bbimg(this)" onload="javascript:resizepic(this)" border="0"/>
 nmousewheel="return bbimg(this)" onload="javascript:resizepic(this)" border="0"/>
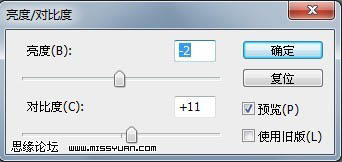
7、新建一个图层,盖印图层得到图层5,最后在建立亮度/对比对调整层,参数如图:
nmousewheel="return bbimg(this)" onload="javascript:resizepic(this)" border="0"/>
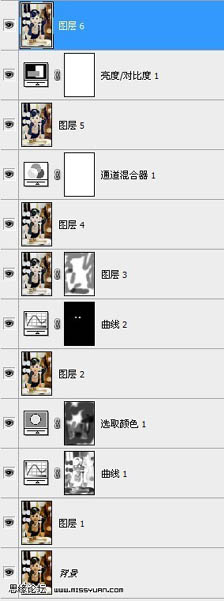
8、新建一个图层,盖印图层8,整体修饰一下细节,完成最终效果。下图为图层参照及效果图:
 nmousewheel="return bbimg(this)" onload="javascript:resizepic(this)" border="0"/>nmousewheel="return bbimg(this)" onload="javascript:resizepic(this)" border="0"/>


