
大致过程如下:先给人物磨皮,这一步是最基础的。然后润色,可以根据自己的喜好选择颜色。最后就是一些细节的美化。过程虽然简单,不过要正真做好还是要点实力的。
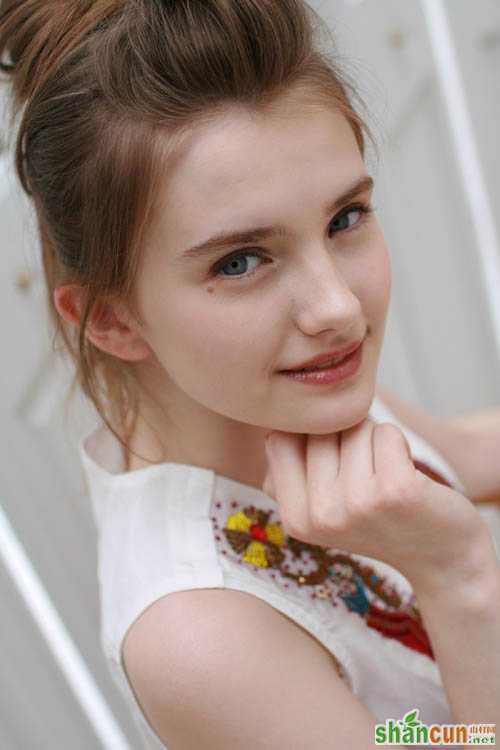
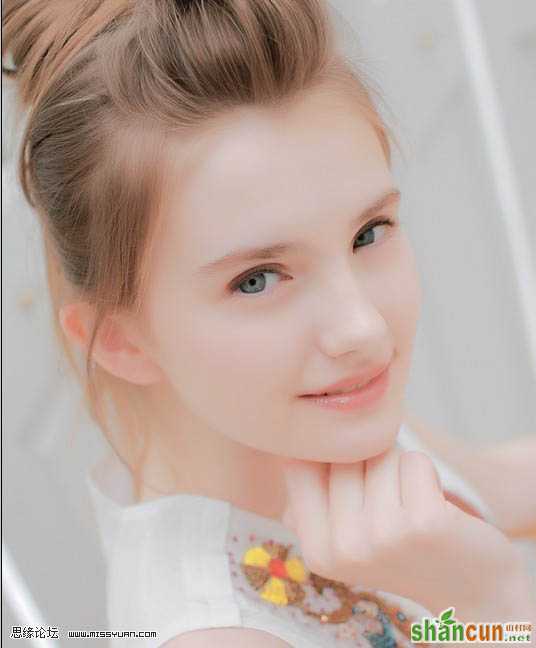
原图
 nmousewheel="return bbimg(this)" onload="javascript:resizepic(this)" border="0"/>
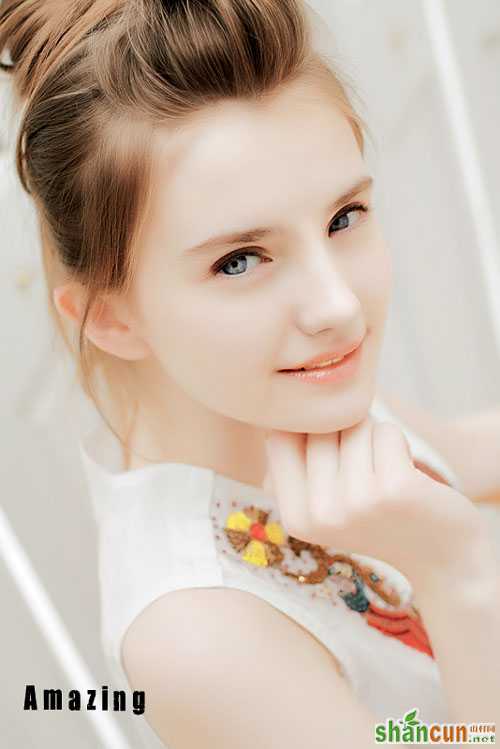
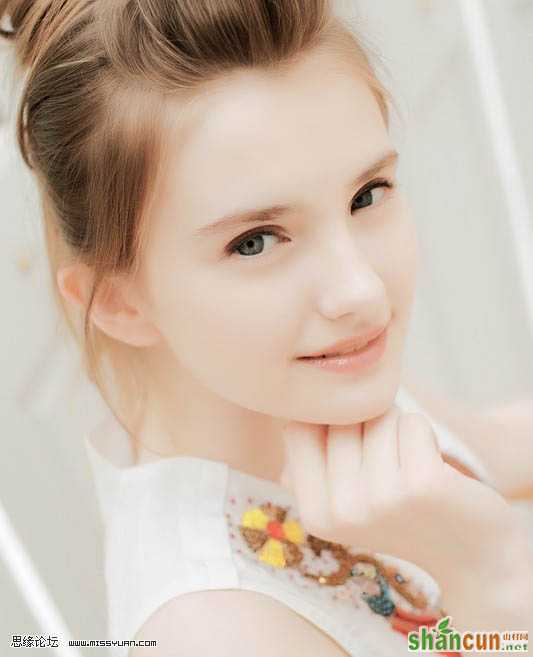
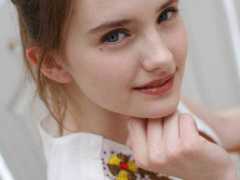
最终效果
 nmousewheel="return bbimg(this)" onload="javascript:resizepic(this)" border="0"/>
1、打开图,把人物皮肤上的一些豆豆去掉。在做磨皮处理。把人像皮肤本身的纹理体现出来,但不要太过强烈。
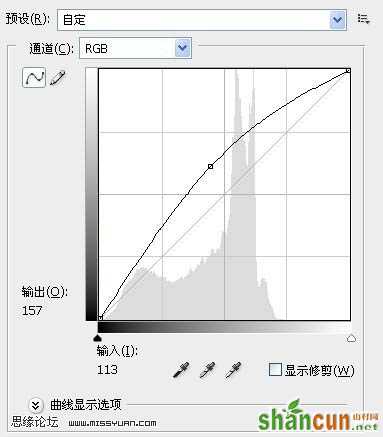
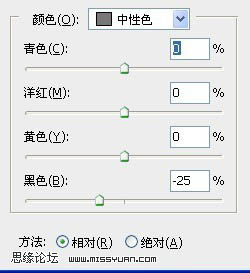
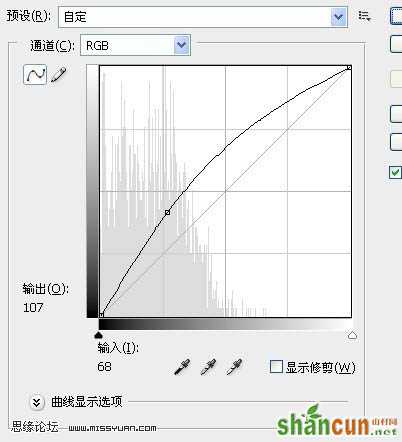
2、磨好皮后,进入通道,得出选区,反向,新建曲线层,如果提亮过了,可以用笔刷降低不透明度来达到最佳效果。
 nmousewheel="return bbimg(this)" onload="javascript:resizepic(this)" border="0"/>
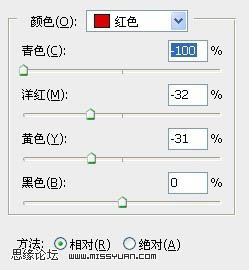
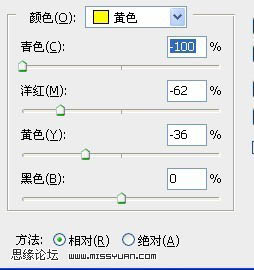
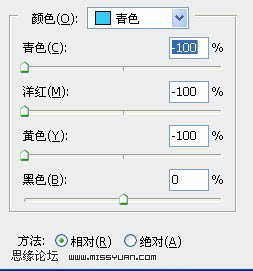
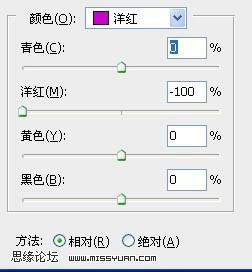
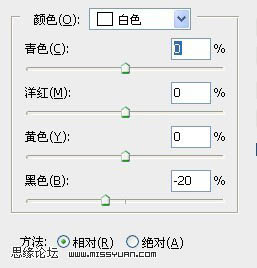
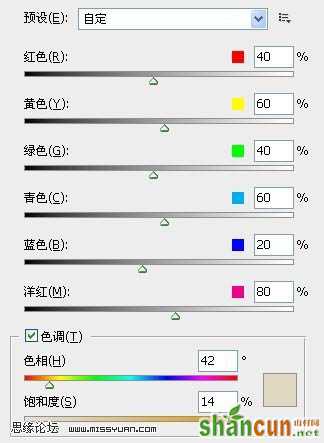
3、新建可选颜色层。我调色时都喜欢用这个工具调。因为可以保持色调平衡,不会出现杂色。参数及效果如下图。
 nmousewheel="return bbimg(this)" onload="javascript:resizepic(this)" border="0"/>
 nmousewheel="return bbimg(this)" onload="javascript:resizepic(this)" border="0"/>
 nmousewheel="return bbimg(this)" onload="javascript:resizepic(this)" border="0"/>
 nmousewheel="return bbimg(this)" onload="javascript:resizepic(this)" border="0"/>
 nmousewheel="return bbimg(this)" onload="javascript:resizepic(this)" border="0"/>
 nmousewheel="return bbimg(this)" onload="javascript:resizepic(this)" border="0"/>
 nmousewheel="return bbimg(this)" onload="javascript:resizepic(this)" border="0"/>
 nmousewheel="return bbimg(this)" onload="javascript:resizepic(this)" border="0"/>
 nmousewheel="return bbimg(this)" onload="javascript:resizepic(this)" border="0"/>
 nmousewheel="return bbimg(this)" onload="javascript:resizepic(this)" border="0"/>
3lian素材
 nmousewheel="return bbimg(this)" onload="javascript:resizepic(this)" border="0"/>
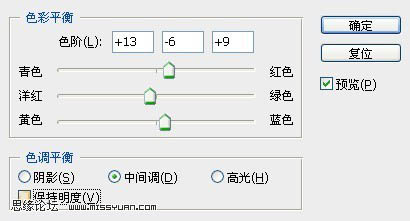
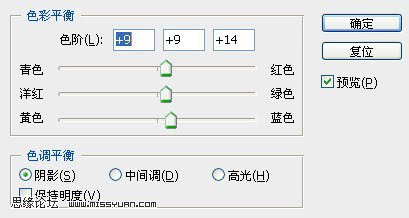
5、接下来是让人物面部看起来接近完美,对眼睛,嘴,牙齿做些处理。我把眼睛先调色后做提亮处理的步骤截个图给你看下。用魔术棒点眼球,得出选区,新建色彩平衡做换色处理。
 nmousewheel="return bbimg(this)" onload="javascript:resizepic(this)" border="0"/>
 nmousewheel="return bbimg(this)" onload="javascript:resizepic(this)" border="0"/>
 nmousewheel="return bbimg(this)" onload="javascript:resizepic(this)" border="0"/>
 nmousewheel="return bbimg(this)" onload="javascript:resizepic(this)" border="0"/>
6、做完后,可以先关掉这些图层的眼睛,仔细看图中人物脸部的小细节变化。
最后把鼻子刷出高光,记得要仔细刷哟。眼睛与嘴,鼻子二边可以用加深工具稍为加深,目的是为了加强面部立体效果。做完后,在锐化次,好了,完工了。
nmousewheel="return bbimg(this)" onload="javascript:resizepic(this)" border="0"/>


