
 nmousewheel="return bbimg(this)" onload="javascript:resizepic(this)" border="0"/>
最终效果
 nmousewheel="return bbimg(this)" onload="javascript:resizepic(this)" border="0"/>
素材
< a href='http://www.scmao.com'>本素材来自素材猫
 nmousewheel="return bbimg(this)" onload="javascript:resizepic(this)" border="0"/>
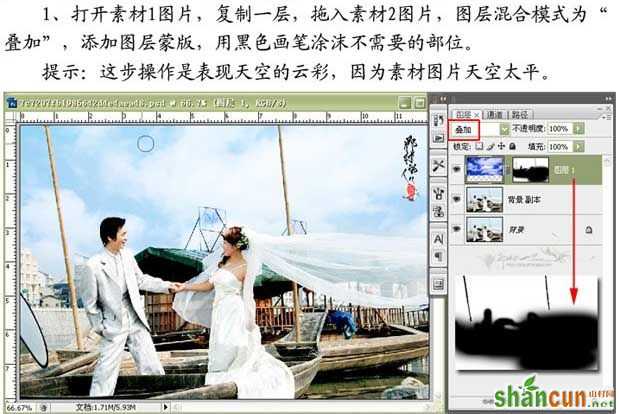
1、打开原图按Ctrl + J复制一层,拖入云彩素材图片,图层混合模式改为“叠加”,添加图层蒙版,用黑色画笔涂抹不需要的部位。
 nmousewheel="return bbimg(this)" onload="javascript:resizepic(this)" border="0"/>
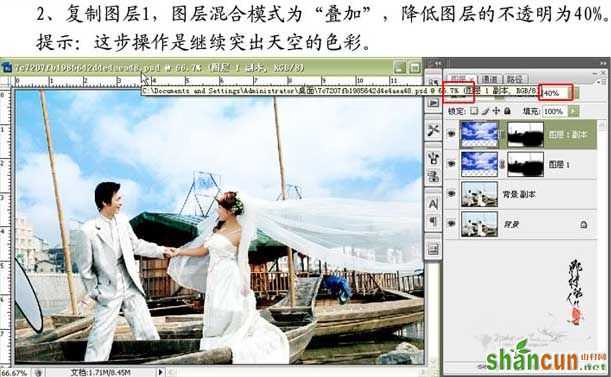
2、复制图层1,图层混合模式改为“叠加”,降低图层的不透明度为:40%。
 nmousewheel="return bbimg(this)" onload="javascript:resizepic(this)" border="0"/>
3、新建一个图层按Ctrl + Alt + Shift + E盖印图层,选择菜单:图像 > 模式 > Lab颜色,选择不拼合,创建曲线调整图层,对明度通道进行调节。
 nmousewheel="return bbimg(this)" onload="javascript:resizepic(this)" border="0"/>
 nmousewheel="return bbimg(this)" onload="javascript:resizepic(this)" border="0"/>
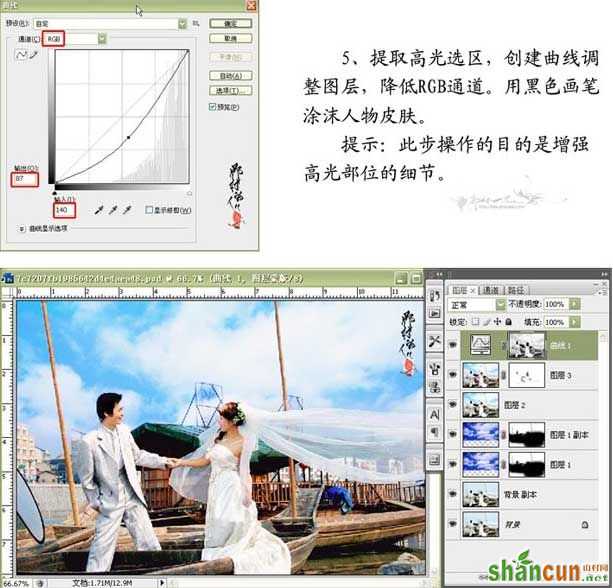
5、提取高光选区,创建曲线调整图层,降低RGB通道。用黑色画笔涂抹人物皮肤。
 nmousewheel="return bbimg(this)" onload="javascript:resizepic(this)" border="0"/>
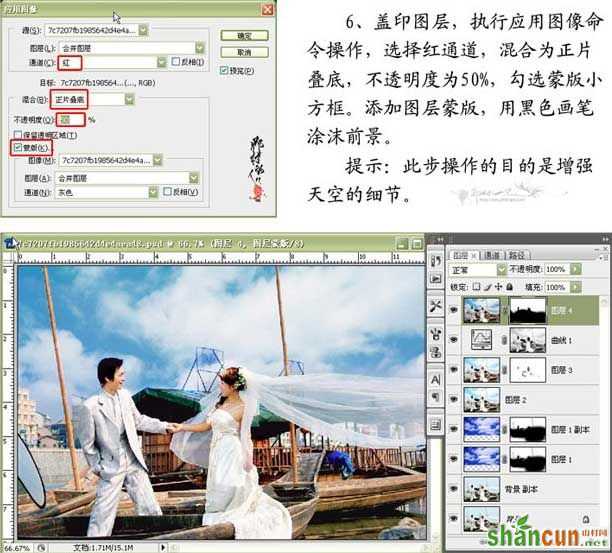
新建一个图层按Ctrl + Alt + Shift + E盖印图层,3lian素材,执行应用图像命令操作,选择红通道,混合模式改为“正片叠底”,不透明度为:50%,勾选蒙版小方框。添加图层蒙版,用黑色画笔涂抹前景。
nmousewheel="return bbimg(this)" onload="javascript:resizepic(this)" border="0"/>
 nmousewheel="return bbimg(this)" onload="javascript:resizepic(this)" border="0"/>
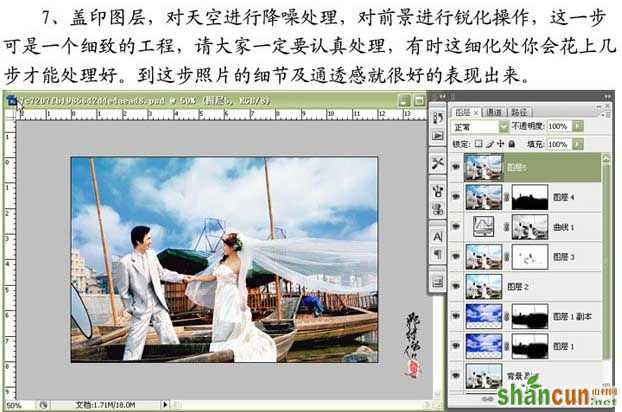
8、添加装修文字,完成最终效果。
nmousewheel="return bbimg(this)" onload="javascript:resizepic(this)" border="0"/>


