
原图与最终效果图对比:
 nmousewheel="return bbimg(this)" onload="javascript:resizepic(this)" border="0"/>
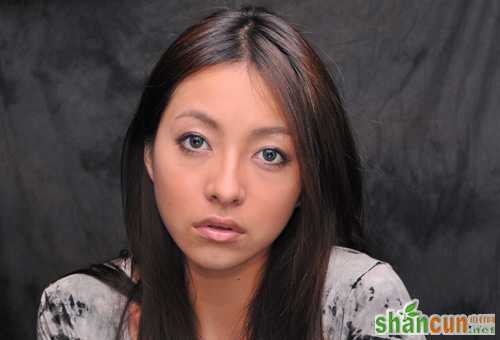
步骤1:保存这张素材到桌面上,然后打开。
 nmousewheel="return bbimg(this)" onload="javascript:resizepic(this)" border="0"/>
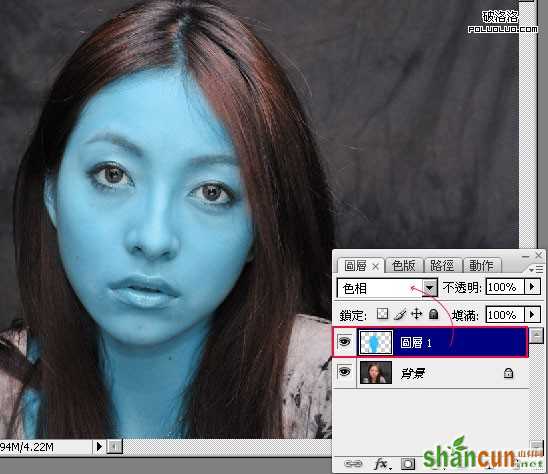
步骤2:新添加一个图层,将图层模式设为【色相】,接着利用笔刷,并将前景设为【青蓝】色,然后直接把脸涂成蓝色。
 nmousewheel="return bbimg(this)" onload="javascript:resizepic(this)" border="0"/>
步骤3:在【图层1】上加一个图层蒙板,把前景设为【黑色】,再利用笔刷工具,涂在眼睛、嘴巴上。
 nmousewheel="return bbimg(this)" onload="javascript:resizepic(this)" border="0"/>
步骤4:利用套索工具,将嘴纯选取起来,再新增一个曲线调整图层,将曲线向下拉,把嘴纯的明度降低。
 nmousewheel="return bbimg(this)" onload="javascript:resizepic(this)" border="0"/>
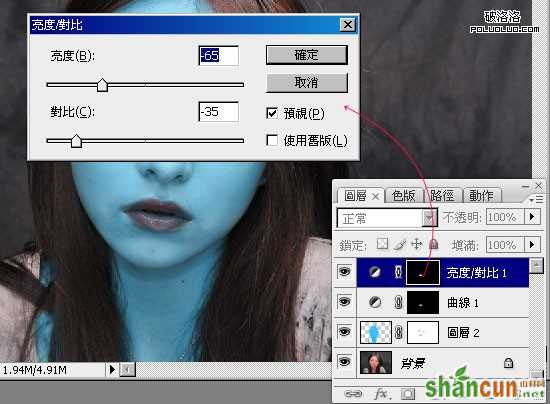
步骤5:完成后按住Ctrl键,再对着刚的曲线调整图层缩图点一下,新增一个【亮度/对比】调整图层,该调整图层则是用来降低嘴纯的亮度与对比。
 nmousewheel="return bbimg(this)" onload="javascript:resizepic(this)" border="0"/>
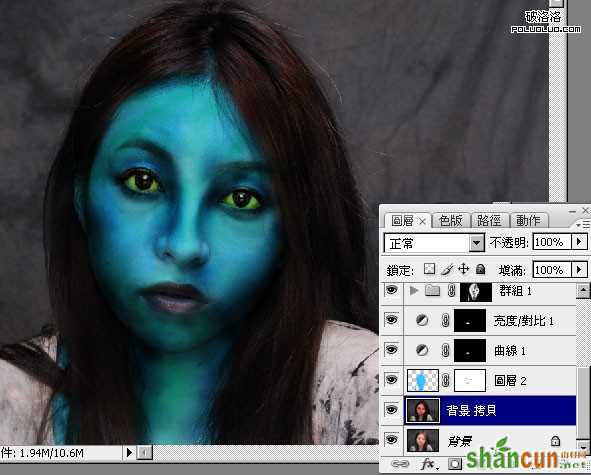
步骤6:完成后按住Ctrl键,再对着图层1的缩图点一下,新增一个【曲线调整图层】,将脸的亮度对比降低。
 nmousewheel="return bbimg(this)" onload="javascript:resizepic(this)" border="0"/>
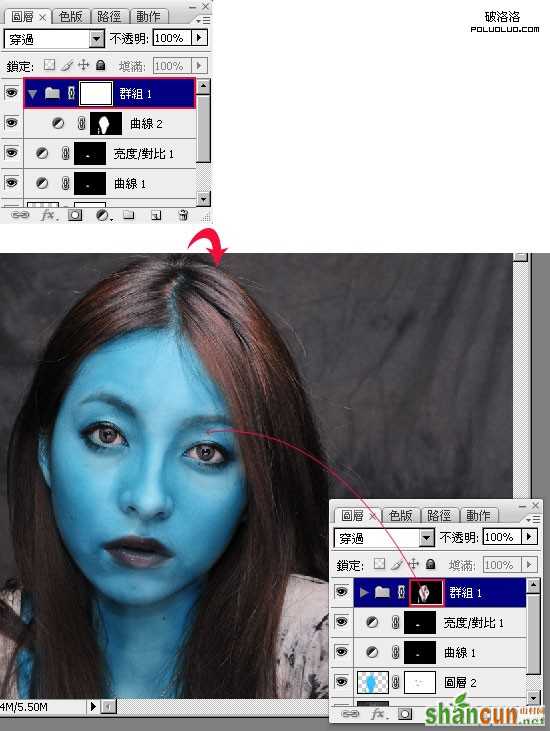
步骤7:把刚【曲线调整图层】放到群组中,并将该群组建立一个图层蒙板,先将图层蒙板填满黑色,再利用笔刷以及白色,将脸部中的眼窝、鼻子二侧的暗面作出来。
 nmousewheel="return bbimg(this)" onload="javascript:resizepic(this)" border="0"/>
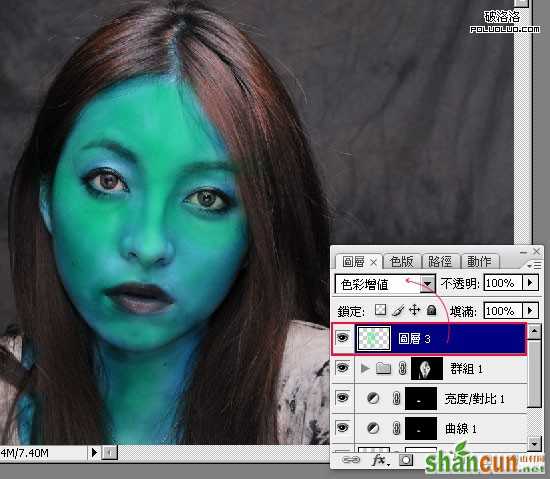
步骤8:再新建一个新图层,将前景色为【蓝绿色】,利用笔刷工具,将脸的部分再涂上一些蓝缘色,完成后再将该图层模式设为【颜色加深】。
 nmousewheel="return bbimg(this)" onload="javascript:resizepic(this)" border="0"/>
步骤9:涂完后并在该图层建立一个蒙板,将刚所涂的蓝绿色,遮掩一些掉让蓝绿色与原本的底色更调合 。
 nmousewheel="return bbimg(this)" onload="javascript:resizepic(this)" border="0"/>
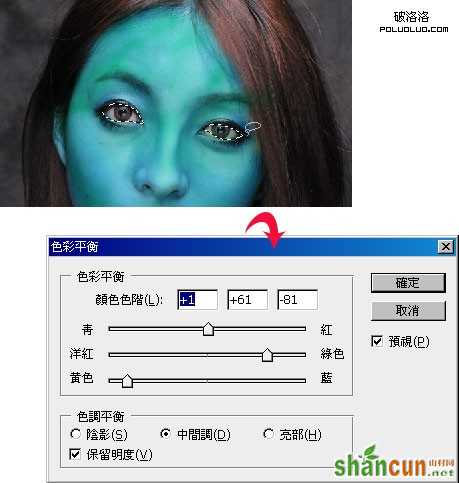
步骤10:利用套索选取工具将眼睛选取起来,3lian素材,再新增一个【色彩平衡】调整图层,再加入大量的黄光与绿光如下图。
 nmousewheel="return bbimg(this)" onload="javascript:resizepic(this)" border="0"/>
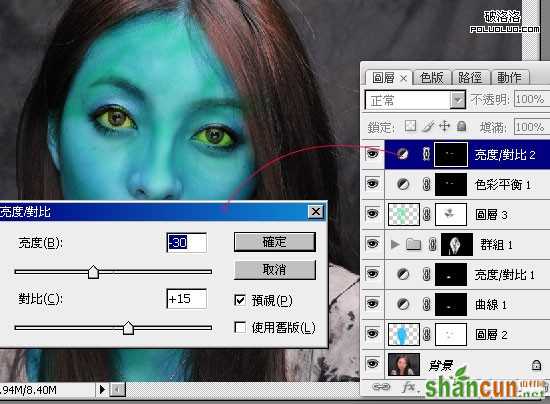
步骤11:按住Ctrl键对着刚的【色彩平衡】调整图层缩图点一下,新增【亮度/对比】调整图层,降低亮度提高对比。
 nmousewheel="return bbimg(this)" onload="javascript:resizepic(this)" border="0"/>
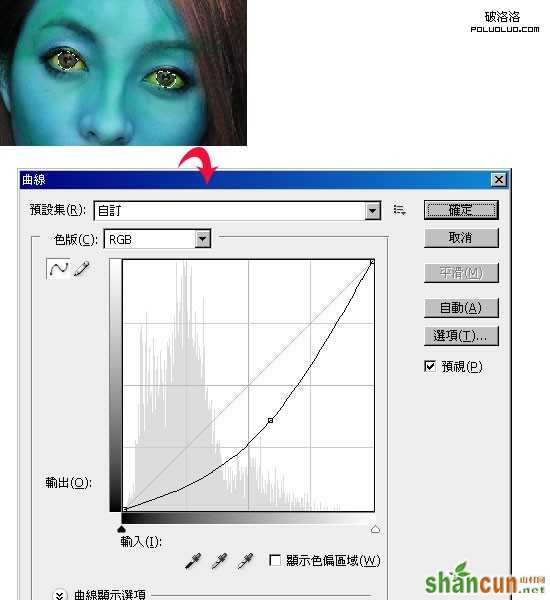
步骤12:利用套索选取工具,将眼珠子选取起来,新增一个【曲线】调整图层,将曲线向下拉,把眼珠子变暗。
 nmousewheel="return bbimg(this)" onload="javascript:resizepic(this)" border="0"/>
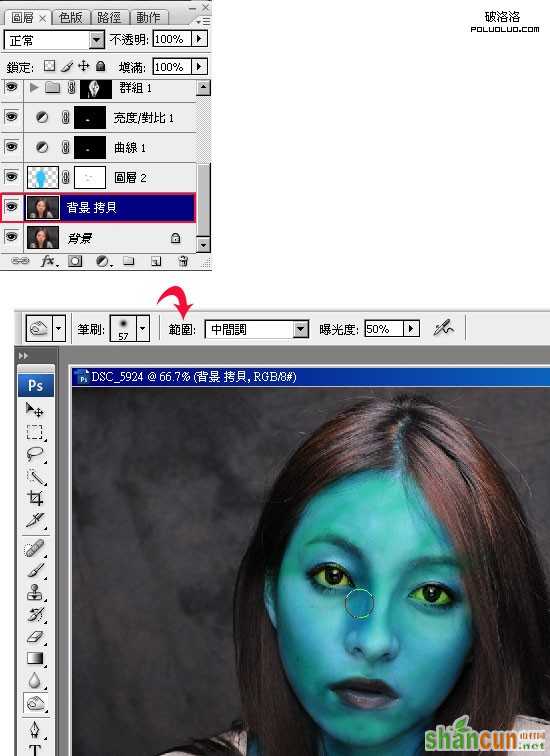
步骤13:将背景拷贝一份,选择工具箱 / 加深工具,分别将头发、眼窝、鼻子二侧加深。
 nmousewheel="return bbimg(this)" onload="javascript:resizepic(this)" border="0"/>
步骤14:完成如下。
 nmousewheel="return bbimg(this)" onload="javascript:resizepic(this)" border="0"/>
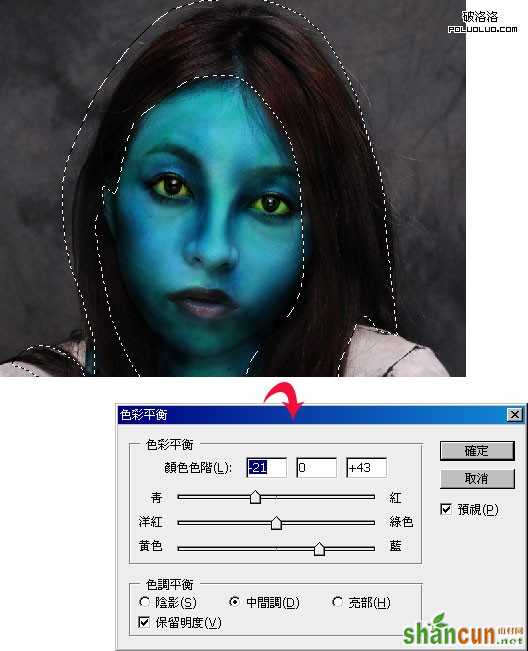
步骤15:利用套索工具,将头髮选取起来,新增【色彩平衡】调整图层,把头髮加入一些蓝色。
 nmousewheel="return bbimg(this)" onload="javascript:resizepic(this)" border="0"/>
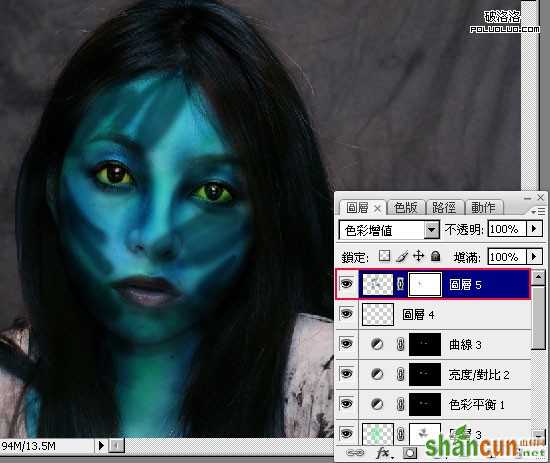
步骤16:再新增一个图层,将模式设为【颜色加深】,3lian.com,并选择较深一点的蓝色,其这边主要用来製作脸上的虎纹,自已用画的或者去下载一个虎纹笔刷,先随便乱画,再利用图层蒙板,把纹路慢慢的修出来,若你手边有类似的虎纹笔刷,直接画上去就可以了。
 nmousewheel="return bbimg(this)" onload="javascript:resizepic(this)" border="0"/>
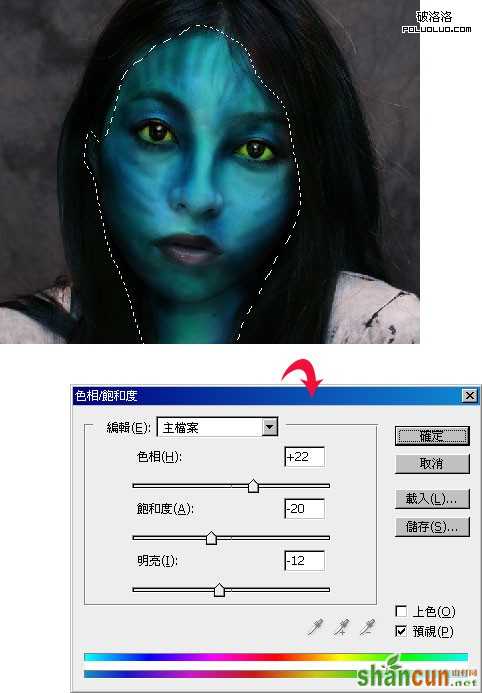
步骤17:再利用套索工具将脸选取起来,新增【色相/饱和度】调整图层,稍微的调整一下整体的颜色与饱和度。
nmousewheel="return bbimg(this)" onload="javascript:resizepic(this)" border="0"/>
步骤18:在图层最上方再新建一个新图层。
 nmousewheel="return bbimg(this)" onload="javascript:resizepic(this)" border="0"/>
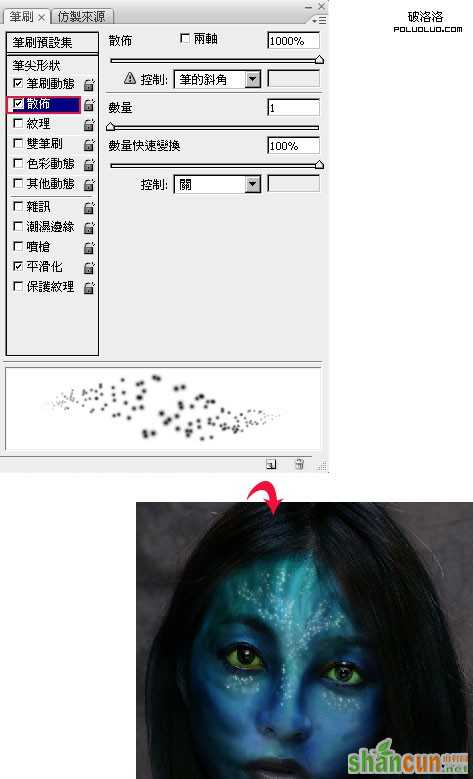
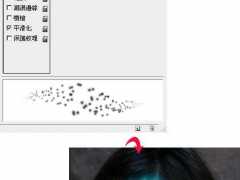
步骤19:选择笔刷,开启笔刷面板,将散布勾选起来,并把散布拉到最大。
nmousewheel="return bbimg(this)" onload="javascript:resizepic(this)" border="0"/>
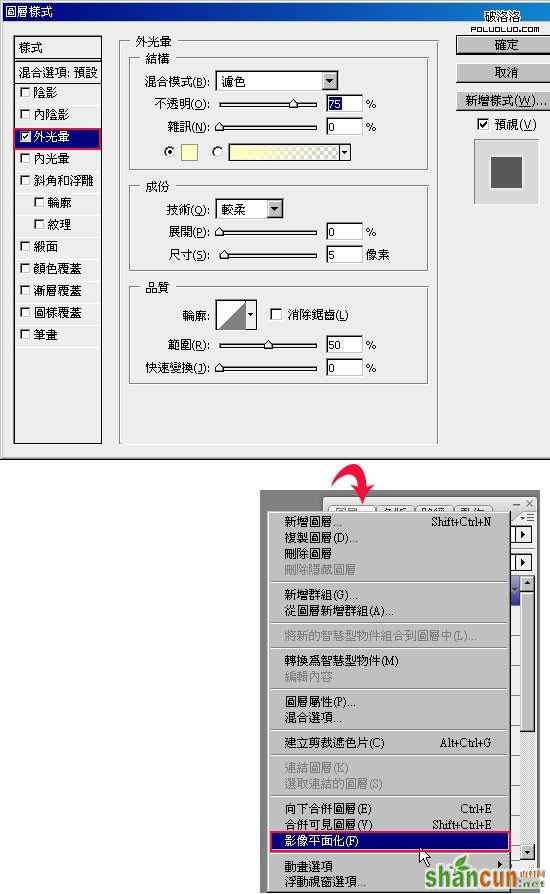
步骤20:好了之后直接涂在鼻子以及眼下,完成后将该图层,新增图层样式将外发光勾选起来,再拼合图象,或者盖印图层ctrl+alt+shift+e。
nmousewheel="return bbimg(this)" onload="javascript:resizepic(this)" border="0"/>
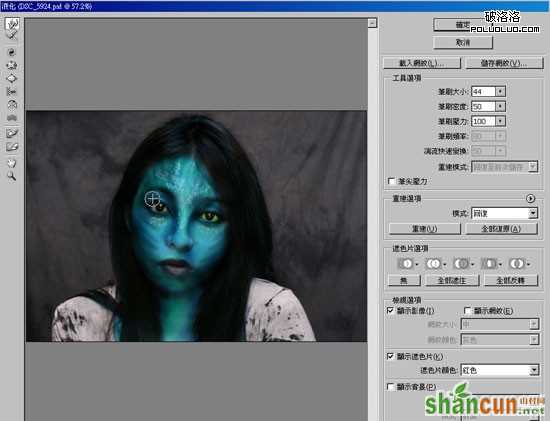
步骤21:选择滤镜 / 液化,3lian.com,将鼻子拉成像虎鼻、眼睛有点猫眼,都完成后再将整体稍微的修饰一下。
 nmousewheel="return bbimg(this)" onload="javascript:resizepic(this)" border="0"/>
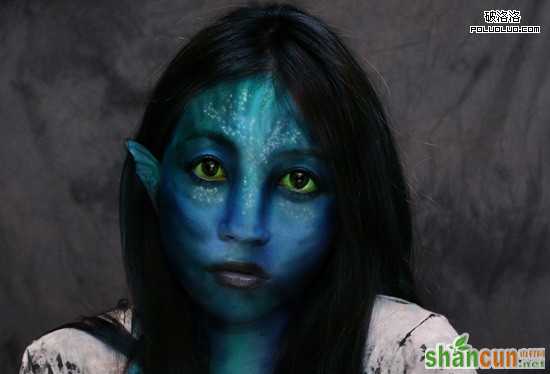
步骤22:完成如下,看了老半天才发现原来少了耳朵,作法与刚刚一样,把耳朵染成蓝色再加上去。
 nmousewheel="return bbimg(this)" onload="javascript:resizepic(this)" border="0"/>


