原图:
效果图:

步骤一、打开一张已经美白和祛斑的照片然后复制副本,在副本上执行高斯模糊(8-10):如图所示:
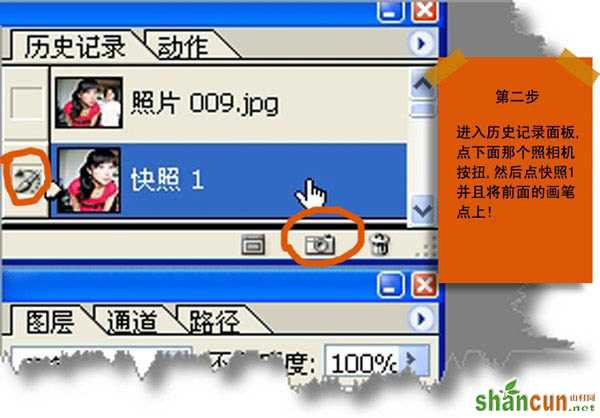
步骤二、进入到历史记录面板,点下面的那个照相机按钮,然后点快照1,并且将前面的画笔点击选择上。如图所示:
步骤三、在将历史记录面板向下拉!!看到如下图所示:选择“取消选择”选项。如图所示:
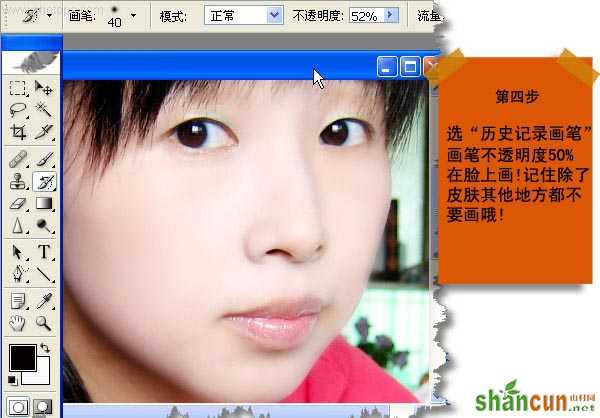
步骤四、选择“历史记录画笔”画笔不透明度修改了50%往脸上画,记住除了皮肤其他地方都不要画哦。
步骤五、用“加深工具”画出深上下眼线,上眼线工具曝光度调15%左右,下眼线调整至7%左右。
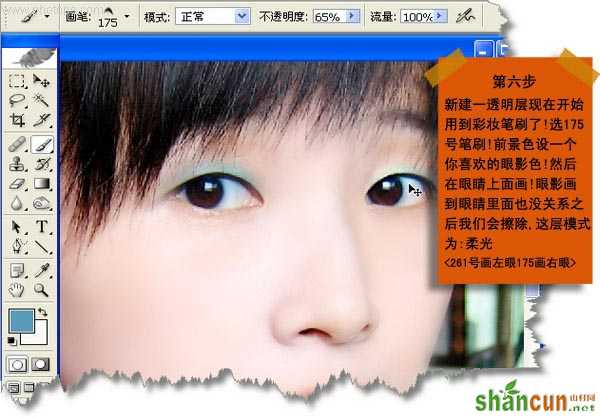
步骤六、新建一个透明图层,下面这里就采用彩妆的笔刷工具了。选择175号彩妆笔刷(264号左眼175画右眼),将前景色设置一个你不叫喜欢的眼影色,然后在眼睛上面进行涂抹,眼影画到里面也关系不大,只需要将其擦除即可,然后将这些画笔图层设置为“柔光”模式。
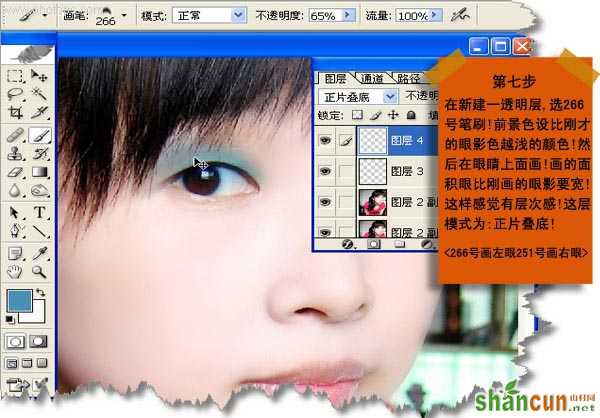
步骤七、新建一个图透明图层,选择266号笔刷,前景色设置的比前面的眼影色越浅的颜色,然后在眼睛上面进行涂画,画的面积要不刚刚话的眼影要宽点,这样才能突出眼睛的层次感,然后将这个透明图层设置为“正片叠底”的混合模式。
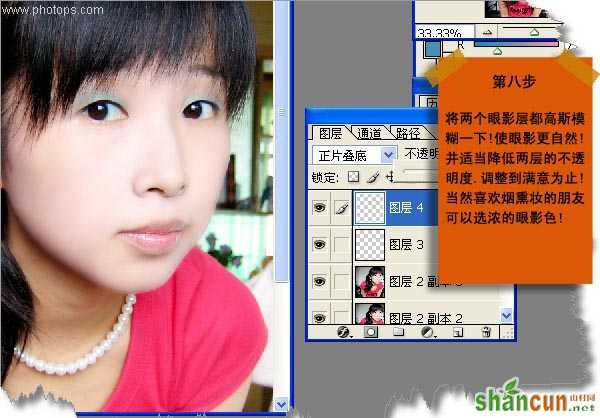
步骤八、将两个眼影图层都设置一个高斯模糊,将眼影更自然,并适当的降低两层的不透明度,调整到满意为止!当然如果你喜欢烟熏妆的话,可以适当的选择比较浓一点的眼影色。
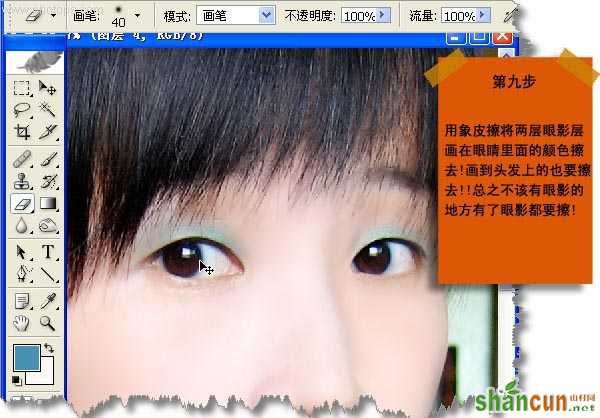
步骤九、用橡皮擦工具将两层眼影图层画上面的眼睛里面的颜色给擦除掉。包括头发上面的颜色也是要擦除掉,这样才更显得真实。
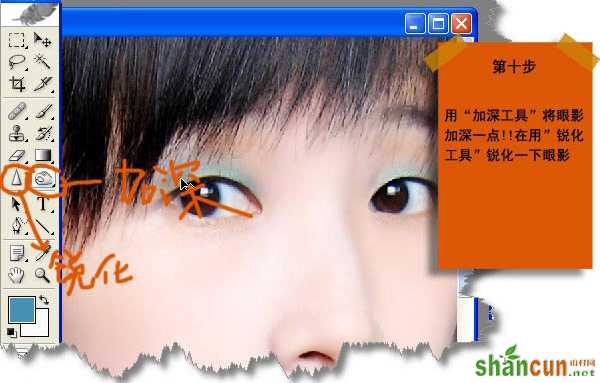
步骤十、用“加深工具”,将眼影加深一点,在用“锐化工具”锐化一下眼影。如图所示:
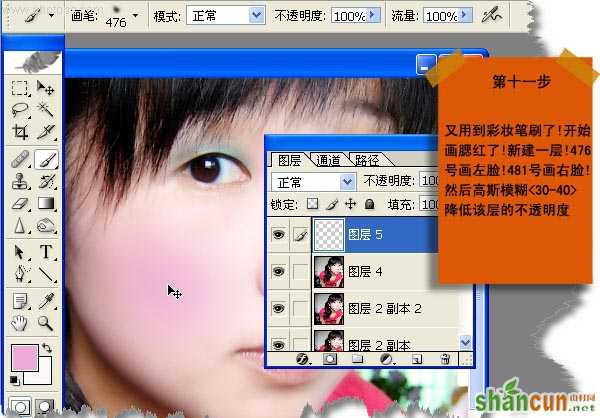
步骤十一、又用到彩妆笔刷了,开始对脸部位置进行加工,新建一个图层,用笔刷工具476号画左脸,481号画右脸。然后都进行高斯模糊,参数设置为30-40即可。降低该层的不透明度。
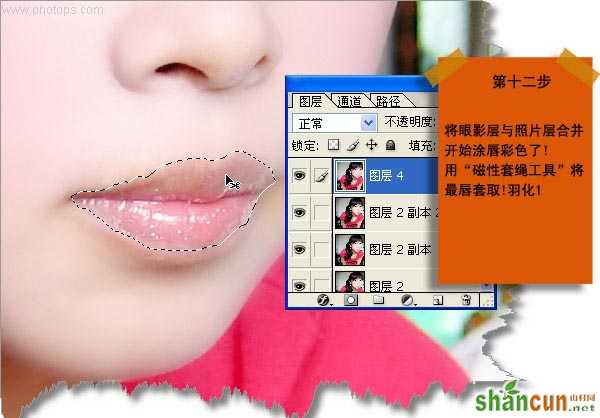
步骤十二、将眼影层与照片图层合并,最后对嘴唇的部位进行涂抹了,用磁性套索工具将嘴唇部位进行套索,羽化。如图所示:
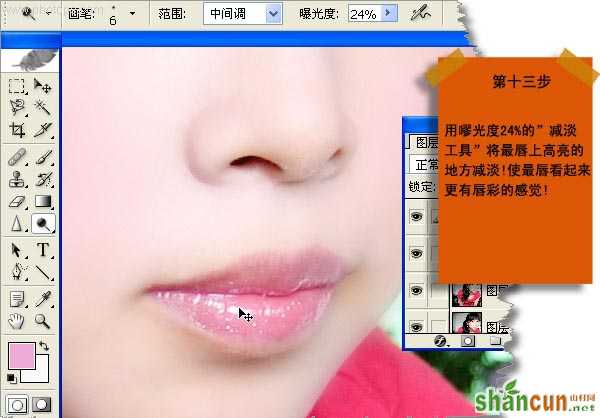
步骤十三、用曝光度为24%的“减淡工具”,将嘴唇上高亮的地方减淡。使嘴唇看起来有一种唇彩的感觉。如图所示:
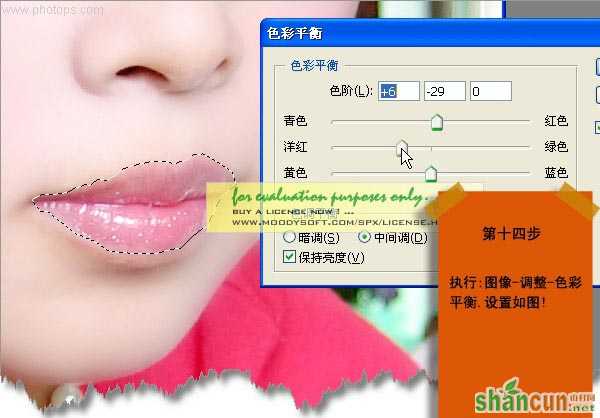
步骤十四、执行“图像--调整--色彩平衡”,参数设置如下图所示:
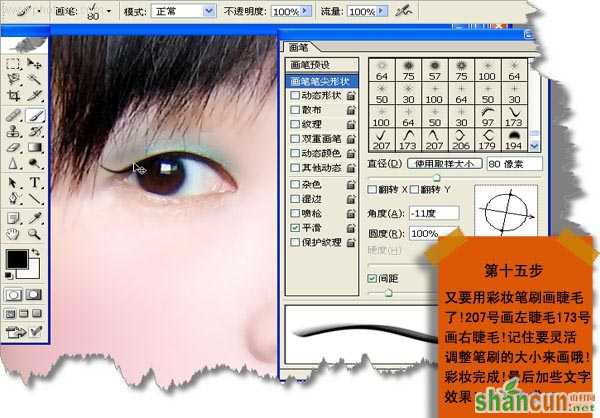
步骤十五、又要用彩妆笔刷话睫毛了,207号画笔绘制左睫毛,173号画笔画右睫毛。记住要灵活,调整画笔笔刷的大小来画,彩妆完成之后,最后适当的在图片上加上一个文字的点缀效果,最终如图所示: