大致思路:先给人物局部调色,如眼影,唇红,皮肤等部分。然后再整体调色,可以调成自己喜好的颜色。最后加上一些装饰高光素材即可。
原图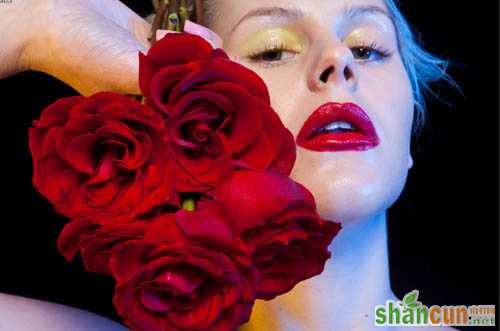 nmousewheel="return bbimg(this)" onload="javascript:resizepic(this)" border="0"/>
最终效果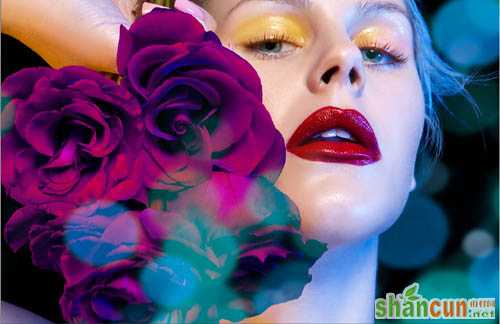 nmousewheel="return bbimg(this)" onload="javascript:resizepic(this)" border="0"/>
1、打开原图素材,用套索工具去掉脸上的瑕疵。
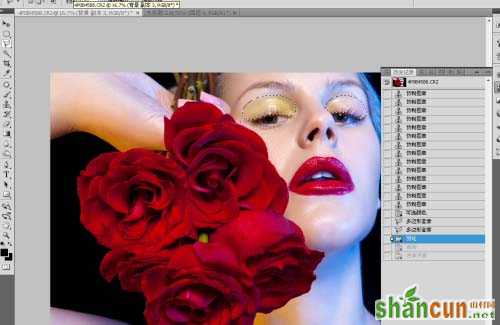 nmousewheel="return bbimg(this)" onload="javascript:resizepic(this)" border="0"/>
2、印章工具使皮肤深浅过度的更和谐。
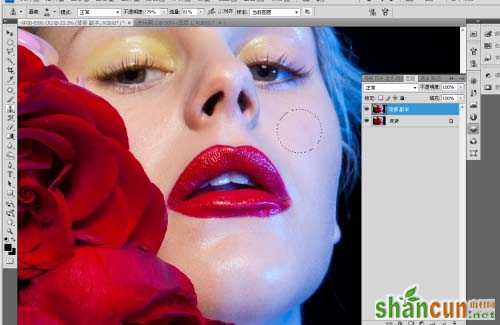 nmousewheel="return bbimg(this)" onload="javascript:resizepic(this)" border="0"/>
3、可选颜色(图像 > 调整 > 可选颜色)调整你想要的皮肤色调。
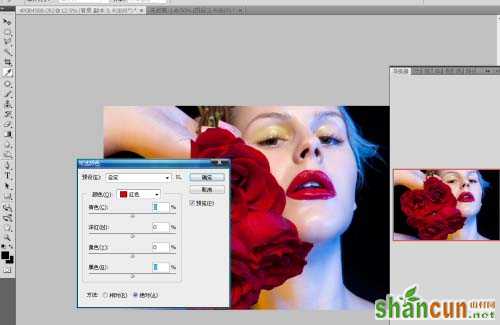 nmousewheel="return bbimg(this)" onload="javascript:resizepic(this)" border="0"/>
4、用套索工具选择要调整的眼影位置,按Ctrl + J 把选区部分复制到新的图层。
 nmousewheel="return bbimg(this)" onload="javascript:resizepic(this)" border="0"/>
5、按Ctrl + B 调整色彩平衡,调高眼影的饱和度。
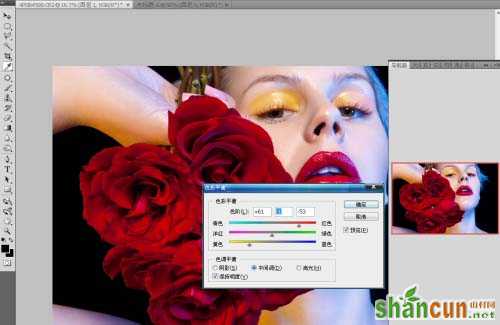 nmousewheel="return bbimg(this)" onload="javascript:resizepic(this)" border="0"/>
6、用套索工具选择要调整眼球的位置,然后按Ctrl + J 把选区部分复制到新的图层。
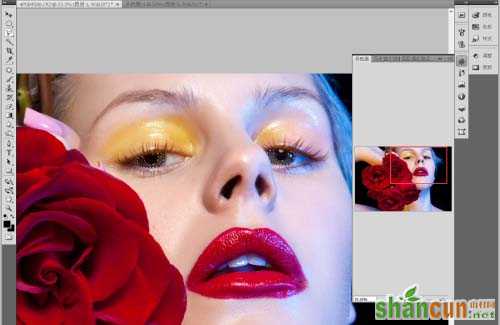 nmousewheel="return bbimg(this)" onload="javascript:resizepic(this)" border="0"/>
7、按Ctrl + M 调整曲线,提亮眼球的明度。
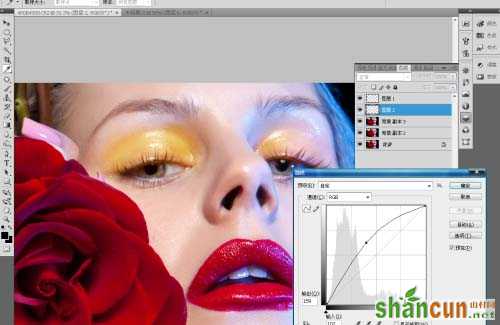 nmousewheel="return bbimg(this)" onload="javascript:resizepic(this)" border="0"/>
8、利用通道混合器(图像 > 调整 > 通道混合器)调整眼球色彩。
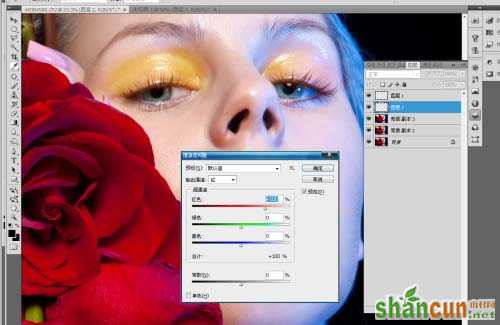 nmousewheel="return bbimg(this)" onload="javascript:resizepic(this)" border="0"/>
9、用套索工具选择唇部要调整的位置。
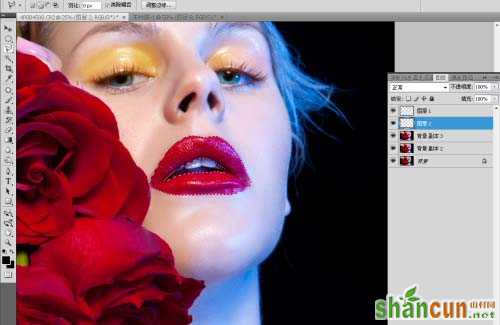 nmousewheel="return bbimg(this)" onload="javascript:resizepic(this)" border="0"/>
10、调整唇部的曝光指数,3lian素材。
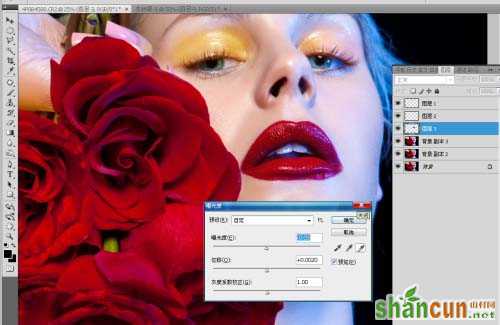 nmousewheel="return bbimg(this)" onload="javascript:resizepic(this)" border="0"/>
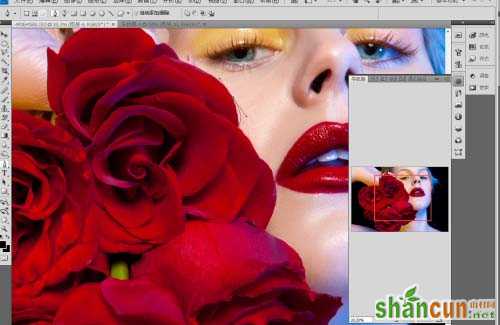
11、用钢笔工具圈出玫瑰的位置。
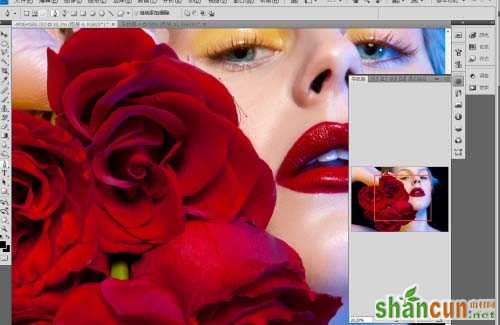 nmousewheel="return bbimg(this)" onload="javascript:resizepic(this)" border="0"/>
12、按Ctrl + B 调整色彩平衡,改变你想要的颜色。
 nmousewheel="return bbimg(this)" onload="javascript:resizepic(this)" border="0"/>
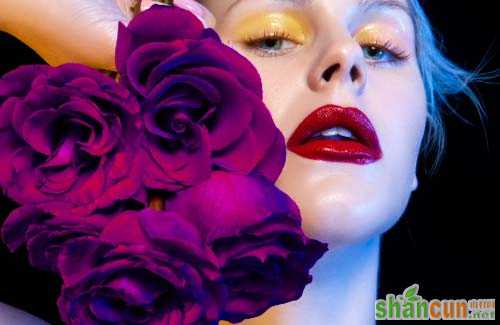
13、大体修完的效果。
 nmousewheel="return bbimg(this)" onload="javascript:resizepic(this)" border="0"/>
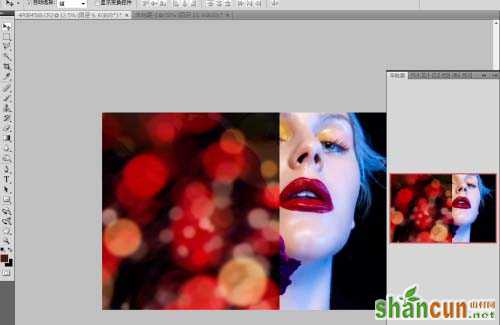
14、加高光素材。
 nmousewheel="return bbimg(this)" onload="javascript:resizepic(this)" border="0"/>
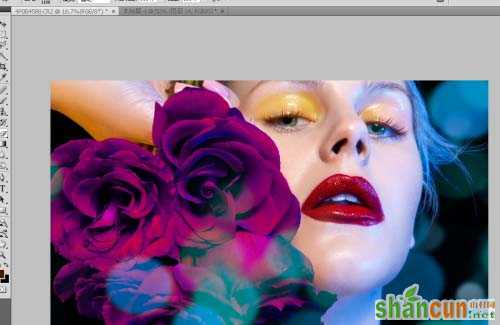
15、调整高光图片的图层混合模式使其达到自己想要的效果。
 nmousewheel="return bbimg(this)" onload="javascript:resizepic(this)" border="0"/>
最终效果:
 nmousewheel="return bbimg(this)" onload="javascript:resizepic(this)" border="0"/>


