原始图素材的光线有点暗,不过背景等都非常清晰。非常适合用来做暖色调整。调色的时候先大致调出整体的主题色调,然后再修饰局部细节及色调
原图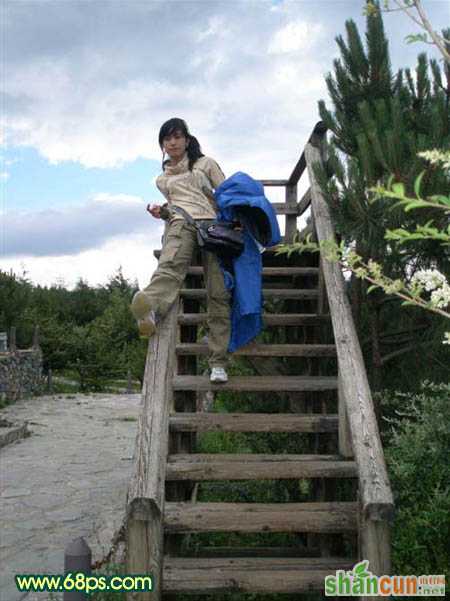 nmousewheel="return bbimg(this)" onload="javascript:resizepic(this)" border="0"/>
最终效果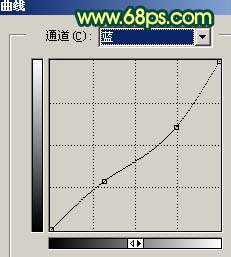 nmousewheel="return bbimg(this)" onload="javascript:resizepic(this)" border="0"/>
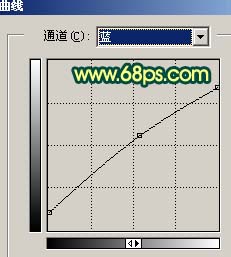
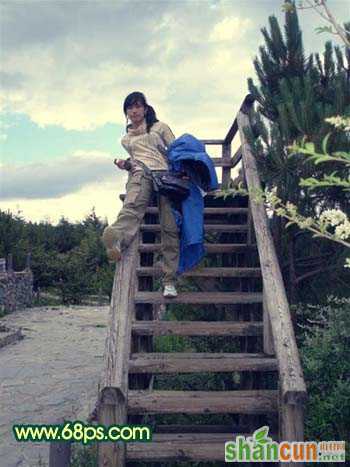
1、打开原图素材,创建曲线调整图层,对蓝色进行调整,参数设置如图1,效果如图2。
 nmousewheel="return bbimg(this)" onload="javascript:resizepic(this)" border="0"/>
<图1>
 nmousewheel="return bbimg(this)" onload="javascript:resizepic(this)" border="0"/>
<图2>
2、创建可选颜色调整图层,参数设置如图3,4,效果如图5。
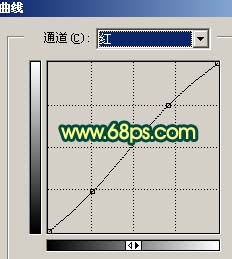 nmousewheel="return bbimg(this)" onload="javascript:resizepic(this)" border="0"/>
<图3>
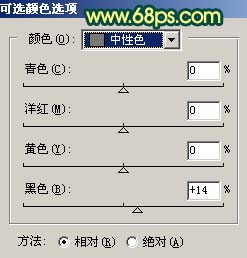 nmousewheel="return bbimg(this)" onload="javascript:resizepic(this)" border="0"/>
<图4>
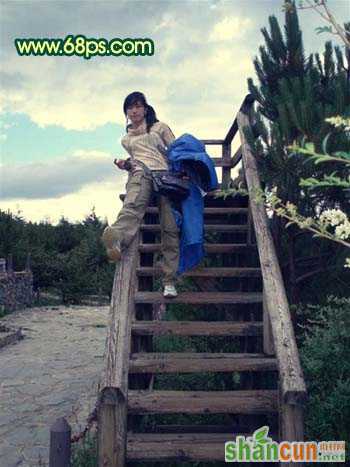 nmousewheel="return bbimg(this)" onload="javascript:resizepic(this)" border="0"/>
3、新建一个图层,按Ctrl + Alt + Shift + E盖印图层,3lian.com,然后把图层混合模式改为“正片叠底”,加上图层蒙版,用黑色画笔把梯子的栏杆及阶梯擦出来,图层参考及效果如下图。
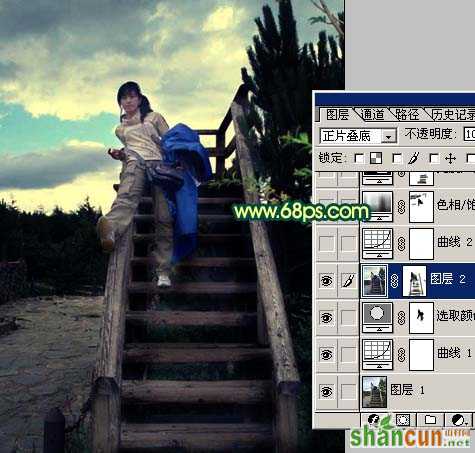 nmousewheel="return bbimg(this)" onload="javascript:resizepic(this)" border="0"/>
<图6>
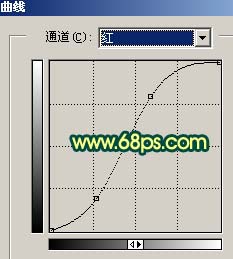
4、创建曲线调整图层,对红色及蓝色进行调整,稍微把幅度拉大一点,参数设置如图7,8,效果如图9.到这一步主体色彩基本调出来了,不过人物部分有点偏暗,下面还需要对人物调色。
 nmousewheel="return bbimg(this)" onload="javascript:resizepic(this)" border="0"/>
<图7>
 nmousewheel="return bbimg(this)" onload="javascript:resizepic(this)" border="0"/>
<图8>
 nmousewheel="return bbimg(this)" onload="javascript:resizepic(this)" border="0"/>
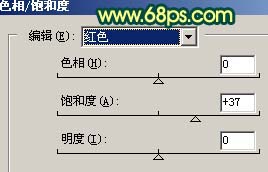
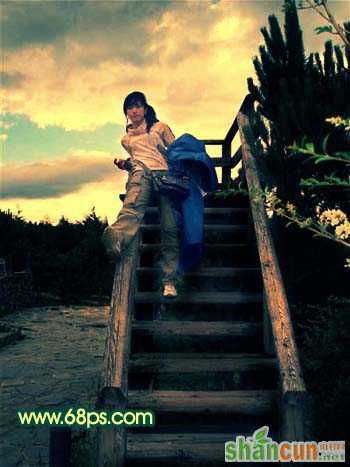
5、创建色相/饱和度调整图层,适当的把饱和度调大一点,参数设置如图10,效果如图11。
 nmousewheel="return bbimg(this)" onload="javascript:resizepic(this)" border="0"/>
<图10>
 nmousewheel="return bbimg(this)" onload="javascript:resizepic(this)" border="0"/>
<图11>
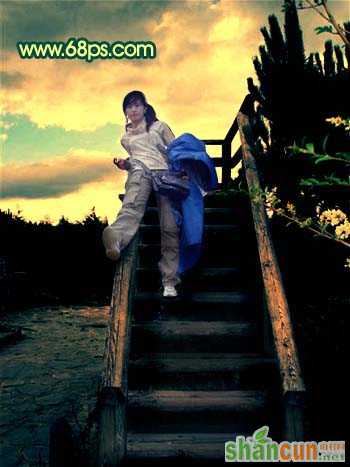
6、把背景图层复制一层,然后把副本按Ctrl + Shift + ]移到图层的最上面,用钢笔工具把人物部分抠出来,复制到新的图层,然后把副本图岑隐藏,效果如图12。
 nmousewheel="return bbimg(this)" onload="javascript:resizepic(this)" border="0"/>
7、回到抠出的人物图层,3lian素材,按Ctrl + M调整曲线,参数设置如图13-15,效果如图16。
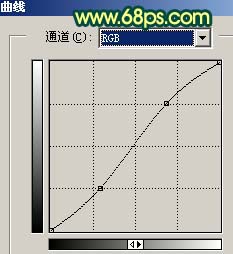 nmousewheel="return bbimg(this)" onload="javascript:resizepic(this)" border="0"/>
<图13>
 nmousewheel="return bbimg(this)" onload="javascript:resizepic(this)" border="0"/>
<图14>
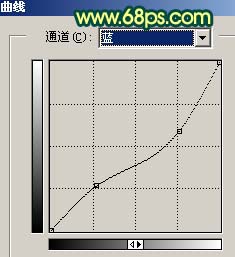 nmousewheel="return bbimg(this)" onload="javascript:resizepic(this)" border="0"/>
<图15>
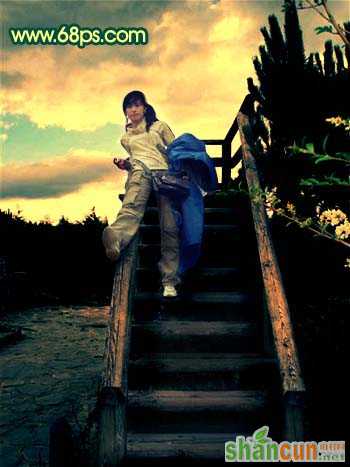 nmousewheel="return bbimg(this)" onload="javascript:resizepic(this)" border="0"/>
8、再适当的调整下人物的颜色,可以用色彩平衡调。自己觉得满意即可。然后调整下对比度,大致效果如图17。
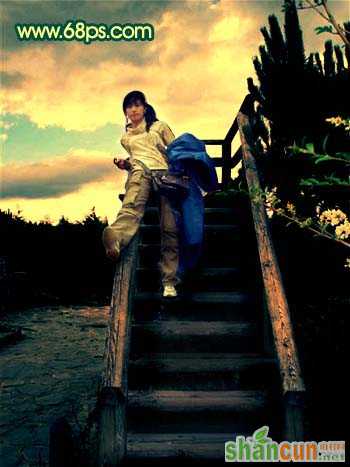 nmousewheel="return bbimg(this)" onload="javascript:resizepic(this)" border="0"/>
<图17>
9、新建一个图层,盖印图层,修饰下细节部分,再适当的锐化一下,完成最终效果。
 nmousewheel="return bbimg(this)" onload="javascript:resizepic(this)" border="0"/>
<图18>


