
调色技巧,PS调出金属肤色效果教程
原图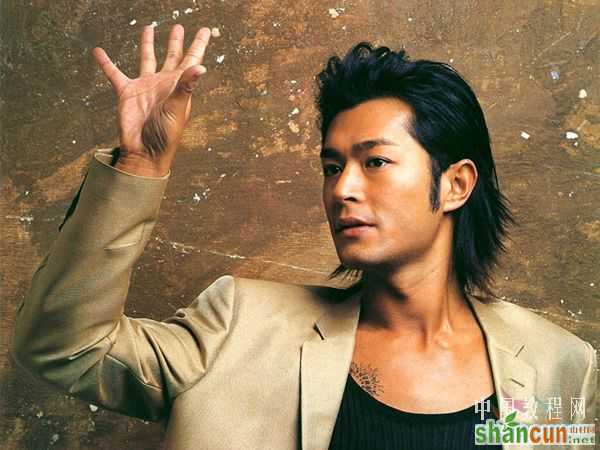 nmousewheel="return bbimg(this)" onload="javascript:resizepic(this)" border="0"/>
最终效果图 nmousewheel="return bbimg(this)" onload="javascript:resizepic(this)" border="0"/>
1、打开图片.Ctrl+J复制一层。
nmousewheel="return bbimg(this)" onload="javascript:resizepic(this)" border="0"/>
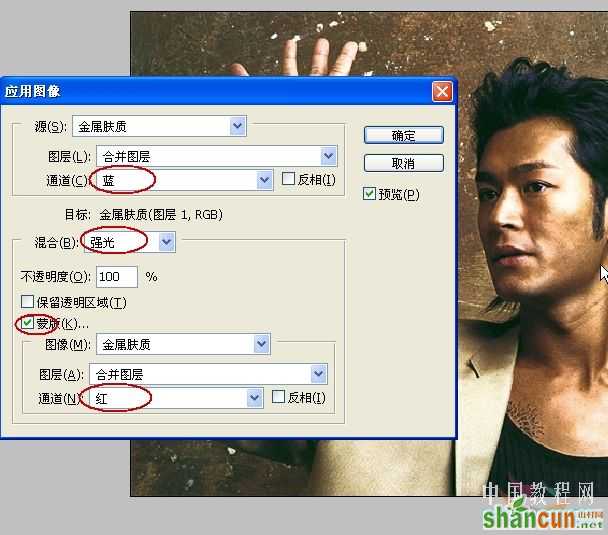
2、打开菜单图像,应用图像。
 nmousewheel="return bbimg(this)" onload="javascript:resizepic(this)" border="0"/>
3、选择蓝色和红色通道勾选蒙板,模式:强光。
 nmousewheel="return bbimg(this)" onload="javascript:resizepic(this)" border="0"/>
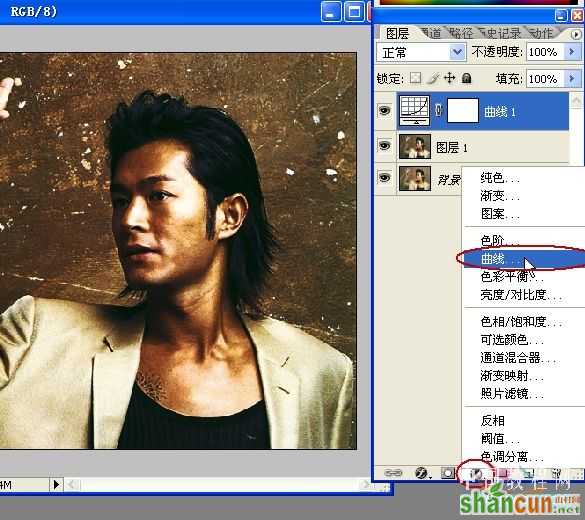
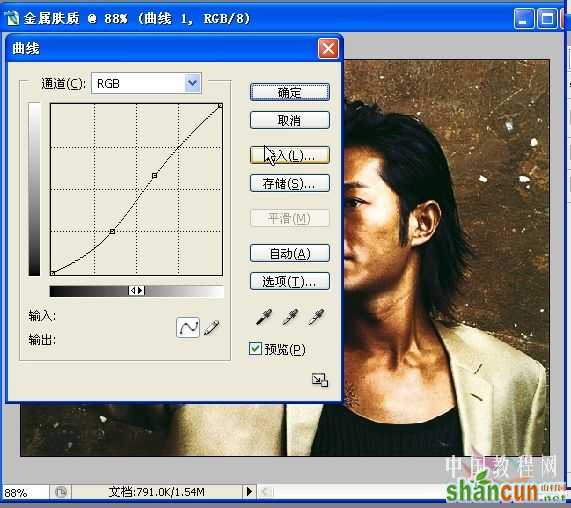
4、基本效果出来了,打开曲线调整层。
 nmousewheel="return bbimg(this)" onload="javascript:resizepic(this)" border="0"/>
5、金属的明暗对比应该强一点,参数如下图:
 nmousewheel="return bbimg(this)" onload="javascript:resizepic(this)" border="0"/>
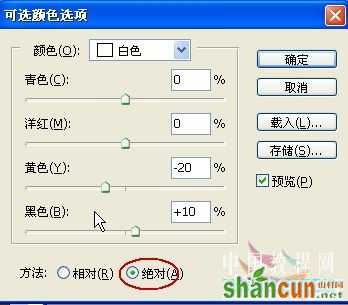
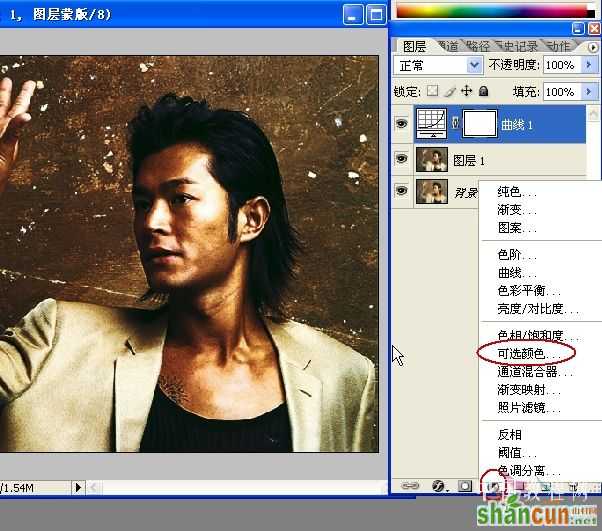
6、新建可选颜色调层。
 nmousewheel="return bbimg(this)" onload="javascript:resizepic(this)" border="0"/>
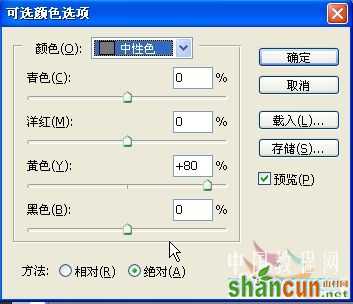
7、参数,勾选绝对。
 nmousewheel="return bbimg(this)" onload="javascript:resizepic(this)" border="0"/>
 nmousewheel="return bbimg(this)" onload="javascript:resizepic(this)" border="0"/>
nmousewheel="return bbimg(this)" onload="javascript:resizepic(this)" border="0"/>
 nmousewheel="return bbimg(this)" onload="javascript:resizepic(this)" border="0"/>
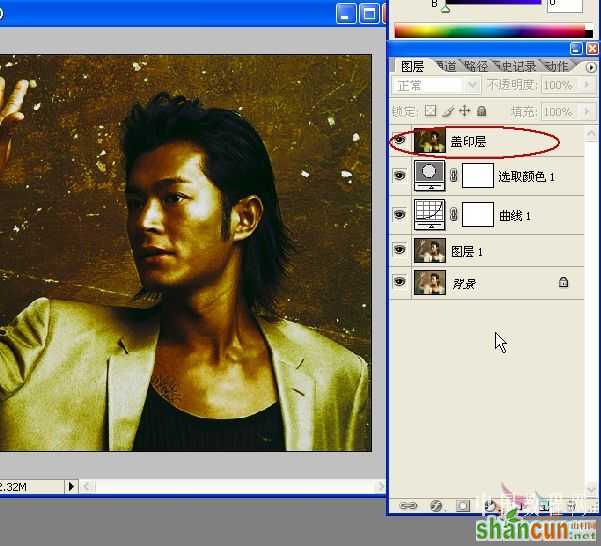
8、Ctrl+Shift+Alt+E盖印可见图层。
 nmousewheel="return bbimg(this)" onload="javascript:resizepic(this)" border="0"/>
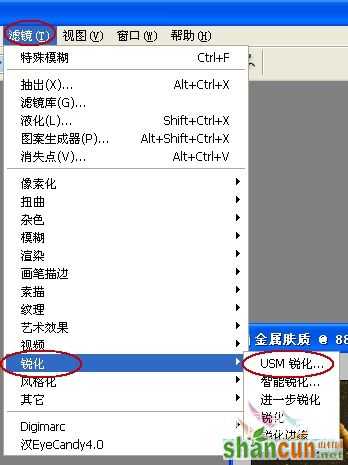
9、执行滤镜-锐化-USM锐化一下,看起来有点粗糙的感觉。
 nmousewheel="return bbimg(this)" onload="javascript:resizepic(this)" border="0"/>
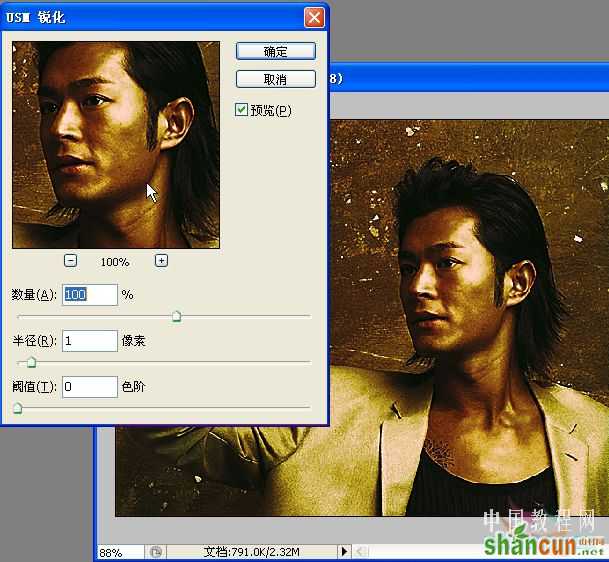
USM锐化参数:
 nmousewheel="return bbimg(this)" onload="javascript:resizepic(this)" border="0"/>
基本上就是这样了,细节上可以自己细致的调一下。
nmousewheel="return bbimg(this)" onload="javascript:resizepic(this)" border="0"/>


