调色技巧——PS调色让照片显示内涵
原图 nmousewheel="return bbimg(this)" onload="javascript:resizepic(this)" border="0"/>
最终效果图 nmousewheel="return bbimg(this)" onload="javascript:resizepic(this)" border="0"/>
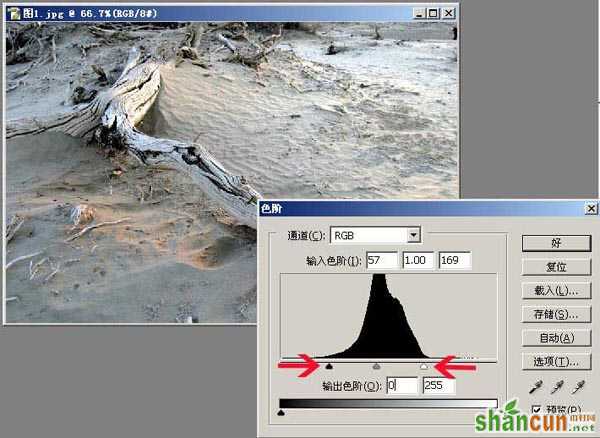
1、调整图片的影调——选择——图像——调整——色阶,设置见图。
 nmousewheel="return bbimg(this)" onload="javascript:resizepic(this)" border="0"/>
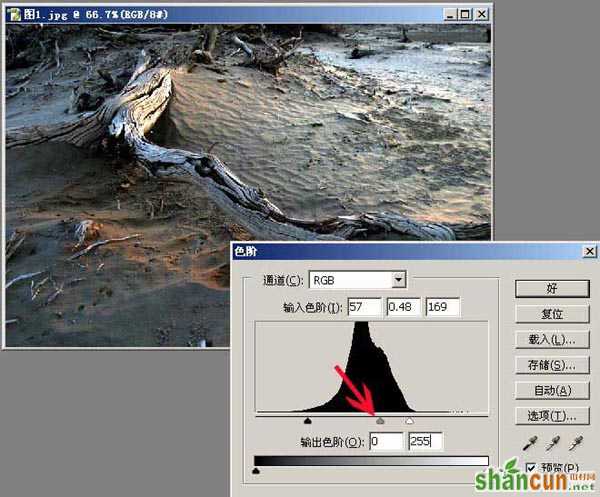
2、为了体现黄昏那种较暗的影调,再将中间灰滑标向右侧移动,整个片子的影调正常了,看图。
 nmousewheel="return bbimg(this)" onload="javascript:resizepic(this)" border="0"/>
3、渲染片子的色调,选择图像——调整——色相饱和度。
 nmousewheel="return bbimg(this)" onload="javascript:resizepic(this)" border="0"/>
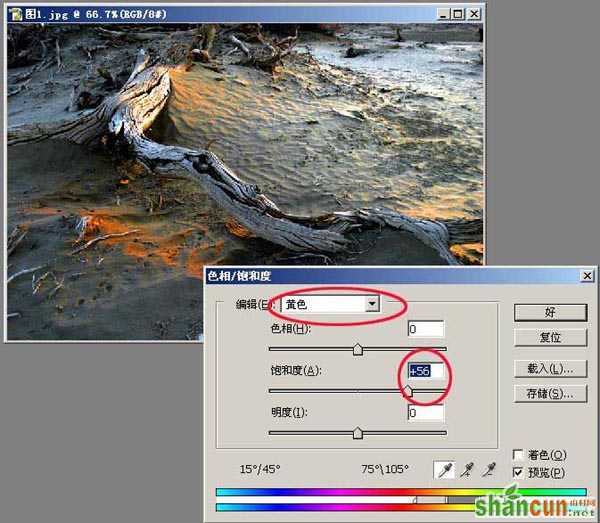
4、再次打开编辑下拉框,选择黄色选项,看图:
 nmousewheel="return bbimg(this)" onload="javascript:resizepic(this)" border="0"/>
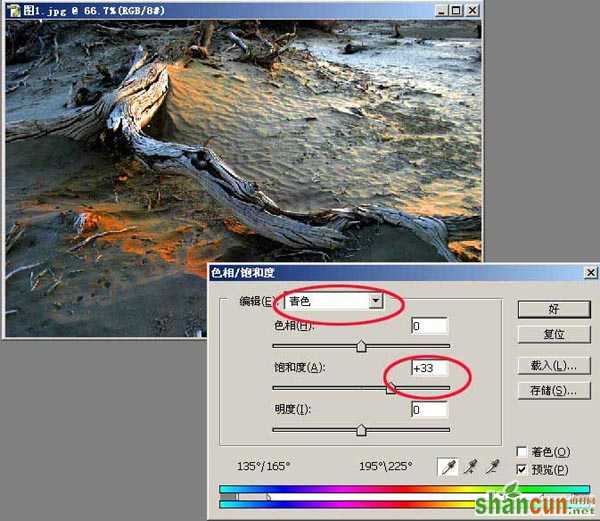
5、为了强调片子的冷暖对比,还需要加强冷颜色的饱和度,再次打开编辑下拉框,选择青色选项,看图:
 nmousewheel="return bbimg(this)" onload="javascript:resizepic(this)" border="0"/>
6、选择图像——调整——曲线,适当调整片子影调,直到满意,看图:
 nmousewheel="return bbimg(this)" onload="javascript:resizepic(this)" border="0"/>
7、最终结果——感到暗了的话,就增加亮度/对比度:
 nmousewheel="return bbimg(this)" onload="javascript:resizepic(this)" border="0"/>


