调色技巧——Photoshop美化偏色照片教程
原图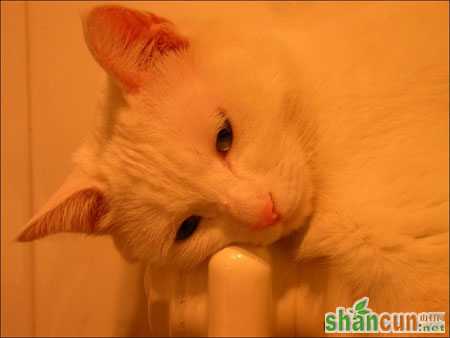 nmousewheel="return bbimg(this)" onload="javascript:resizepic(this)" border="0"/>
最终效果图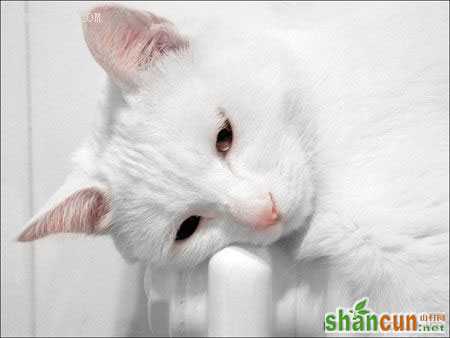 nmousewheel="return bbimg(this)" onload="javascript:resizepic(this)" border="0"/>
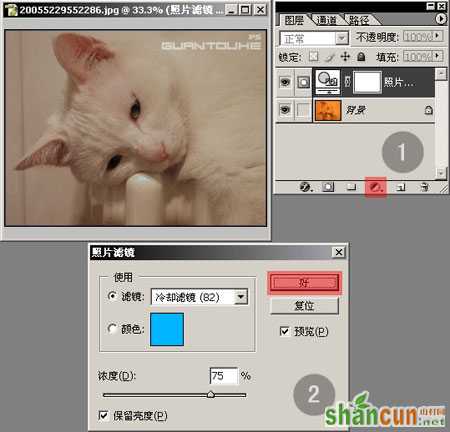
1、首先用PHOTOSHOP打开图片,鼠标单击标签1位置为图片添加一个“照片滤镜”调整图层。参照标签2调整其参数,并单击好按钮确定。
 nmousewheel="return bbimg(this)" onload="javascript:resizepic(this)" border="0"/>
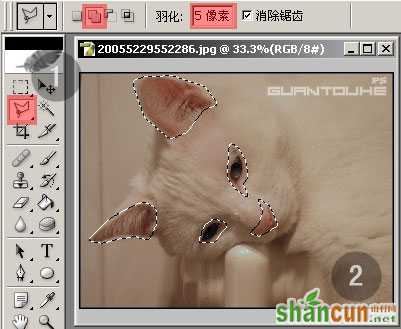
2、按键盘Ctrl+E将调整图层拼合,然后选择多边形套索工具参照标签1的参数,把猫猫的五官部分如标签2选择出来。
 nmousewheel="return bbimg(this)" onload="javascript:resizepic(this)" border="0"/>
3、按键盘Ctrl+J将选区作为新图层建立。
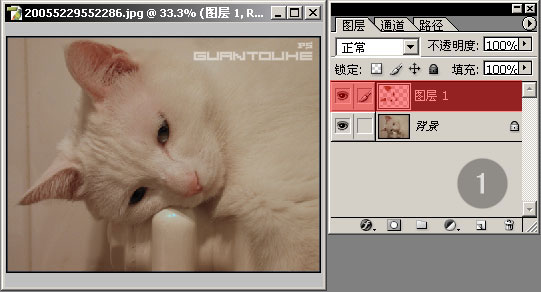 nmousewheel="return bbimg(this)" onload="javascript:resizepic(this)" border="0"/>
4、如标签1所示对背景图层进行图象-调整-色阶,数值参照标签2,调整后按好按钮确定。
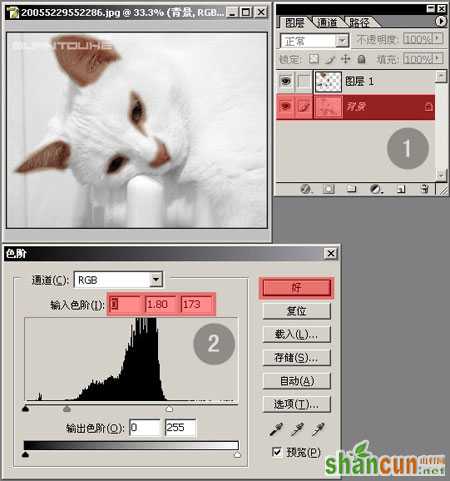 nmousewheel="return bbimg(this)" onload="javascript:resizepic(this)" border="0"/>
5、如标签1所示将图层1的图层混合模式改为“柔光”并对其进行图象-调整-色相饱和度,数值参考标签2。
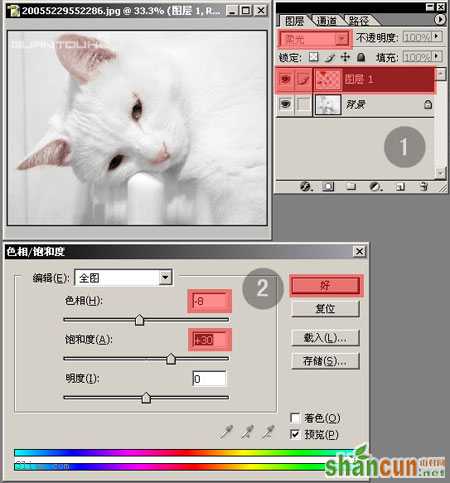 nmousewheel="return bbimg(this)" onload="javascript:resizepic(this)" border="0"/>
6、选择橡皮擦工具选用合适笔触及不透明度,将图层1猫猫五官多余的部分进行擦除。
 nmousewheel="return bbimg(this)" onload="javascript:resizepic(this)" border="0"/>
7、修整好以后合并图层保存文件就可以收工了。
 nmousewheel="return bbimg(this)" onload="javascript:resizepic(this)" border="0"/>


