儿童照片调色比较讲究,色调需要鲜艳明亮。调色的时候可以逐步来美化。先适当把图片的整体或局部调亮。像素不高的话人物部分还需要简单磨皮处理。然后再整体润色,最后再适当锐化即可。
原图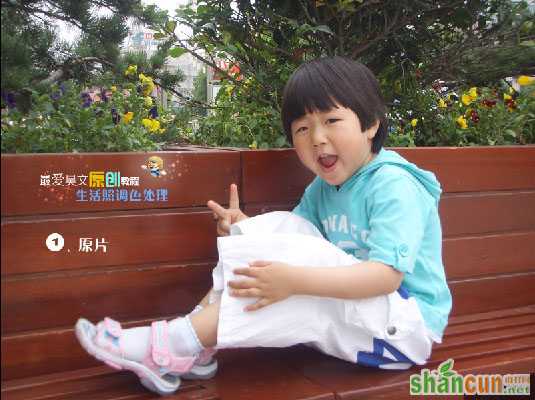 nmousewheel="return bbimg(this)" onload="javascript:resizepic(this)" border="0"/>
最终效果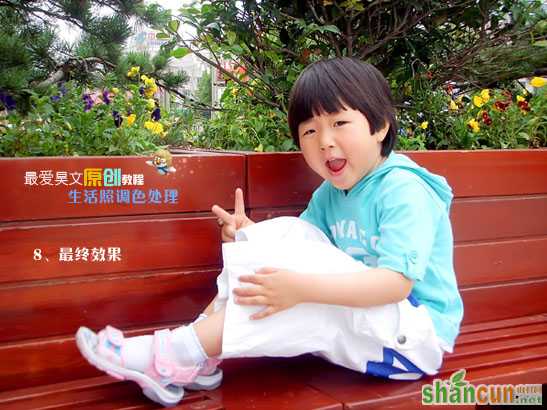 nmousewheel="return bbimg(this)" onload="javascript:resizepic(this)" border="0"/>
1、打开原图素材。
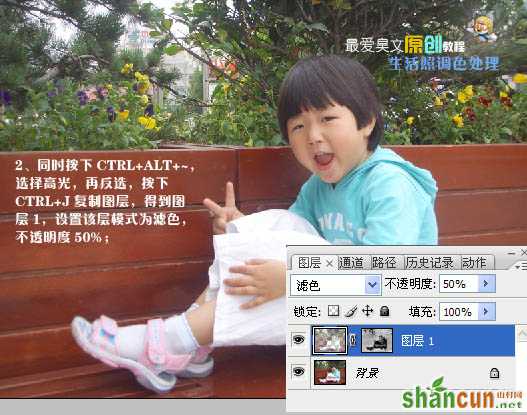
2、按Ctrl + Alt + ~ 调出高光选区,按Ctrl + Shift + I 反选,按Ctrl + J 复制一层,得到图层1,把图层混合模式改为“滤色”,图层不透明度改为:50%,效果如下图。
 nmousewheel="return bbimg(this)" onload="javascript:resizepic(this)" border="0"/>
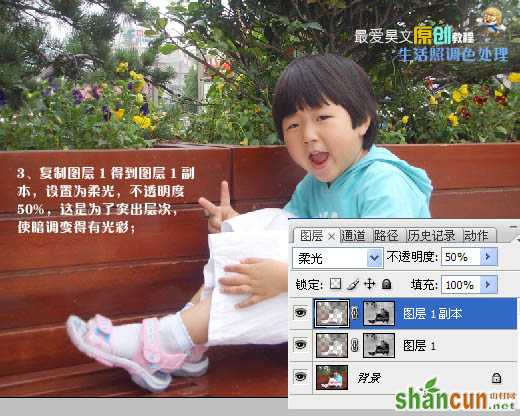
3、把图层1复制一层,得到图层1副本,图层混合模式改为“柔光”,不透明度改为:50%,这一步操作为了突出图片的层次感,使暗调变得有光彩。
 nmousewheel="return bbimg(this)" onload="javascript:resizepic(this)" border="0"/>
4、创建色阶调整图层,对各个通道进行调整,这个主要是纠正图像的灰度。
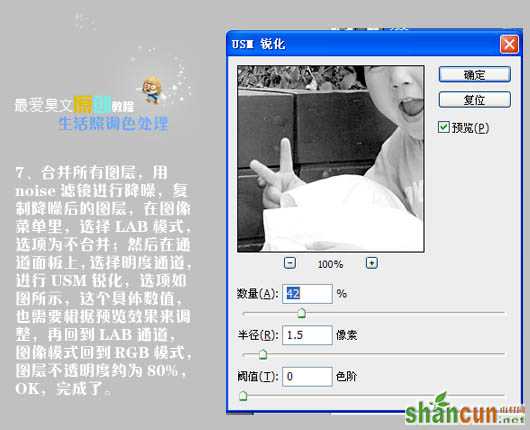 nmousewheel="return bbimg(this)" onload="javascript:resizepic(this)" border="0"/>
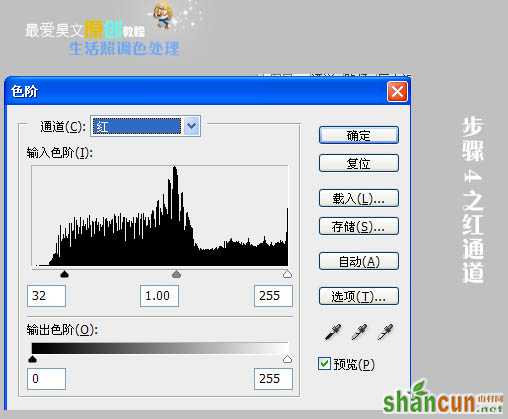 nmousewheel="return bbimg(this)" onload="javascript:resizepic(this)" border="0"/>
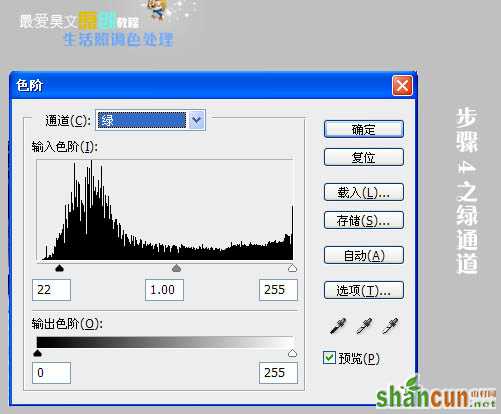 nmousewheel="return bbimg(this)" onload="javascript:resizepic(this)" border="0"/>
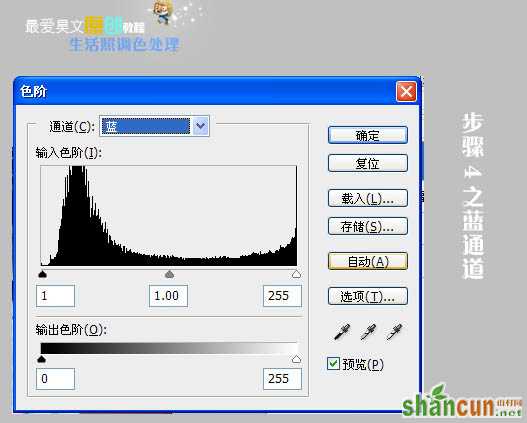 nmousewheel="return bbimg(this)" onload="javascript:resizepic(this)" border="0"/>
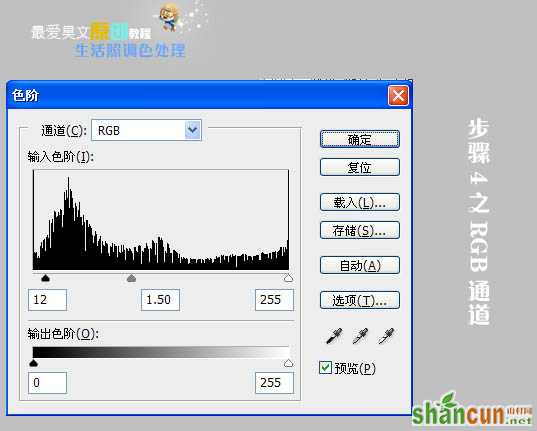 nmousewheel="return bbimg(this)" onload="javascript:resizepic(this)" border="0"/>
5、创建色相/饱和度调整图层,适当增加饱和度,是层次更为丰富。
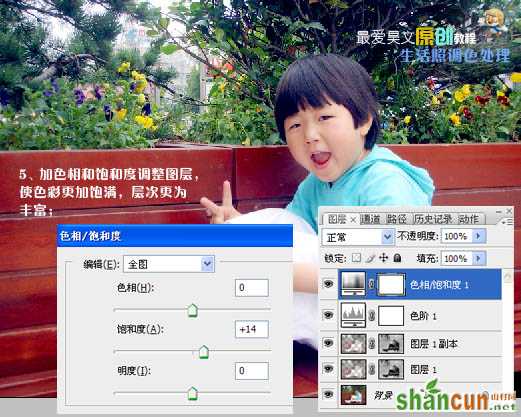 nmousewheel="return bbimg(this)" onload="javascript:resizepic(this)" border="0"/>
6、创建可选颜色调整图层,参数设置如下图。使人物肤色更为通透白皙。
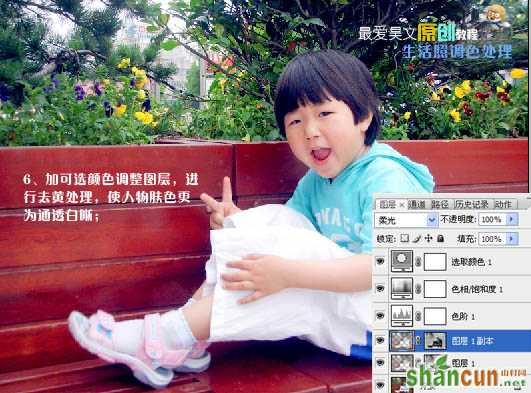 nmousewheel="return bbimg(this)" onload="javascript:resizepic(this)" border="0"/>
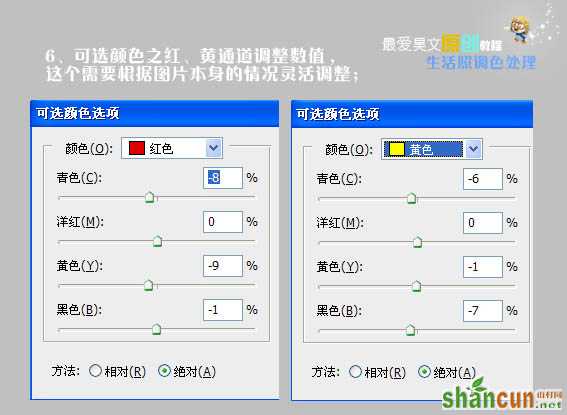 nmousewheel="return bbimg(this)" onload="javascript:resizepic(this)" border="0"/>
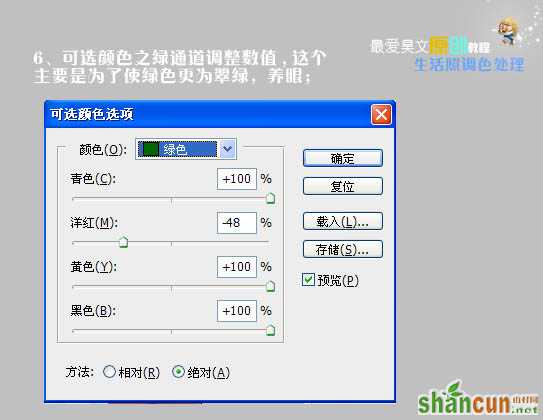 nmousewheel="return bbimg(this)" onload="javascript:resizepic(this)" border="0"/>
7、创建亮度/对比度调整图层,增加整体层次感。这个不可过分,微调即可。至此基本上就可以了。如果有更高要求可以进行下一步细化。
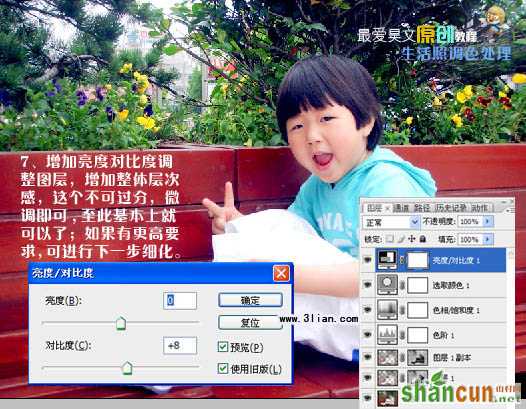 nmousewheel="return bbimg(this)" onload="javascript:resizepic(this)" border="0"/>
8、合并所有图层,用Noise外挂滤镜进行降噪处理,数值自定。复制降噪后的图层,在图像菜单里,选择模式 > Lab颜色。选择不合拼。然后在通道面板上选择明度通道,进行USM锐化,参数设置如下图。这个具体数值也需要更具预览效果来调整。再回到RGB模式,把图层不透明度改为:80%,完成最终效果。
 nmousewheel="return bbimg(this)" onload="javascript:resizepic(this)" border="0"/>
最终效果:
 nmousewheel="return bbimg(this)" onload="javascript:resizepic(this)" border="0"/>


