原图 nmousewheel="return bbimg(this)" onload="javascript:resizepic(this)" border="0"/>
最终效果
 nmousewheel="return bbimg(this)" onload="javascript:resizepic(this)" border="0"/>
1、打开素材图片,把背景图层复制一层,图层混合模式改为“正片叠底”,加上图层蒙版,用黑色画笔涂抹马的周围。
 nmousewheel="return bbimg(this)" onload="javascript:resizepic(this)" border="0"/>
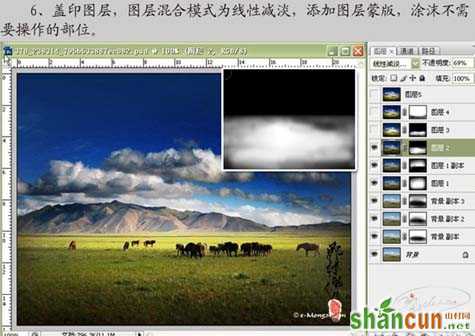
2、把刚才操作的图层复制一层,在原先蒙版的基础上继续涂抹。
 nmousewheel="return bbimg(this)" onload="javascript:resizepic(this)" border="0"/>
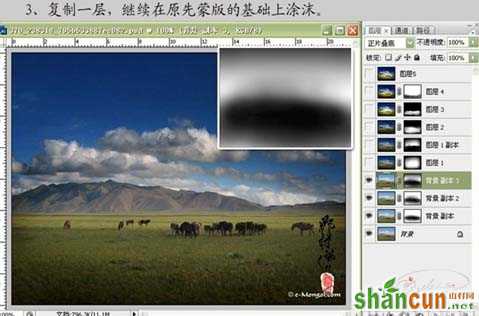
3、再复制一层,在原先蒙版基础上涂抹。
 nmousewheel="return bbimg(this)" onload="javascript:resizepic(this)" border="0"/>
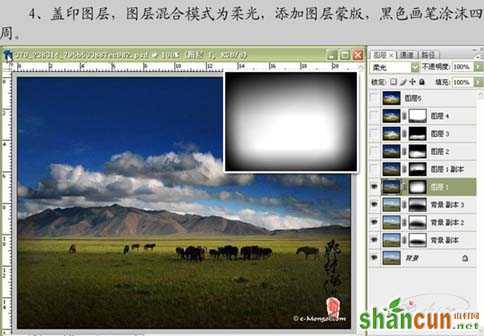
4、新建一个图层,按Ctrl + Alt + Shift + E盖印图层,图层混合模式改为“柔光”,加上图层蒙版用黑色画笔涂抹四周。
 nmousewheel="return bbimg(this)" onload="javascript:resizepic(this)" border="0"/>
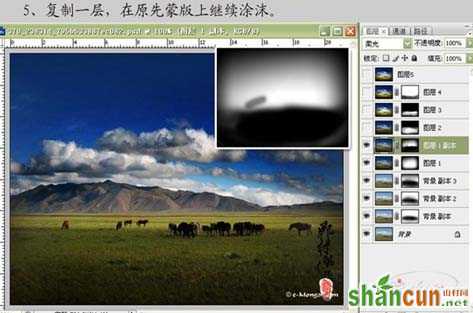
5、复制一层,3lian素材,在原先蒙版上继续涂抹。
 nmousewheel="return bbimg(this)" onload="javascript:resizepic(this)" border="0"/>
6、新建一个图层,盖印图层,图层混合模式改为“线性减淡”,加上图层蒙版,用黑色画笔涂抹不需要操作的部分。
 nmousewheel="return bbimg(this)" onload="javascript:resizepic(this)" border="0"/>
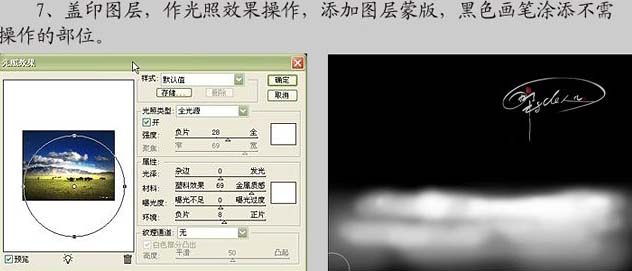
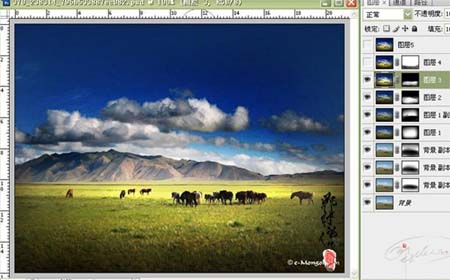
7、新建一个图层,盖印图层,执行:滤镜 > 渲染 > 光照效果,参数设置如下图,确定后加上图层蒙版,用黑色画笔擦掉不需要操作的部位。
 nmousewheel="return bbimg(this)" onload="javascript:resizepic(this)" border="0"/>
 nmousewheel="return bbimg(this)" onload="javascript:resizepic(this)" border="0"/>
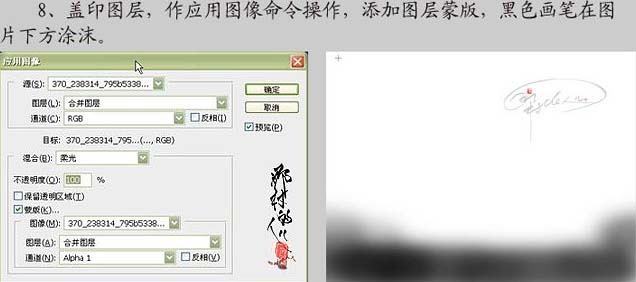
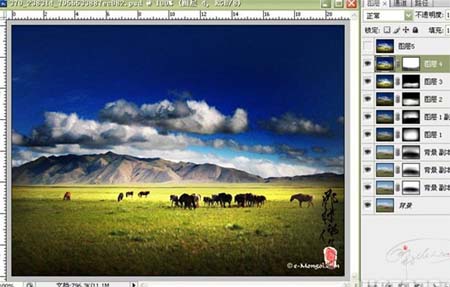
8、新建一个图层,盖印图层,执行:图像 > 应用图像操作,参数设置如下图,确定后加上图层蒙版,用黑色画笔在图片下方涂抹。
 nmousewheel="return bbimg(this)" onload="javascript:resizepic(this)" border="0"/>
 nmousewheel="return bbimg(this)" onload="javascript:resizepic(this)" border="0"/>
9、新建一个图层,盖印图层,做降噪、锐化、细节处理,完成最终效果。
 nmousewheel="return bbimg(this)" onload="javascript:resizepic(this)" border="0"/>


