
教程介绍对比较大的暖色照片调色方法。调色的时候需要由淡到深的慢慢调整。先用曲线等把图片的色调调成淡黄色,然后再适当加重,直到自己满意为止。
原图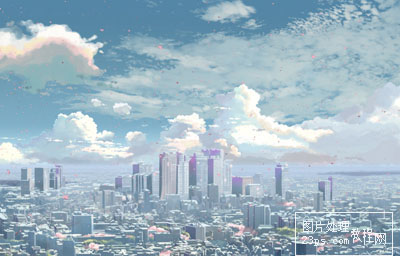 nmousewheel="return bbimg(this)" onload="javascript:resizepic(this)" border="0"/>
最终效果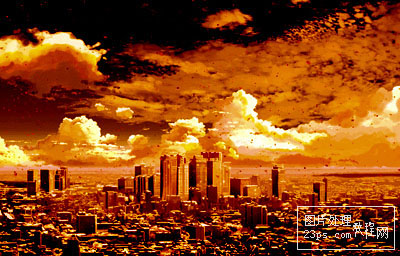 nmousewheel="return bbimg(this)" onload="javascript:resizepic(this)" border="0"/>
1、打开图片,ctrl+alt+~ 选取高光部分选区。
 nmousewheel="return bbimg(this)" onload="javascript:resizepic(this)" border="0"/>
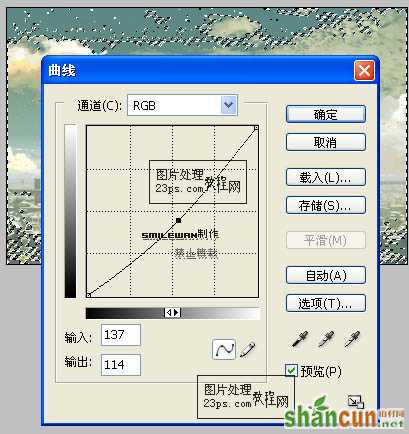
2、创建曲线调整层,参数设置如下图。
 nmousewheel="return bbimg(this)" onload="javascript:resizepic(this)" border="0"/>
 nmousewheel="return bbimg(this)" onload="javascript:resizepic(this)" border="0"/>
 nmousewheel="return bbimg(this)" onload="javascript:resizepic(this)" border="0"/>
 nmousewheel="return bbimg(this)" onload="javascript:resizepic(this)" border="0"/>
 nmousewheel="return bbimg(this)" onload="javascript:resizepic(this)" border="0"/>
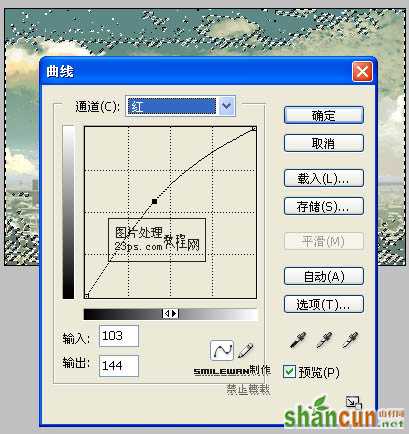
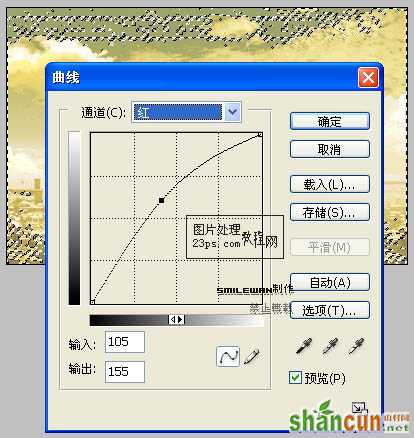
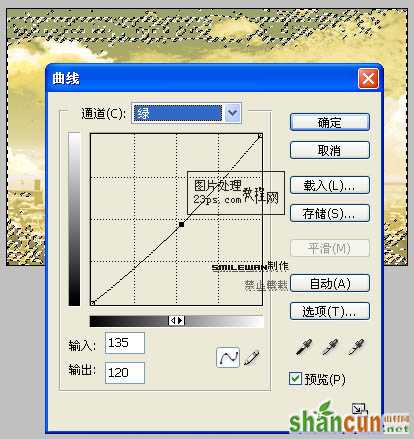
3、在刚刚的曲线1层上继续ctrl+alt+~ 选取高光部分,创建曲线2调整层,完成曲线选择。
nmousewheel="return bbimg(this)" onload="javascript:resizepic(this)" border="0"/>
 nmousewheel="return bbimg(this)" onload="javascript:resizepic(this)" border="0"/>
 nmousewheel="return bbimg(this)" onload="javascript:resizepic(this)" border="0"/>
3lian素材
 nmousewheel="return bbimg(this)" onload="javascript:resizepic(this)" border="0"/>
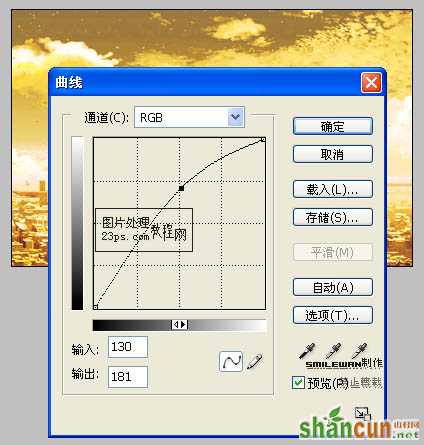
4、创建曲线3调整层。
 nmousewheel="return bbimg(this)" onload="javascript:resizepic(this)" border="0"/>
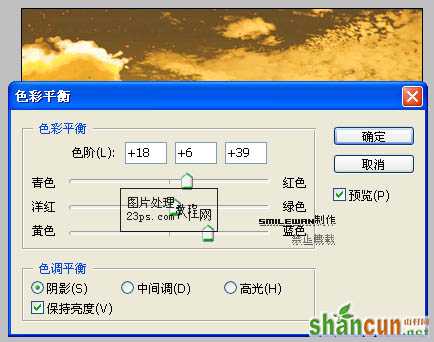
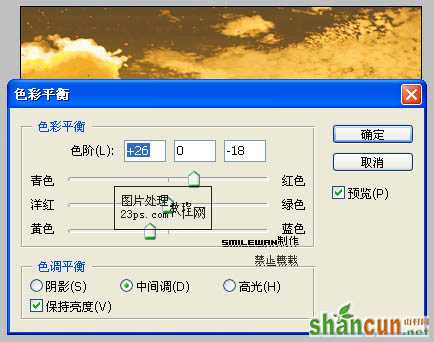
5、创建色彩平衡调整层。
 nmousewheel="return bbimg(this)" onload="javascript:resizepic(this)" border="0"/>
nmousewheel="return bbimg(this)" onload="javascript:resizepic(this)" border="0"/>
 nmousewheel="return bbimg(this)" onload="javascript:resizepic(this)" border="0"/>
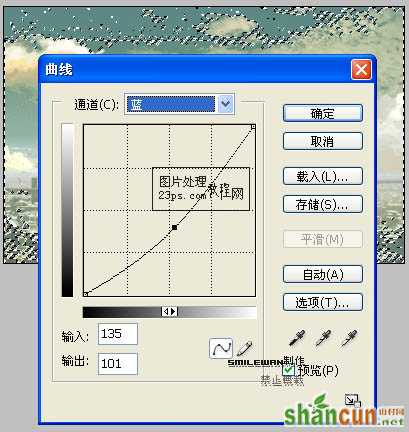
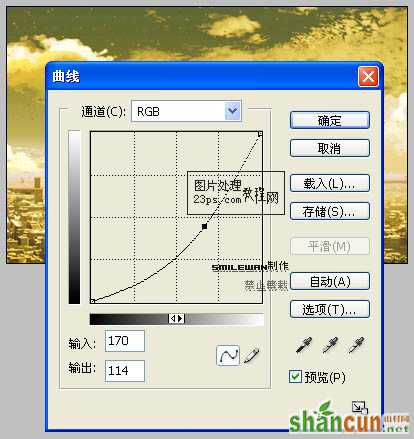
6、创建曲线4调整层。
nmousewheel="return bbimg(this)" onload="javascript:resizepic(this)" border="0"/>
7、创建曲线5调整层。
 nmousewheel="return bbimg(this)" onload="javascript:resizepic(this)" border="0"/>
8、图像-调整-渐变映射(灰色#aaaaaa加白色渐变),图层混合模式为正片叠底。
 nmousewheel="return bbimg(this)" onload="javascript:resizepic(this)" border="0"/>
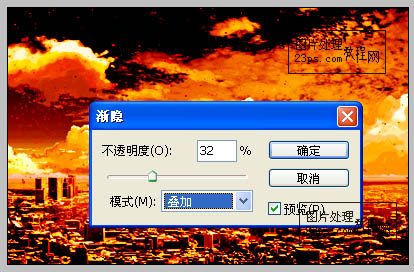
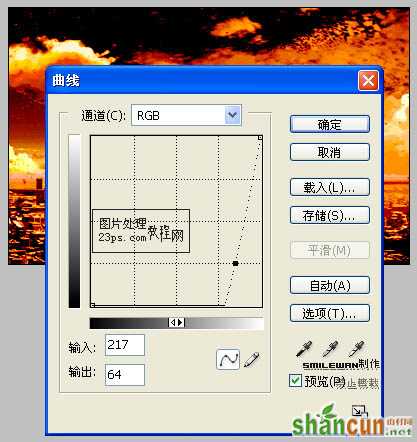
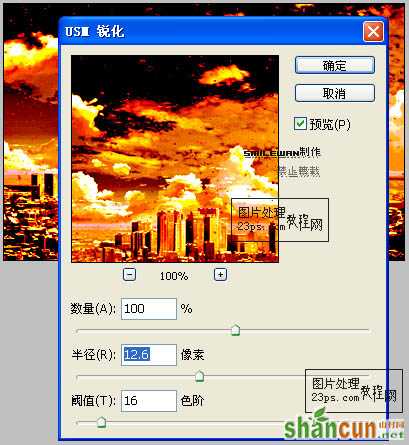
9、合并所有图层,滤镜-锐化-usm锐化,接着编辑-消褪渐隐USM锐化,完成!
 nmousewheel="return bbimg(this)" onload="javascript:resizepic(this)" border="0"/>
nmousewheel="return bbimg(this)" onload="javascript:resizepic(this)" border="0"/>
最终效果:
nmousewheel="return bbimg(this)" onload="javascript:resizepic(this)" border="0"/>


