本教程除了调色之外还融入了很多装饰元素。画面效果非常壮观,尤其是后期颜色调整的非常有视觉冲击力。教程中作者没有提供教材中的一些用到的素材,需要自己去网上下载。
原图
 nmousewheel="return bbimg(this)" onload="javascript:resizepic(this)" border="0"/>
最终效果
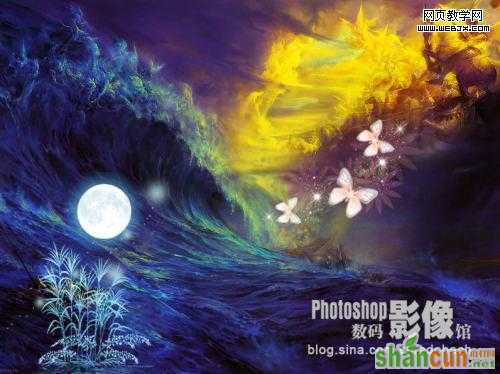 nmousewheel="return bbimg(this)" onload="javascript:resizepic(this)" border="0"/>
1、文件/打开图像。调出需要处理的图片。
 nmousewheel="return bbimg(this)" onload="javascript:resizepic(this)" border="0"/>
2、图层/新建调整图层/色彩平衡,参数设置如下图。
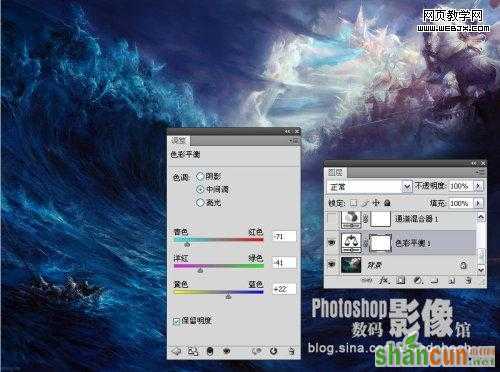 nmousewheel="return bbimg(this)" onload="javascript:resizepic(this)" border="0"/>
3、图层/新建调整图层/通道混合器,分别调节红、绿、蓝通道。
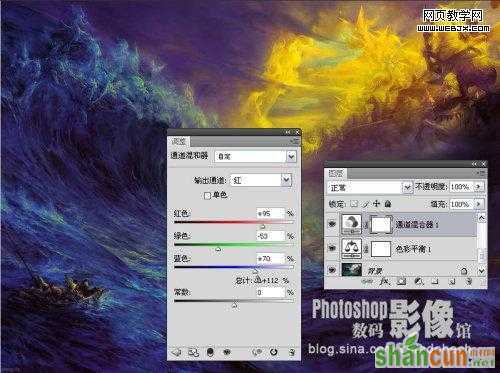 nmousewheel="return bbimg(this)" onload="javascript:resizepic(this)" border="0"/>
3lian素材
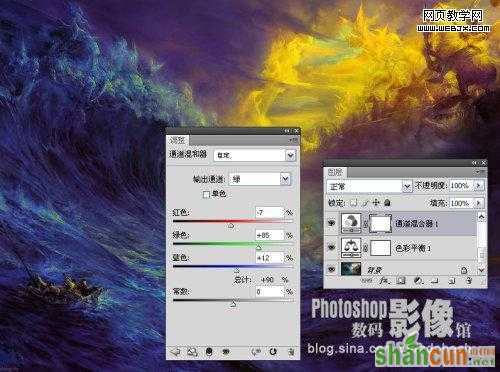 nmousewheel="return bbimg(this)" onload="javascript:resizepic(this)" border="0"/>
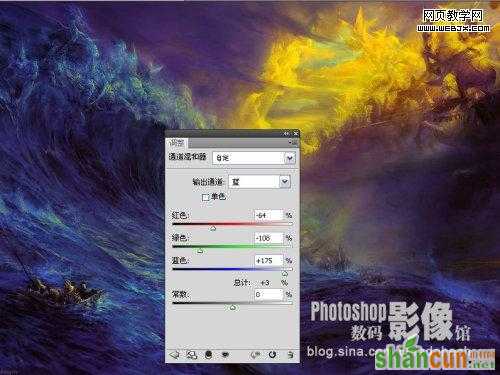 nmousewheel="return bbimg(this)" onload="javascript:resizepic(this)" border="0"/>
4、图层/新建调整图层/曲线,对图像的对比进行调节。
 nmousewheel="return bbimg(this)" onload="javascript:resizepic(this)" border="0"/>
5、打开素材,并移至过来,放在画面的左侧,图层模式:滤色。将黑色屏蔽掉。
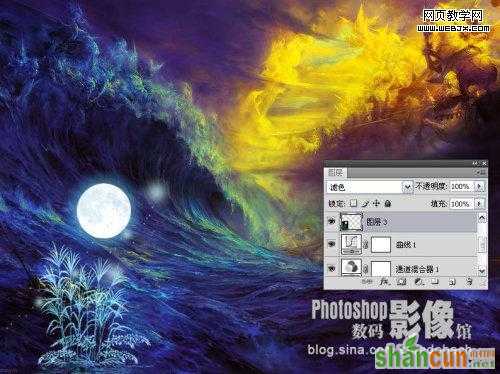 nmousewheel="return bbimg(this)" onload="javascript:resizepic(this)" border="0"/>
6、拷贝当前层,模式更改为变亮。
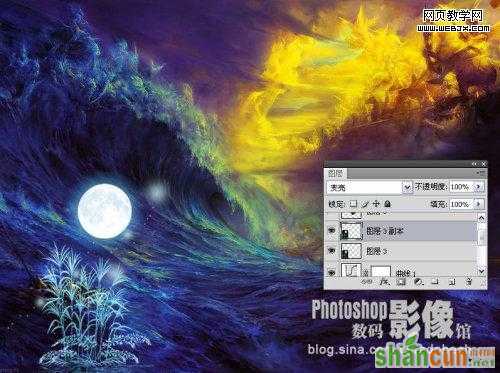 nmousewheel="return bbimg(this)" onload="javascript:resizepic(this)" border="0"/>
7、打开素材蝴蝶,并移至过来,放在画面的左侧,图层模式:滤色。将黑色屏蔽掉。
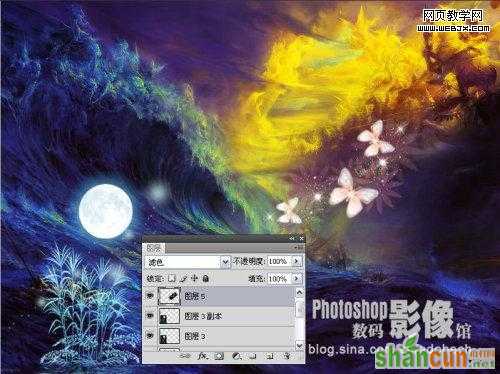 nmousewheel="return bbimg(this)" onload="javascript:resizepic(this)" border="0"/>
最终效果如下图:
 nmousewheel="return bbimg(this)" onload="javascript:resizepic(this)" border="0"/>


