PS制作精美双层文字教程
最终效果图 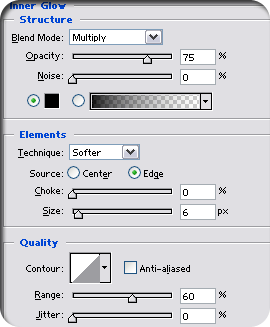 nmousewheel="return bbimg(this)" onload="javascript:resizepic(this)" border="0"/>
1、新建一个适合你自己文字大小的文件,分辨率72像素/英寸,RGB颜色模式。
2、点击图层面板底部的按钮新建一图层,点击D键恢复默认的黑色前景色和黑色背景色(译者注:按D键需要在英文输入法下)。
3、选择菜单滤镜/渲染/云彩(Filter > Render > Clouds),选择菜单图像/调整/色相和饱和度(Image > Adjustments > Hue/Saturation... ,Ctrl+U),弹出色相和饱和度对话框,选中着色(Colorize)复选框,拖动色相滑块或在输入框中输入数字30,设置饱和度为75, 选择图像/调整/亮度和对比度(Image > Adjustments > Brightness/Contrast...),设置对比度为+30。应用滤镜/扭曲/极坐标(Filter > Distort > Polar Coordinates...),选中极坐标到平面(Polar to Rectangular)坐标,确定。
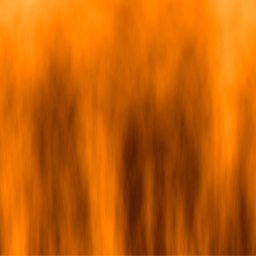 nmousewheel="return bbimg(this)" onload="javascript:resizepic(this)" border="0"/>
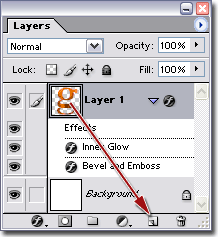
4、激活通道面板,点击 nmousewheel="return bbimg(this)" onload="javascript:resizepic(this)" border="0"/>按钮新建一个通道:通道1,选择横排文字工具(T)在通道1中单击, 此时显示区显示为红色,输入文字,我用的是粗体Garmond字体,350像素。点击通道面板顶部的RGB通道,此时自动建立文字选区,选择选择/反选(Select > Inverse ,Ctrl+shift+I),点击Delete键清除不需要部分。
回到图层面板,点击 nmousewheel="return bbimg(this)" onload="javascript:resizepic(this)" border="0"/>图层面板底部的(添加图层样式)按钮,选择内发光(Inner Glow...),作如图所示设置:(Multiply中文为正片叠底)。
 nmousewheel="return bbimg(this)" onload="javascript:resizepic(this)" border="0"/>
5、然后选择斜面和浮雕(Bevel and Emboss),作图所示设置:(Inner Bevel中文为内斜面,smooth中文为平滑,screen在7.0中为滤色,6.0中为屏幕)。
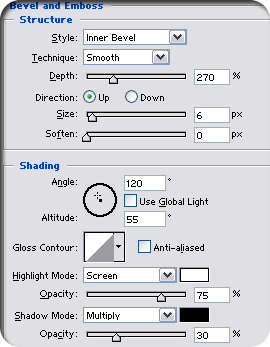 nmousewheel="return bbimg(this)" onload="javascript:resizepic(this)" border="0"/>
 nmousewheel="return bbimg(this)" onload="javascript:resizepic(this)" border="0"/>
6、把图层1拖动到新建图层按钮释放,复制出图层1 副本。选中图层1 副本,选择图像/调整/去色(Image > Adjustments > Desaturate ,Ctrl+Shift+U),激活图层1,按住Ctrl点击图层1载入选区,选择/修改/收缩(Select > Modify > Contract... ),输入数字2,确定。选择/反选(Select > Inverse ,Ctrl+Shift+I),按Delete清除。点击图层1 副本回到图层1 副本,选择椭圆选取工具,按图所示沿文字边缘选择数个选区(选取第一个选区后,按住Shift键可以同时选择数个选区),按Delete清除。
 nmousewheel="return bbimg(this)" onload="javascript:resizepic(this)" border="0"/>
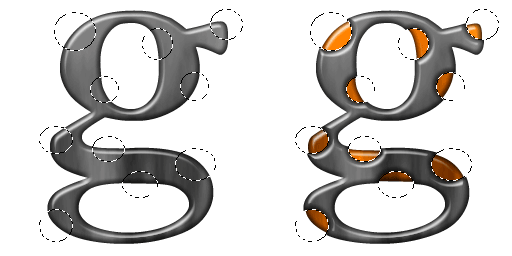 nmousewheel="return bbimg(this)" onload="javascript:resizepic(this)" border="0"/>
7、最后,选择选择/反选(Select > Deselect ,Ctrl+D)取消选择,用图层样式添加阴影,用默认设置即可。
补充:在第6步选取时可以一次选取单个选区,用图像/调整/色相和饱和度(Ctrl+U)给单个选区的颜色。成品图如下。
 nmousewheel="return bbimg(this)" onload="javascript:resizepic(this)" border="0"/>


