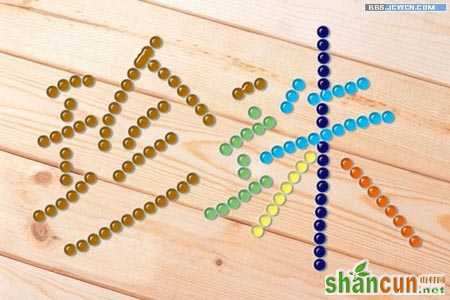
闪亮珍珠字的制作教程的最终效果
 nmousewheel="return bbimg(this)" onload="javascript:resizepic(this)" border="0"/>
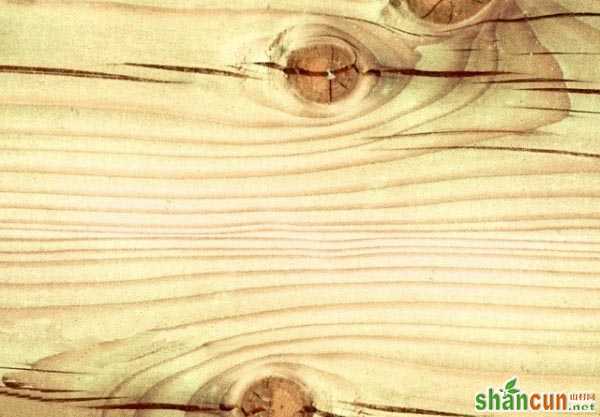
1、新建一个文档,大小自定(随便找一个素材也行)。
 nmousewheel="return bbimg(this)" onload="javascript:resizepic(this)" border="0"/>
<图1>
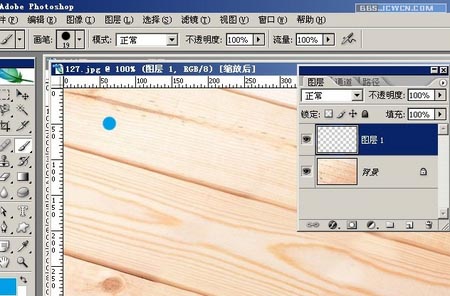
2、新建一层,用画笔工具,我选尖角19像素(硬笔),颜色我选蓝色(大家可以选喜欢的颜色),在画布上点一下,以前景色为填充色的小圆就出来了。
 nmousewheel="return bbimg(this)" onload="javascript:resizepic(this)" border="0"/>
<图2>
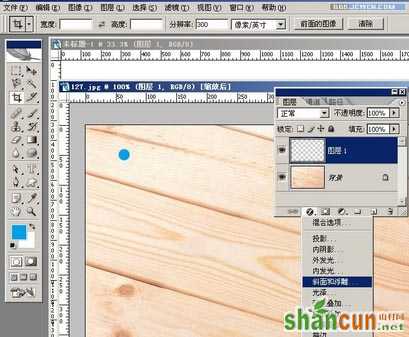
3、点图层面板下的“添加图层样式”(或双击图层缩略图),打开图层样式对话框。
 nmousewheel="return bbimg(this)" onload="javascript:resizepic(this)" border="0"/>
<图3>
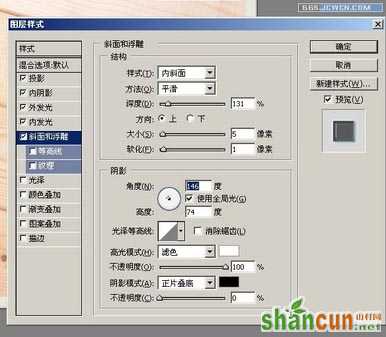
4、在图层样式对话框,我首先选的是“斜面和浮雕”(这是最重要的一步,凹凸面和高光就是在这儿来表现出来的),结构:深度131,大小5
5、软化1;阴影:高度74(大家把高度设40、50、60、70,看看有什么不同,高光就慢慢地出来了),高光模式不透明度100%,阴影模式不透明度0%。
 nmousewheel="return bbimg(this)" onload="javascript:resizepic(this)" border="0"/>
<图4>
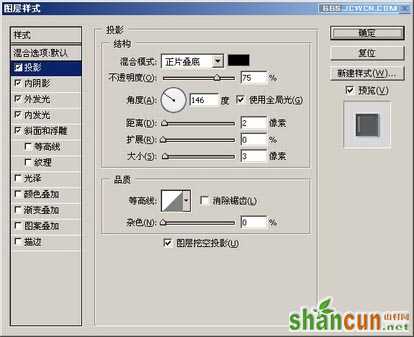
5、选“投影样式”,不透明度75%,距离2,大小3。
 nmousewheel="return bbimg(this)" onload="javascript:resizepic(this)" border="0"/>
<图5>
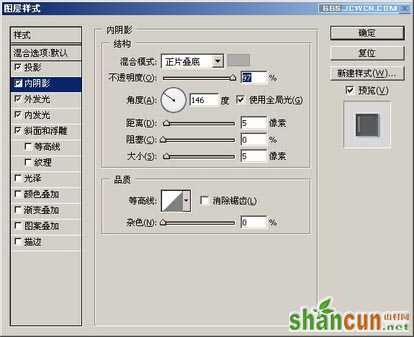
6、“内阴影”样式:混合模式正片叠底,颜色为灰色,不透明度97%。
 nmousewheel="return bbimg(this)" onload="javascript:resizepic(this)" border="0"/>
<图6>
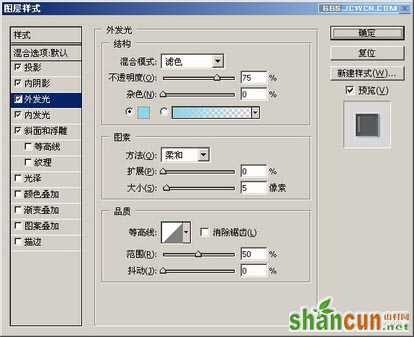
7、“外发光”样式:混合模式滤色,不透明度75%,颜色为浅蓝色。(之前的前景色是蓝色,这次的颜色要比它浅些)。
 nmousewheel="return bbimg(this)" onload="javascript:resizepic(this)" border="0"/>
<图7>
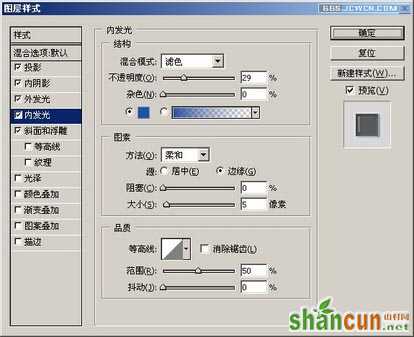
8、“内发光”样式:混合模式滤色,不透明度29%,颜色蓝色。
 nmousewheel="return bbimg(this)" onload="javascript:resizepic(this)" border="0"/>
<图8>
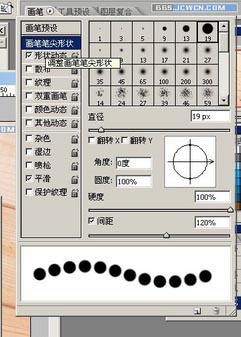
9、确定。好啦,调出画笔调板,点“画笔笔尖形状”,间距大一些,120%。随意画一条,出来了吧。。。换不同的颜色画画。
 nmousewheel="return bbimg(this)" onload="javascript:resizepic(this)" border="0"/>
<图9>
 nmousewheel="return bbimg(this)" onload="javascript:resizepic(this)" border="0"/>
<图10>


