最终效果图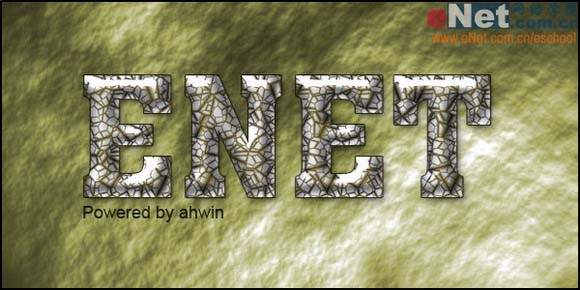 nmousewheel="return bbimg(this)" onload="javascript:resizepic(this)" border="0"/>
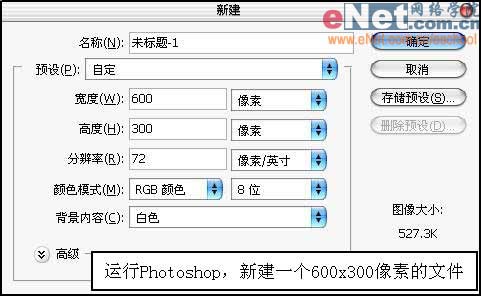
1、运行Photoshop,新建一个600*300像素文件。
 nmousewheel="return bbimg(this)" onload="javascript:resizepic(this)" border="0"/>
2、执行云彩滤镜,制作出云彩效果。
 nmousewheel="return bbimg(this)" onload="javascript:resizepic(this)" border="0"/>
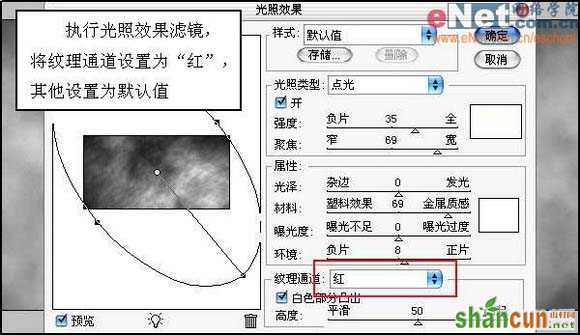
3、执行光照效果滤镜,将纹理通道设置为“红”,其他设置为默认值。
 nmousewheel="return bbimg(this)" onload="javascript:resizepic(this)" border="0"/>
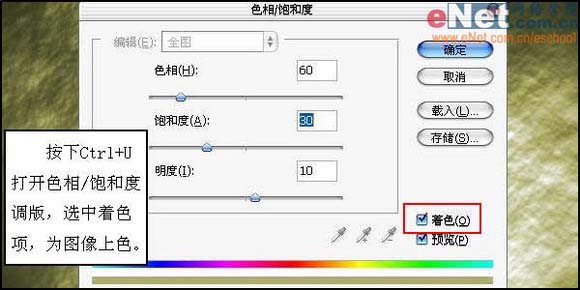
4、按下Ctrl+U打开色相/饱和度调版,选中着色项,为图像上色。
 nmousewheel="return bbimg(this)" onload="javascript:resizepic(this)" border="0"/>
5、使用文字输入工具输入需要的文字。
 nmousewheel="return bbimg(this)" onload="javascript:resizepic(this)" border="0"/>
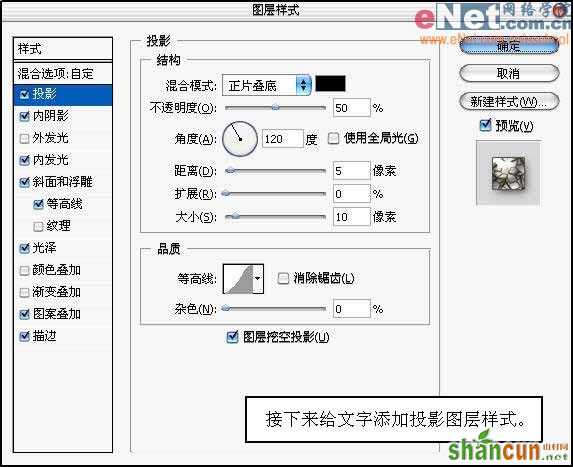
6、接下来给文字添加投影图层样式。
 nmousewheel="return bbimg(this)" onload="javascript:resizepic(this)" border="0"/>
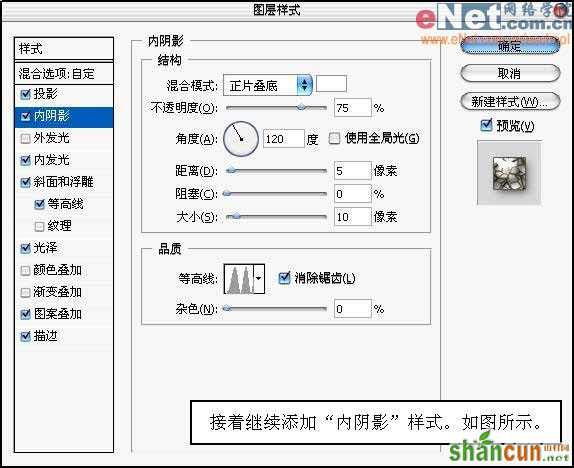
7、接着继续添加“内阴影”样式,如图所示。
 nmousewheel="return bbimg(this)" onload="javascript:resizepic(this)" border="0"/>
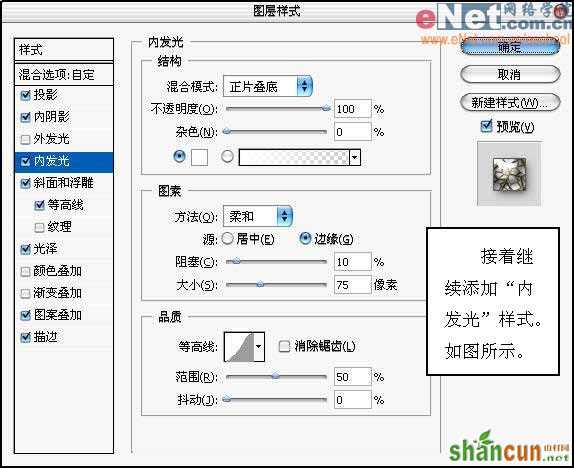
8、接着继续添加“内发光”样式,3lian素材,如图所示。
 nmousewheel="return bbimg(this)" onload="javascript:resizepic(this)" border="0"/>
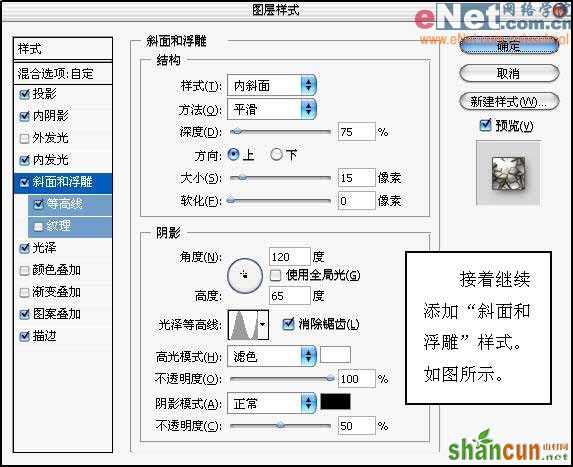
9、接着继续添加“斜面和浮雕”样式,如图所示。
 nmousewheel="return bbimg(this)" onload="javascript:resizepic(this)" border="0"/>
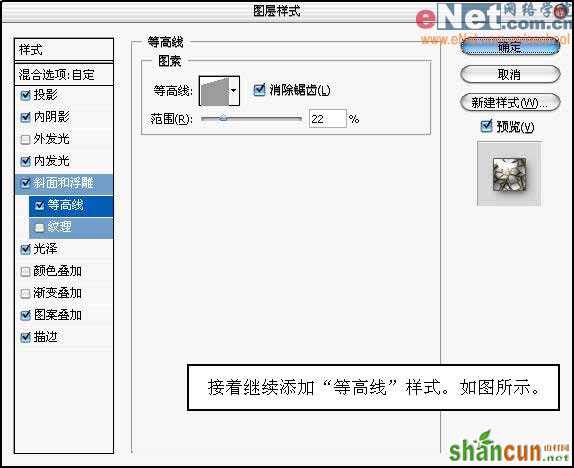
10、接着继续添加“等高线”样式,如图所示。
 nmousewheel="return bbimg(this)" onload="javascript:resizepic(this)" border="0"/>
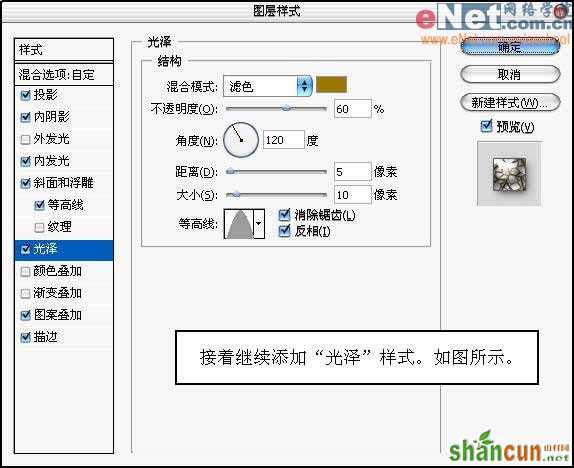
11、接着继续添加“光泽”样式,如图所示。
 nmousewheel="return bbimg(this)" onload="javascript:resizepic(this)" border="0"/>
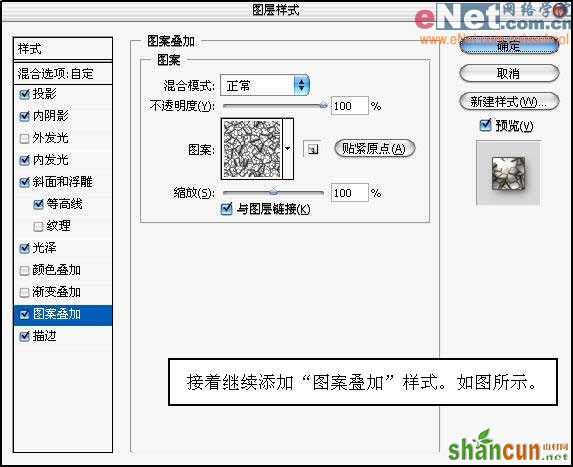
12、接着继续添加“图案叠加”样式,如图所示。
 nmousewheel="return bbimg(this)" onload="javascript:resizepic(this)" border="0"/>
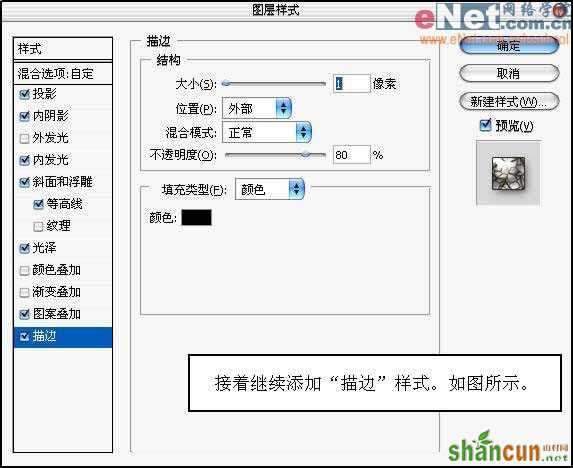
13、接着继续添加“描边”样式,如图所示。
 nmousewheel="return bbimg(this)" onload="javascript:resizepic(this)" border="0"/>
最终效果图
 nmousewheel="return bbimg(this)" onload="javascript:resizepic(this)" border="0"/>


