不管调外景还是室内,都要磨皮,但我不太赞成你们用滤境去磨皮。PS自带的工具就可以磨呀
人物皮肤有些豆豆呀,痔,粉刺之类的,可以利用下面这个工具

大面积的皮肤,可以用修复画笔工具。这个工具能保留皮肤纹理
一些小的地方可以用图章工具
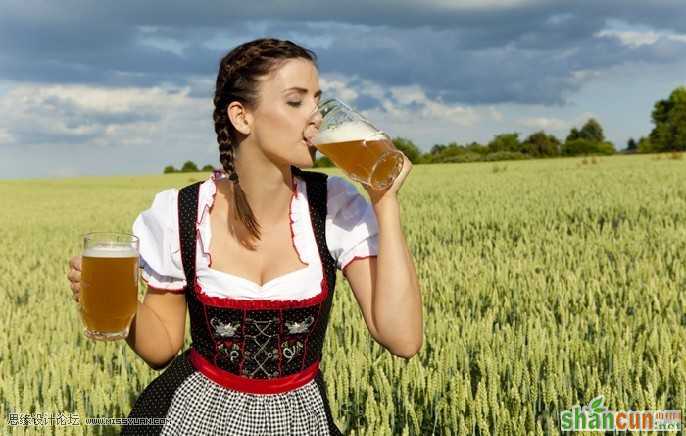
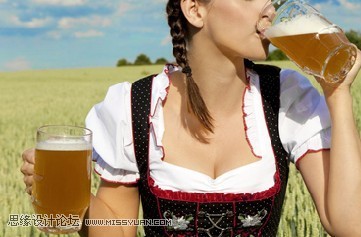
原图比较灰,色彩不正。
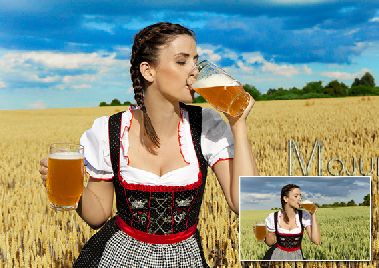
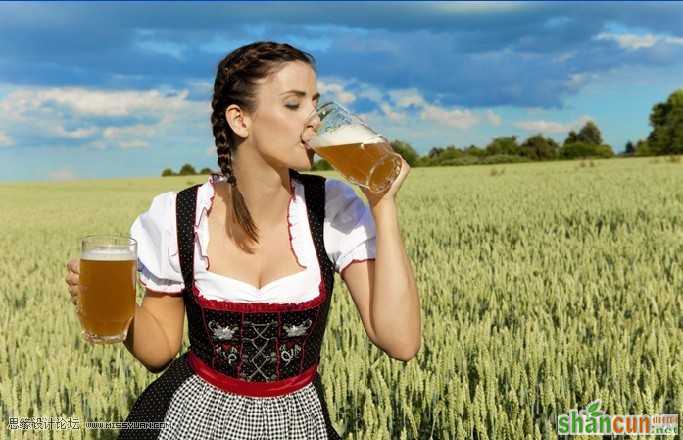
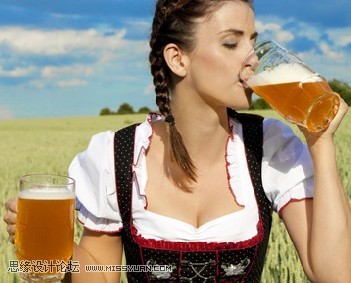
我们照旧看下效果与原图的对比~~!!
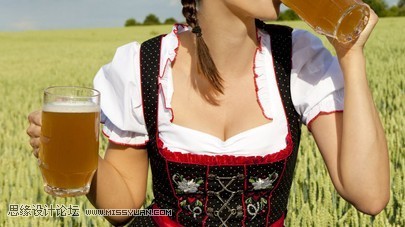
效果

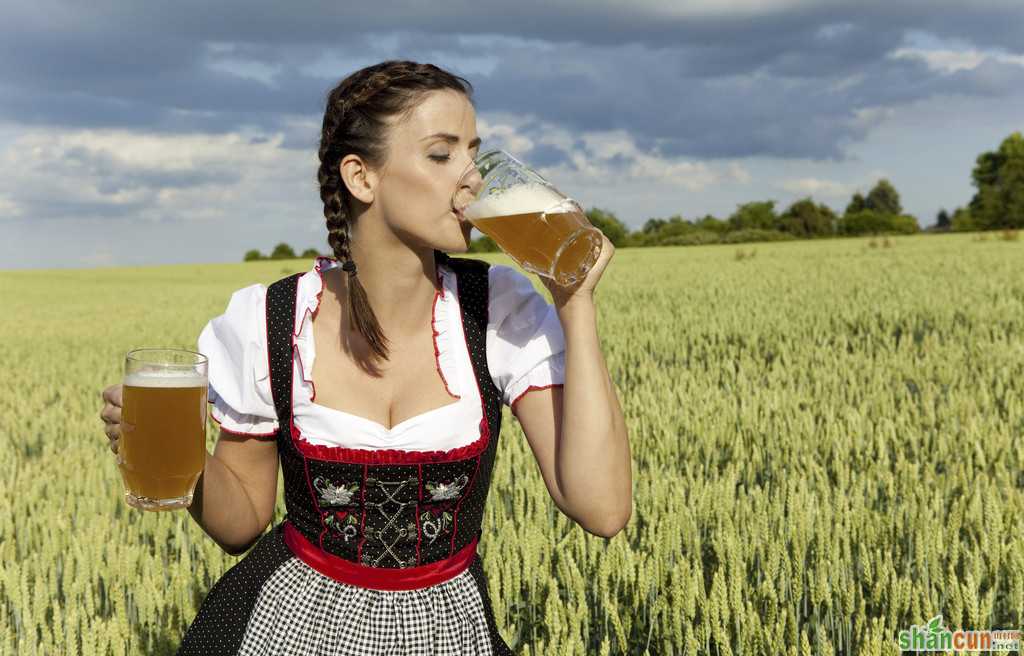
原图
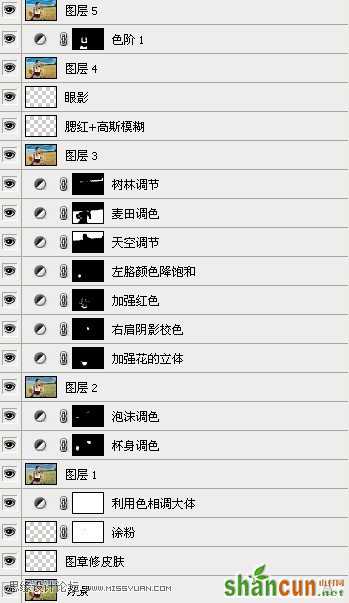
详细图层截图
首先。在PS里打开图,复不复制看个人习惯。
图章修肤,涂粉,这二招是和老师学的。
不过需要耐心和细心。
图章修皮肤不用说了吧,涂粉,就像女生擦粉一样,在人物皮肤亮处用吸管吸下。画笔柔角,大小自控,模式柔光,在人物皮肤暗部,进行涂粉,涂好后,高斯模糊,数值自定。
涂粉之前的图:(我截的是需要涂粉的地方、截出来让你看下对比)
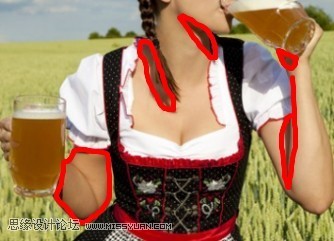
涂完后的截图~!
前面我们把皮肤需要修的地方修复了下。
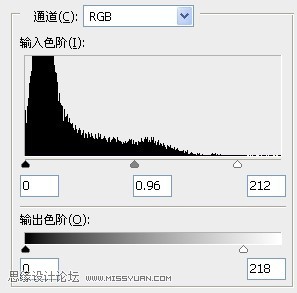
接下来我们对整张图的色彩做一个大体上的修复。
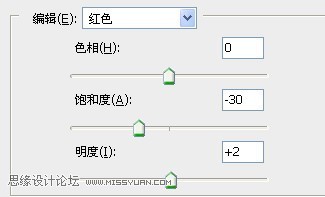
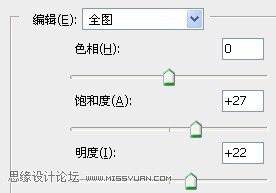
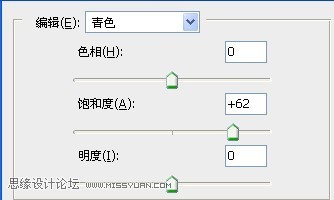
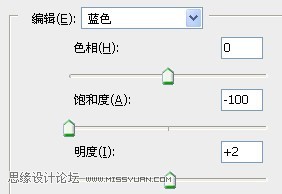
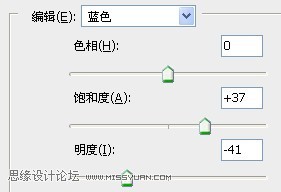
根据图层顺序,利用色相饱和这个工具来做修复。
利用色相之前的截图:
色相过程:
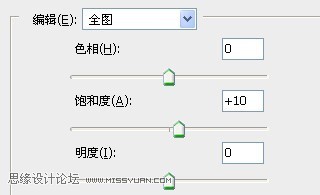

色相饱和之后的截图:
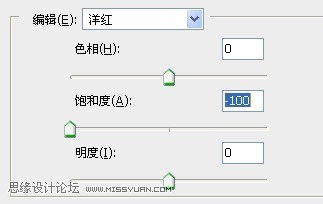
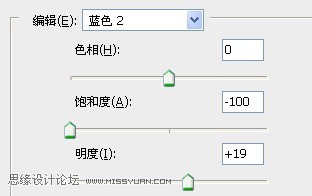
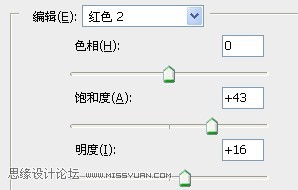
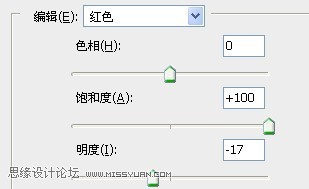
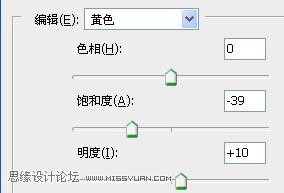
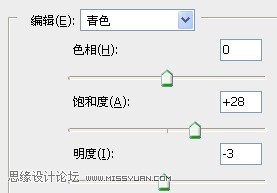
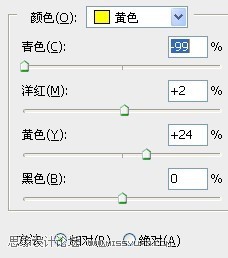
按顺序利用魔术棒+色相饱和工具对图片部分进行调色。
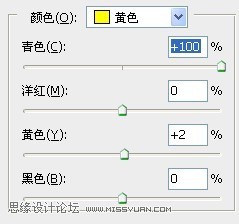
首先是对杯身的黄色进行调色,原图的黄,色彩不正。
用魔术棒得出选区,新建色相饱和工具,选绿色用吸管在杯中的黄色那点下,得出黄色2.
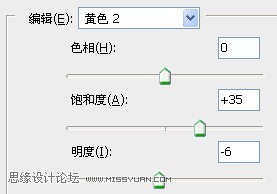
二步之前/之后的截图对比:
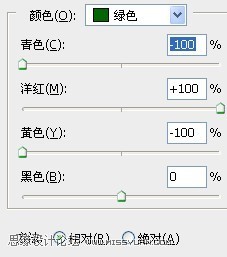
同样利用魔术棒+色阶。对衣服上的花纹加强下。效果变化不大,但不代表没有变化。
把衣服上的红色调艳丽点。方法同上。模式颜色。
利用魔术棒+色相饱和。对天空和云彩。进行调色。模式柔光。
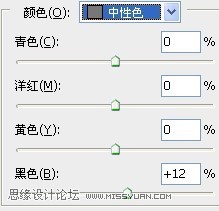
同样利用魔术棒+可选颜色调麦田的色彩。
同样方法,把树林调色。