关于ps如何给图片进行调色技巧大全
首先我们来看一下对比图

1.这里用的版本是CS3,选择高光部分(CTRL+ALT+~),反选)(Ctrl+shift+I),得到暗部选区。复制一层,模式改为滤色,提亮暗部。合并图层


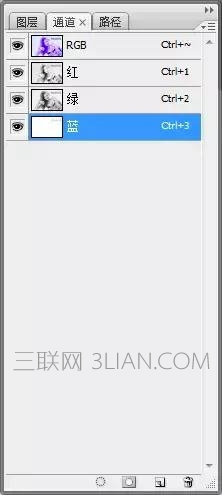
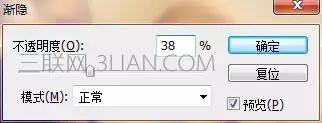
2.我们要抽去所有照片的黄,蓝色通道代表黄色和蓝色, 我们选择蓝色通道,讲蓝色通道填充成白色,CTRL+SHIFT+F渐隐38%.
抽去黄色效果如下。

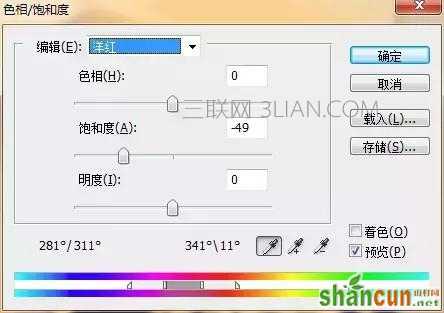
3.如上选取暗部,选择色相饱和度。选择洋红,降低饱和度。

4.确定后不要取消选区,继续用色相饱和度,全图降低饱和度。

最后效果如下,模特的皮肤变得干净了。
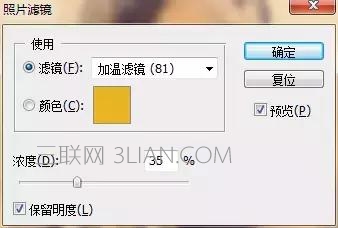
5.选择加温滤镜(81)。

复制一层加温滤镜,加深黄色。

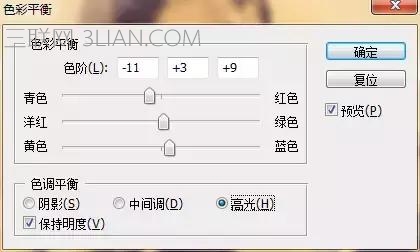
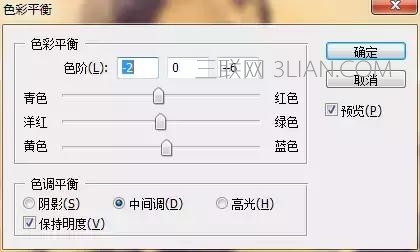
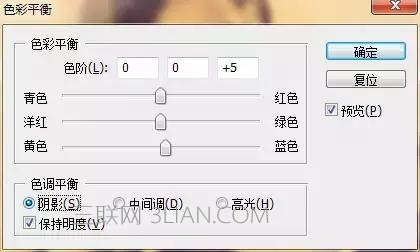
6.选择色彩平衡,给整张图增加层次感。

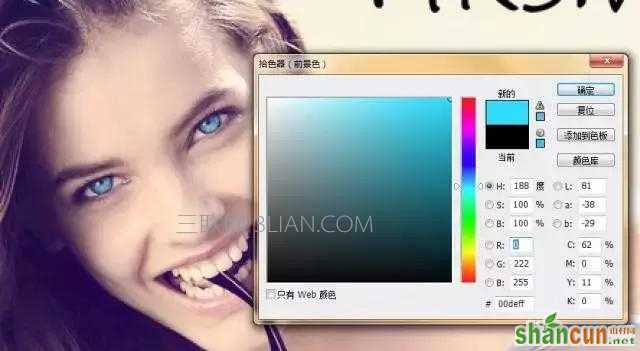
7.最后新建空白图层,模式叠加,选择青色,给模特的眼珠用画笔添加蓝色,降低不透明度。
锐化完成