
关于怎样用PS给老旧褐色照片快速上色技巧大全
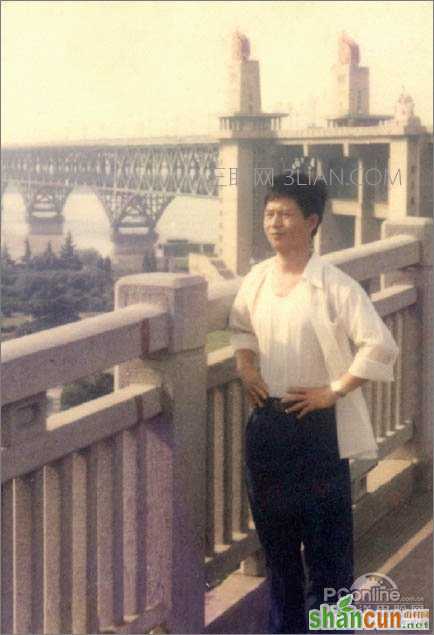
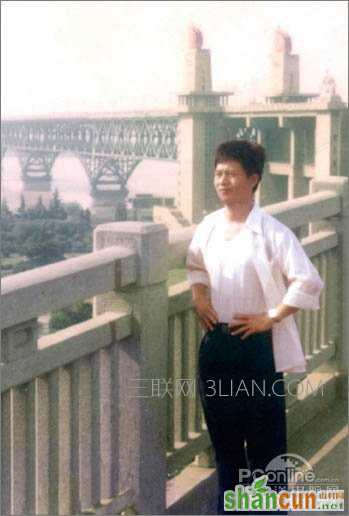
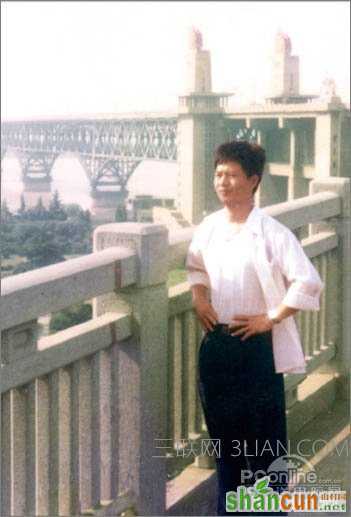
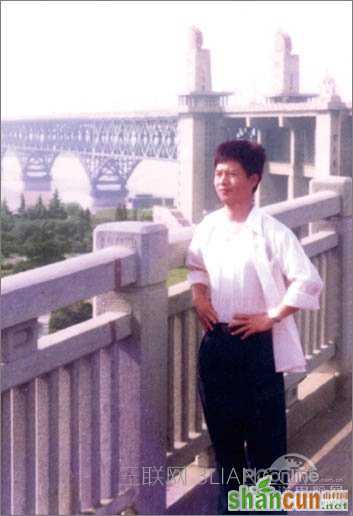
原图
<图1>
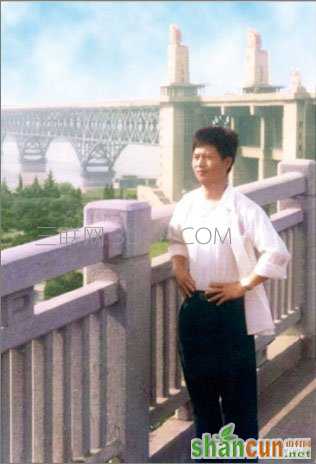
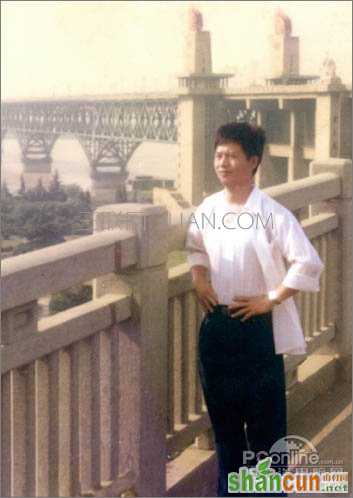
最终效果
修复照片的色彩
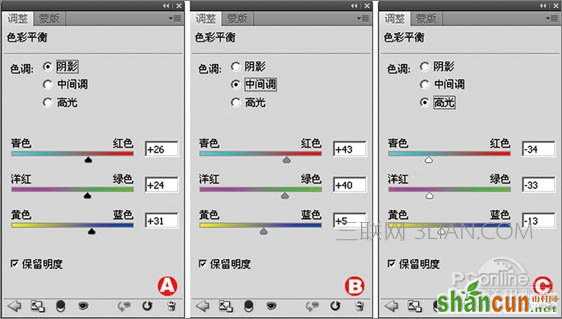
1、单击图层面板下方的创建新的填充或调整图层按钮,在弹出菜单中选择“色彩平衡”,如图47所示。在弹出“色彩平衡”对话框中,选择“阴影”选项,设置其参数分别为:+26、+24、+31,如图48A所示,选择“中间调”选项,设置其参数分别为:+43、+40、+5,如图48B所示,选择“高光”选项,设置其参数分别为:-34、-33、-13,如图48C所示,效果如图49所示。

<图47>
<图48>
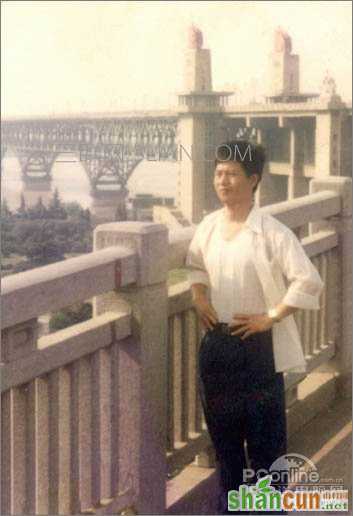
<图49>
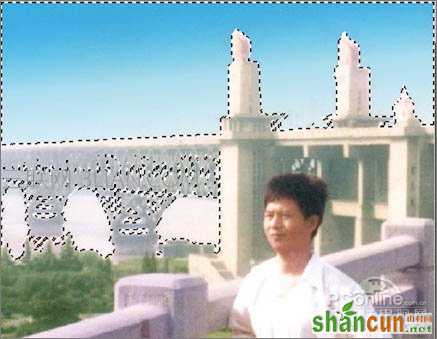
2、选择工具箱中的钢笔工具,在工具选项栏上设置为路径模式,勾勒出人物路径,如图50所示。
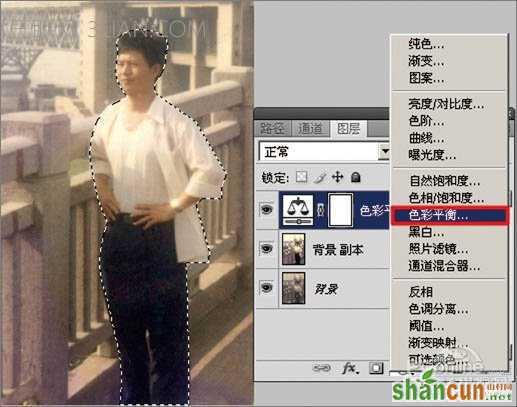
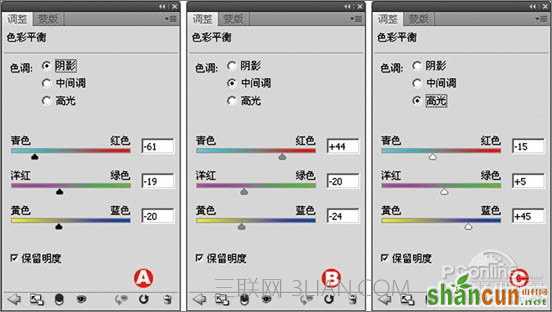
<图50>3、按组合键Ctrl+Enter将路径转为选区,单击图层面板下方的创建新的填充或调整图层按钮,在弹出菜单中选择“色彩平衡”,如图51所示。在弹出“色彩平衡”对话框中,选择“阴影”选项,设置其参数分加别为:-61、-19、-20,如图52A所示,选择“中间调”选项,设置其参数分别为:+44、-20、-24,如图52B所示,选择“高光”选项,设置其参数分别为:-15、+15、+45,如图52C所示。效果如图53所示。
<图51>
<图52>
<图53>
4、切换到路径面板,选择“工作路径”,按组合键Ctrl+Enter将路径转为选区,执行菜单:“选择”/“反向”(快捷键Shift+Ctrl+I),如图54所示。再切换到图层面板,单击图层面板下方的创建新的填充或调整图层按钮,在弹出菜单中选择“色彩平衡”,如图55所示。在弹出“色彩平衡”对话框中,选择“阴影”选项,设置其参数分别为:+30、+20、+15,如图56A所示,选择“中间调”选项,设置其参数分别为:-20、+29、+22,如图56B所示,选择“高光”选项,设置其参数分别为:+13、+3、+29,如图56C所示。效果如图57所示。
<图54>
<图55>

<图56>
<图57>5、单击图层面板下方的创建新的填充或调整图层按钮,在弹出菜单中选择“曲线”,如图58所示。在弹出“曲线”对话框中,设置其参数如图59所示,效果如图60所示。
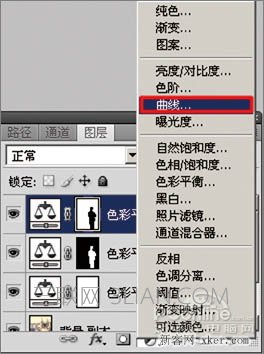
<图58>
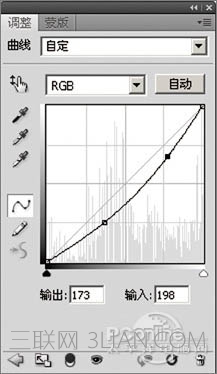
<图59>
<图60>
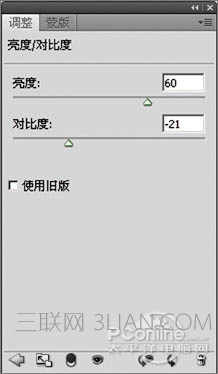
6、单击图层面板下方的创建新的填充或调整图层按钮,在弹出菜单中选择“亮度/对比度”,如图61所示。在弹出“亮度/对比度”对话框中,设置亮度为:60,对比度为:-21,如图62所示,效果如图63所示。
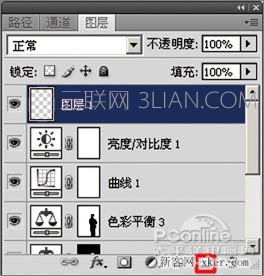
<图61>
<图62>
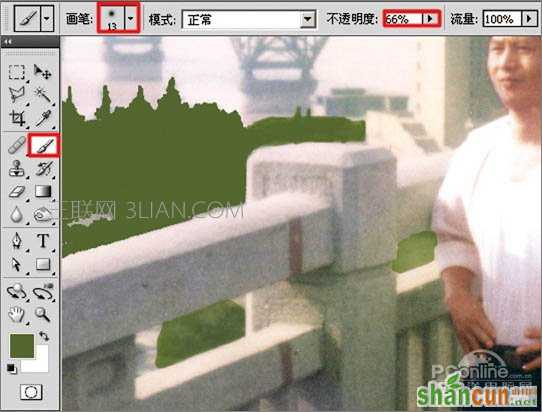
<图63>7、单击图层面板下方的创建新图层按钮(快捷键Ctrl+Shif+N),新建“图层1”,如图64所示。选择工具箱中的画笔工具,在工具选项栏中设置画笔笔尖为柔角13像素,不透明度为:66%,设置前景色为R:85,G:104,B:21,结合左右中括号键调整画笔大小,描绘出树的区域,如图65所示。
<图64>
<图65>
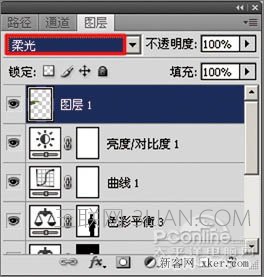
8、在图层面板上设置混合模式为柔光,如图66所示,效果如图67所示。
<图66>
<图67>
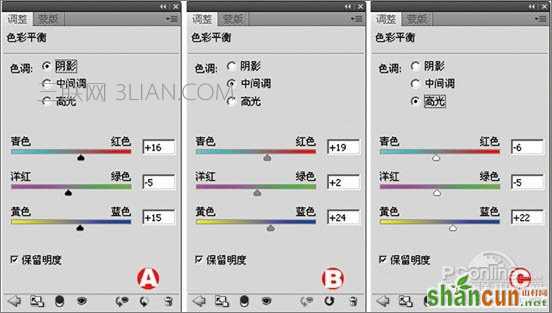
9、单击图层面板下方的创建新的填充或调整图层按钮,在弹出菜单中选择“色彩平衡”,如图68所示。在弹出“色彩平衡”对话框中,选择“阴影”选项,设置其参数分别为:+16、-5、+15,如图69A所示,选择“中间调”选项,设置其参数分别为:+19、+2、+24,如图69B所示,选择“高光”选项,设置其参数分别为:-6、-5、+22如图69C所示;效果如图70所示。
<图68>
<图69>
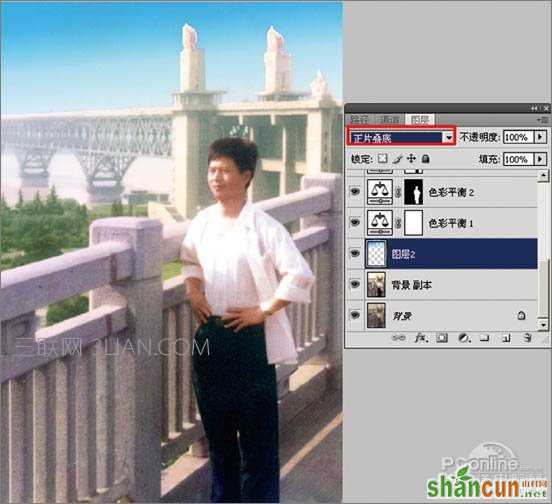
<图70>10、执行菜单:“图像”/“调整”/“反相”(快捷键Ctrl+I),再使用画笔工具,在工具选项栏上设置画笔笔尖为柔角20像素,不透明度为13%,描绘出栏杆上的色彩平衡效果,如图71所示。

<图71>
制作天空的效果
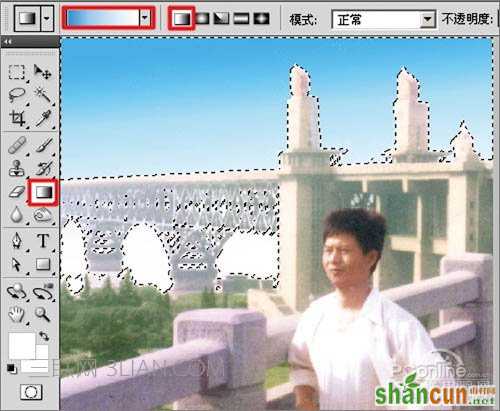
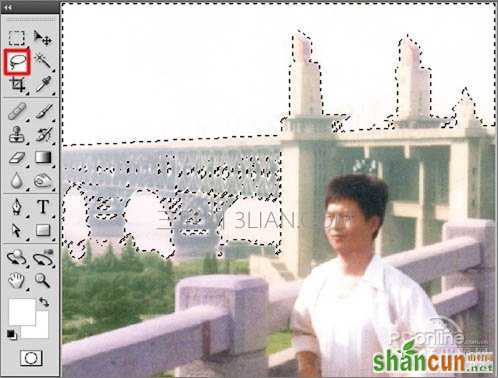
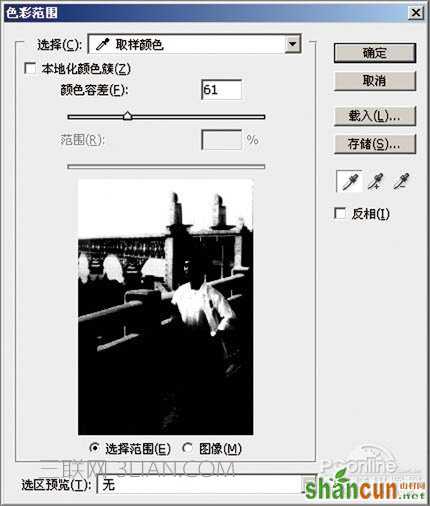
1、执行菜单:“选择”/“色彩范围”,点击图片中的浅色区域,例如天空部分,并设置颜色容差为61,点击“确定”按钮,完成选择,如图72所示,得到选区如图73所示。
<图72>
<图73>
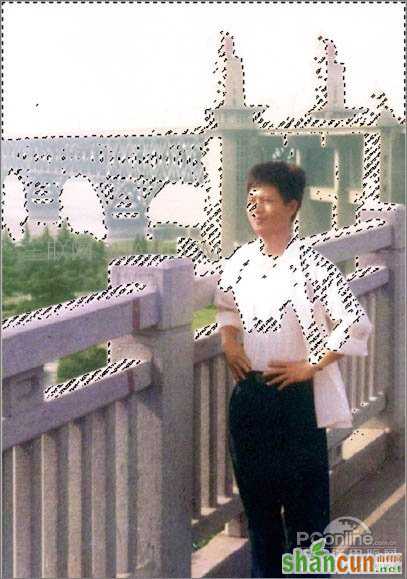
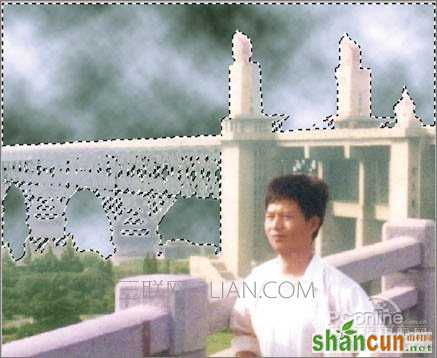
2、选择工具箱中的套索工具,按住Alt键不放用鼠标左键圈选多余的选区将其去除,如栏杆、人物、桥墩处的选区,如图74所示。
<图74>
3、单击图层面板下方的创建新图层按钮(快捷键Ctrl+Shif+N),新建“图层2”,如图75所示。
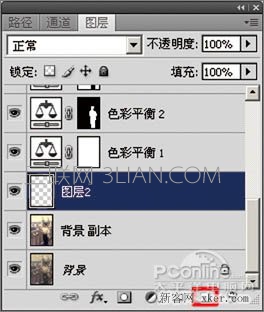
<图75>
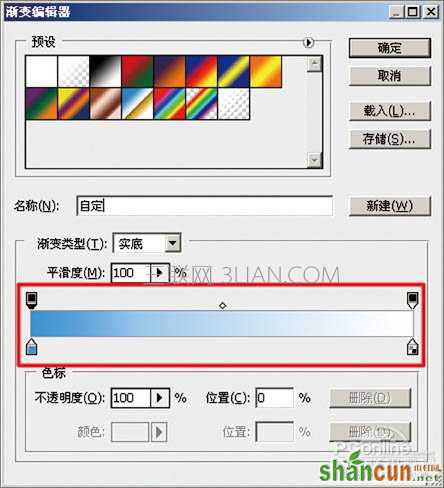
4、选择工具箱中渐变工具,再单击工具选项栏上的渐变编辑器按钮,弹出“渐变编辑器”对话框;选择“渐变编辑器”中的“前景色到背景色渐变”的渐变样式,然后设置其渐变颜色,如图76所示。
<图76>
5、鼠标单击工具选项栏上的渐变类型,选择线性渐变,用鼠标左键选区上部往下垂直拖动,给“图层2”图层添加渐变颜色,如图77所示。并设置图层的混合模式为:正片叠加,如图78所示。
<图77>
<图78>
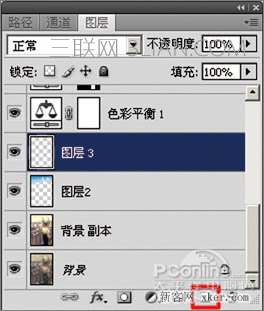
6、单击图层面板下方的创建新图层按钮(快捷键Ctrl+Shif+N),新建“图层3”,如图79所示。
<图79>7、按住Ctrl键单击“图层2”缩览图,得到选区,如图80所示。按键盘上的D键,把软件的前景色彩背景色还原为默认的颜色;执行菜单:“滤镜”/“渲染”/“云彩”,给图层添加“云彩”滤镜,得到的效果如图81所示。提示:按D键可将前景色设置成黑色、背景色为白色,按X键可切换前景色与背景色。
<图80>
<图81>
8、选择工具箱中的矩形选框工具,框选出矩形选区,如图82所示,再按Delete键删除选区中图像,然后按组合键Ctrl+D取消选区。
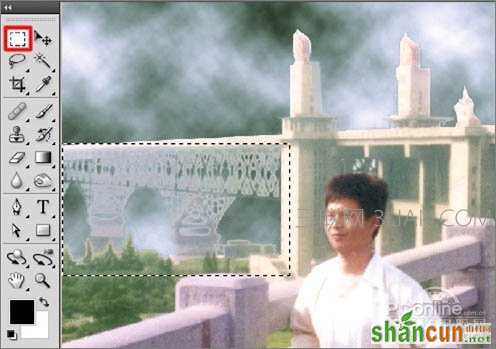
<图82>
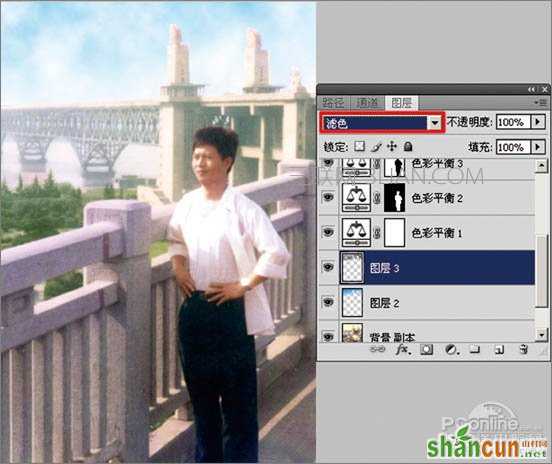
9、在图层面板上设置图层混合模式为滤色,完成本例制作,最终效果如图83所示。


