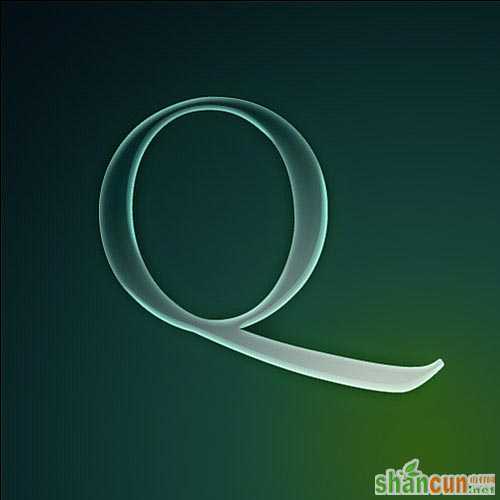
效果图 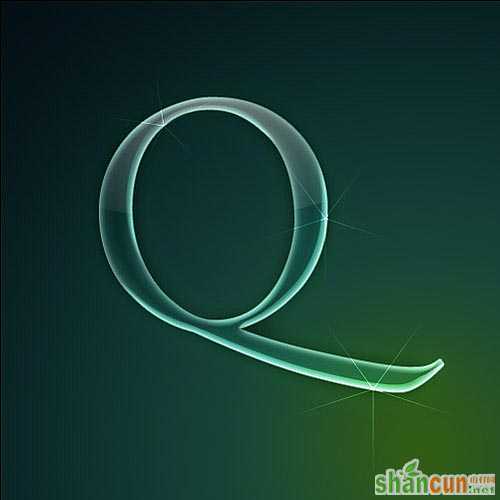 nmousewheel="return bbimg(this)" onload="javascript:resizepic(this)" border="0"/>
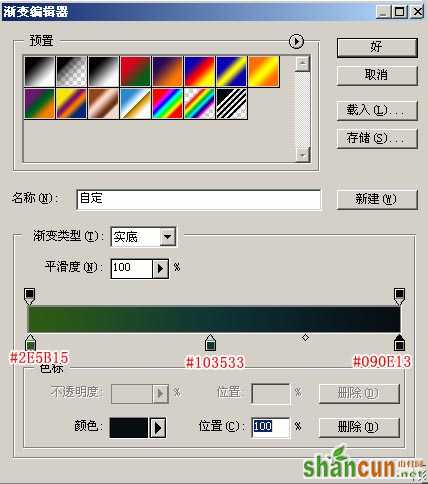
1、新建一个文件500*500,用渐变工具,以右下角为中心,拉一个从绿到蓝的径向渐变,图中使用的颜色:颜色 1 - #2e5b15颜色, 2 - #103533(中间色),颜色 3 - #090e13。
 nmousewheel="return bbimg(this)" onload="javascript:resizepic(this)" border="0"/>
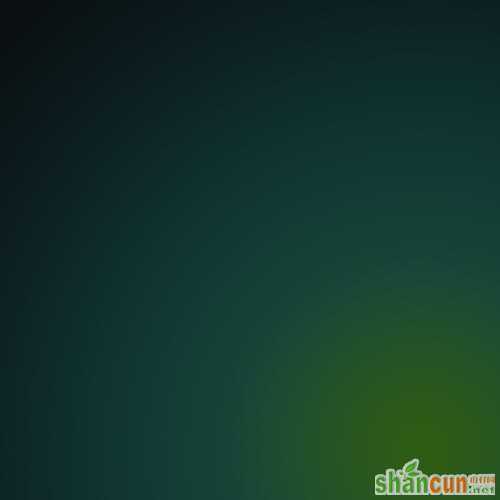
使用渐变拉出来的效果图。
 nmousewheel="return bbimg(this)" onload="javascript:resizepic(this)" border="0"/>
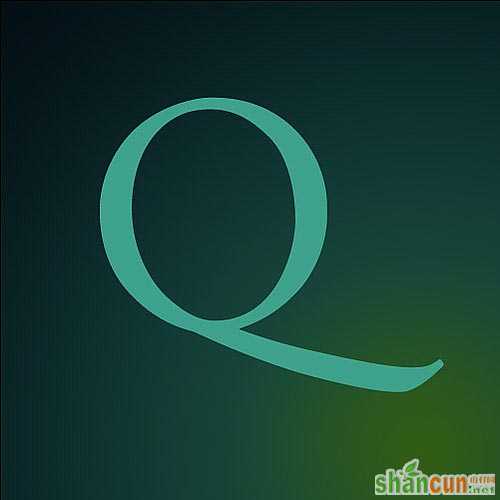
2、使用用文字工具,画出一个你喜欢字母,如 Q 。这里使用的字体是 Adobe Caslon Pro,颜色用 #41a993 。
 nmousewheel="return bbimg(this)" onload="javascript:resizepic(this)" border="0"/>
3、将文字填充不透明度度降至20% ,而不是不透明度。给文字添加图层样式。“投影”,设置如下图:
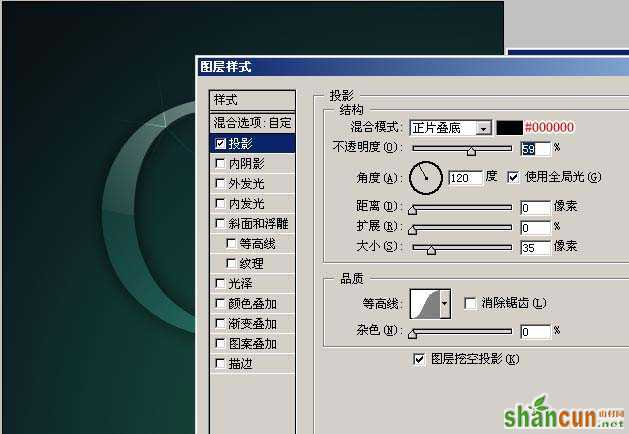 nmousewheel="return bbimg(this)" onload="javascript:resizepic(this)" border="0"/>
4、再给文字添加样式。“内阴影”,设置如下图:
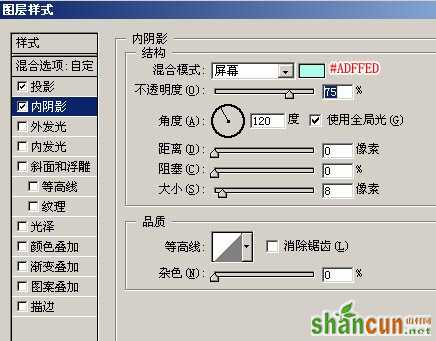 nmousewheel="return bbimg(this)" onload="javascript:resizepic(this)" border="0"/>
5、再给文字添加样式。“外发光”,设置如下图:
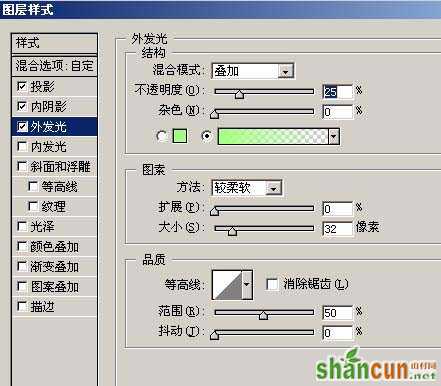 nmousewheel="return bbimg(this)" onload="javascript:resizepic(this)" border="0"/>
6、编辑“外发光”,渐变色,把前景色的颜色设置为:#A8ff84,选择前景色到透明渐变,渐变颜色的设置如下图:
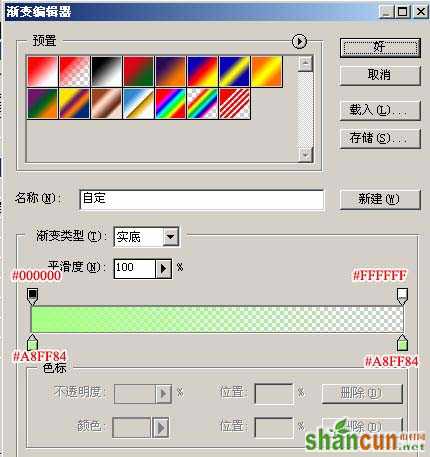 nmousewheel="return bbimg(this)" onload="javascript:resizepic(this)" border="0"/>
7、再给文字添加样式。“内发光”,设置如下图:
 nmousewheel="return bbimg(this)" onload="javascript:resizepic(this)" border="0"/>
8、编辑“内发光”,渐变色,把前景色的颜色设置为:##83CFc9,选择前景色到透明渐变,渐变颜色的设置如下图:
 nmousewheel="return bbimg(this)" onload="javascript:resizepic(this)" border="0"/>
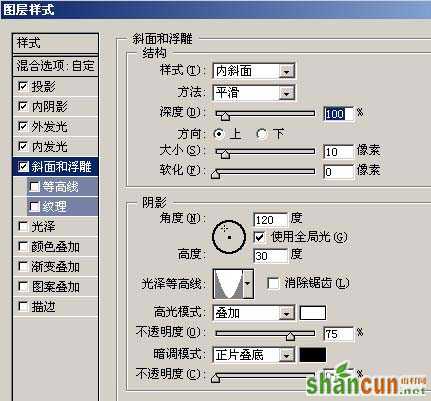
9、再给文字添加样式。“斜面和浮雕”,设置如下图:
 nmousewheel="return bbimg(this)" onload="javascript:resizepic(this)" border="0"/>
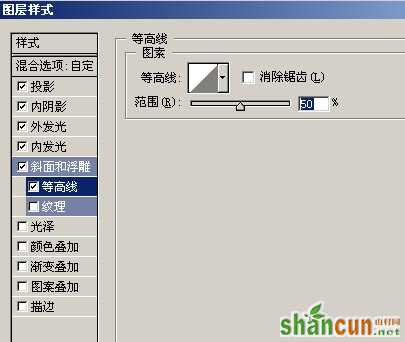
10、再给文字添加样式。“等高线”,设置如下图:
 nmousewheel="return bbimg(this)" onload="javascript:resizepic(this)" border="0"/>
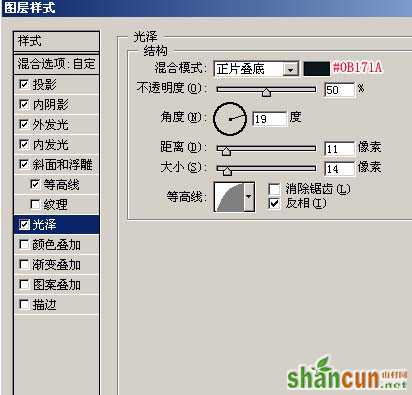
11、再给文字添加样式。“光泽”,设置如下图:
 nmousewheel="return bbimg(this)" onload="javascript:resizepic(this)" border="0"/>
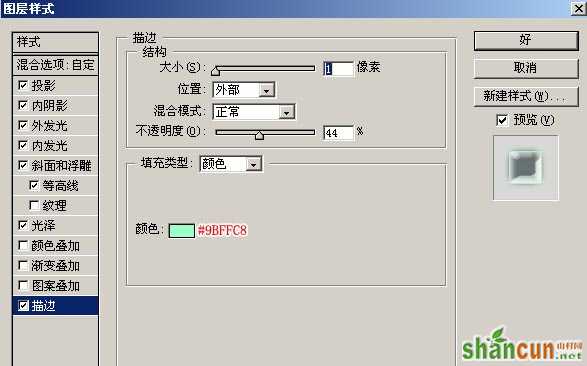
12、再给文字添加样式。“描边”,颜色:#9BFFC8,设置如下图:
 nmousewheel="return bbimg(this)" onload="javascript:resizepic(this)" border="0"/>
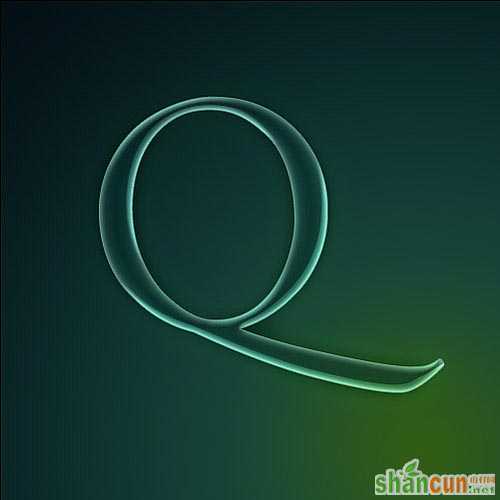
应用所有图层样式后的效果图。
 nmousewheel="return bbimg(this)" onload="javascript:resizepic(this)" border="0"/>
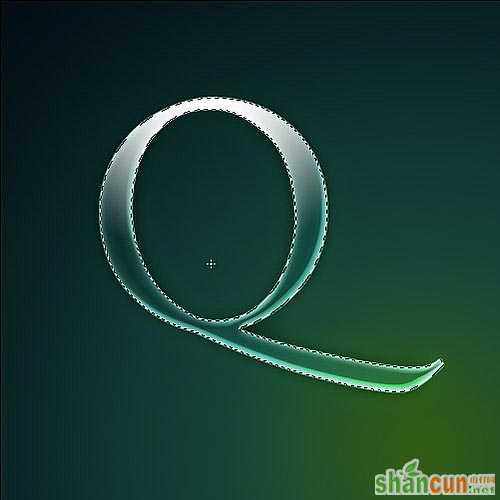
13、按住 CTRL 键单击字母 Q 层选中字母形状,然后新建一个图层,填充为白色到透明的渐变,最后把图层模式改为叠加。
 nmousewheel="return bbimg(this)" onload="javascript:resizepic(this)" border="0"/>
14、再次按住 CTRL 键单击字母 Q 层,新建立一个图层,填充为白色到透明的渐变,并将该层移到最上面。最后把不透明度设置为 40% 。
 nmousewheel="return bbimg(this)" onload="javascript:resizepic(this)" border="0"/>
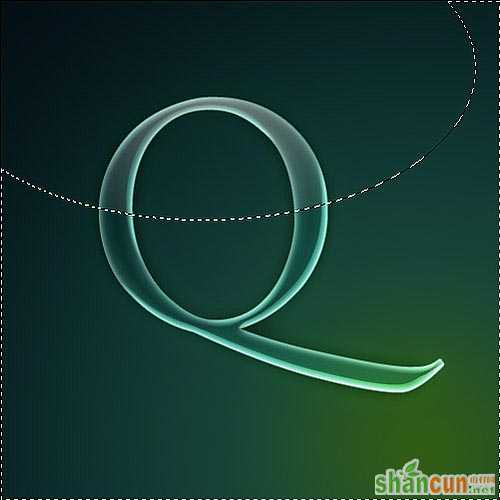
15、在上一步中的图层上,用椭圆选框工具画出一个椭圆选区(如图未选择区域),然后按住 CTRL+SHIFT+I 选择反选,点击 delete 键。这样就有了玻璃的感觉。
 nmousewheel="return bbimg(this)" onload="javascript:resizepic(this)" border="0"/>
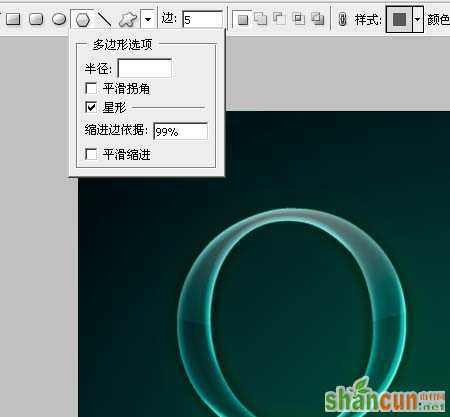
16、点击 U 键,选择多边形工具,点击左上方的下拉箭头,在星形前打勾,缩进边依据设为 99% 。创建一个新图层,将前景色置为白色,在字母 Q 上最亮处画上星星。设置如下图:
 nmousewheel="return bbimg(this)" onload="javascript:resizepic(this)" border="0"/>
完成,最终效果如图所示。
 nmousewheel="return bbimg(this)" onload="javascript:resizepic(this)" border="0"/>


