
先看看效果图

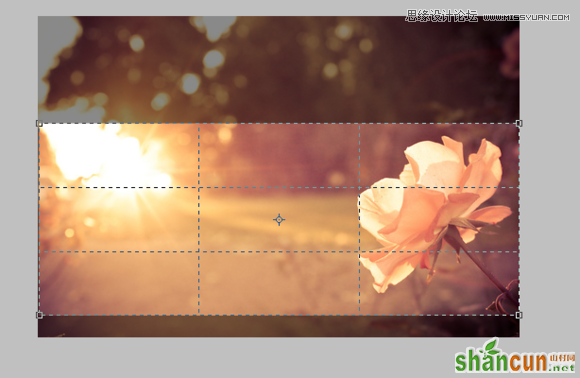
好吧,第一步先打开自己喜欢的图片适当裁剪
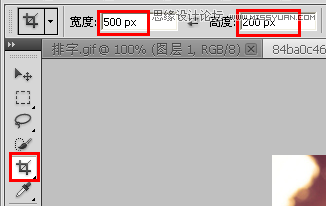
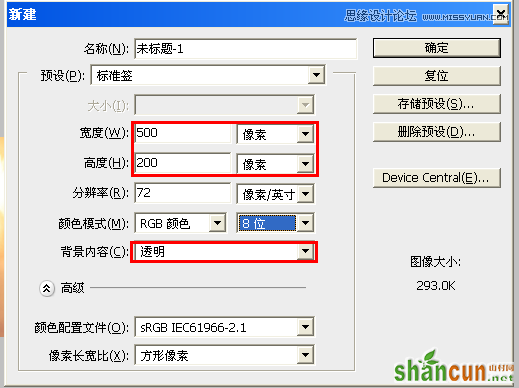
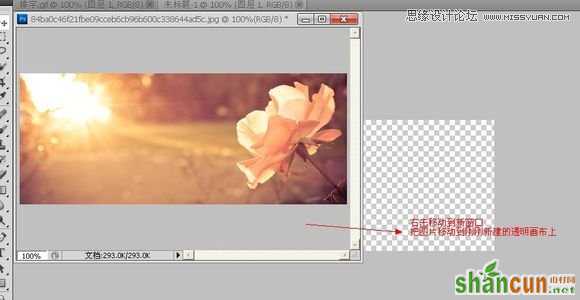
第二步,新建一个500*200的透明画布 把刚刚裁剪好的图按住shift键拖进来
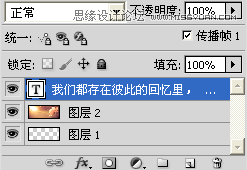
第三步,这个时候我喜欢加上框 选择编辑菜单--描边--大小1px 然后新建一个图层打字
打好字,放在你喜欢的位置

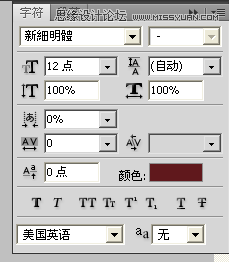
这里我选的是新细明体12号,无效果
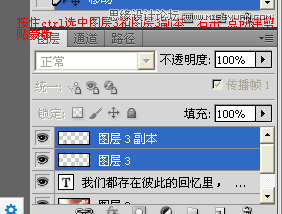
第四步,同样新建一个图层,选择你想要的流光颜色,用画笔工具在字体左边画一条直线

画好,ctrl+j复制一层,有了图层3副本,把副本的直线从左边移到右边

第五步,打开动画窗口,复制一帧。这时候有两条直线,一左一右

把图层3里面左边的直线移动到右边重叠起来,这时只有一条直线了

再把副本里右边的直线移动到左边,又出现了两条直线

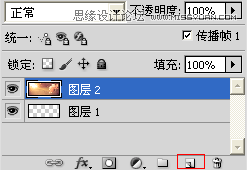
第六步,按住ctrl选中图层3和副本两个图层,右击鼠标选择创建剪贴蒙版
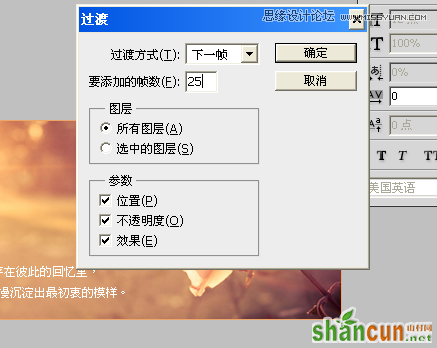
第七步,点回第一帧,点击过渡按钮,选择过渡的帧数,这里我选了25

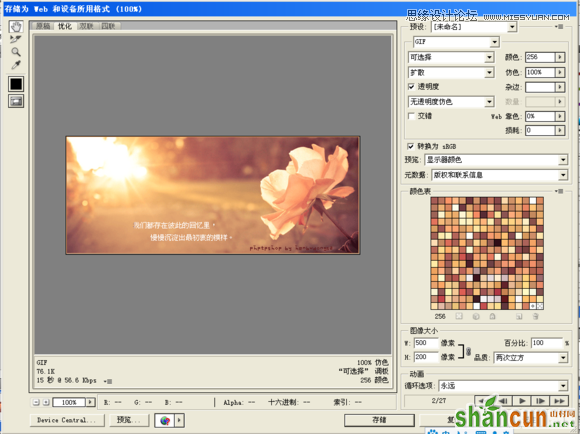
最后一步,新建一个图层署名,存储为web和设备所用格式。
最终效果图


