PS怎么打造银白色的金属感字体?相信很多人都喜欢这种银白色的金属感字体,显得高端又大气,那么下面百事网小编就给大家带来PS打造银白色的金属感字体教程。
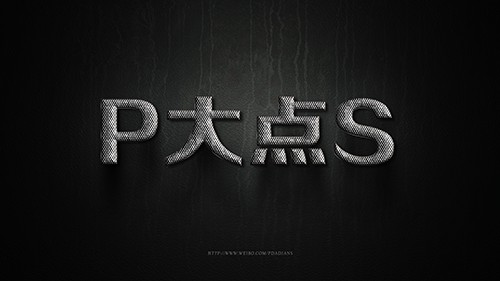
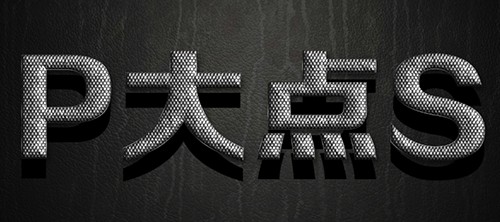
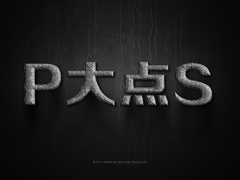
首先,我们来看看我们的最终效果:
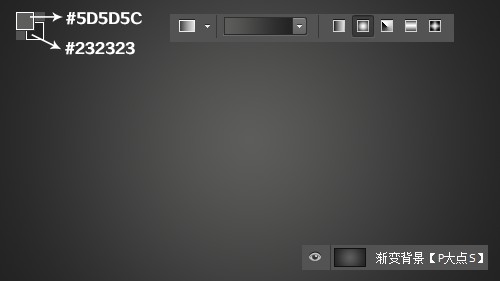
OK,下面我们开始。新建个文档,我用的尺寸是1920*1080像素,设置前景色为#5d5d5c,背景色为#232323,使用径向渐变做一个渐变背景。
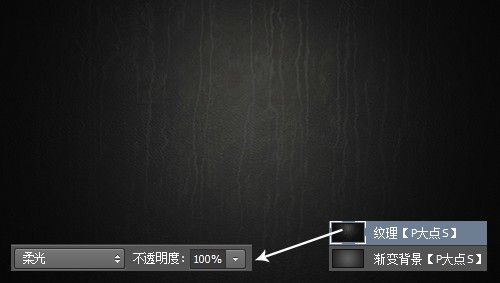
在素材包中,找到我所提供的纹理背景素材,添加到我们渐变背景层的上层,更改图层混合模式为柔光,不透明度为100%,效果如下图所示:
下面,我们完善一下背景,在这里我添加了一个色阶调整层,通过调整色阶,来强化背景的黑白对比度。

到这里,背景算是完了,我们开始添加文字。
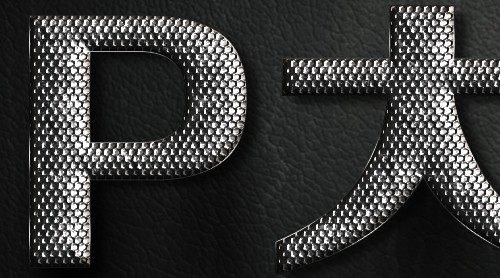
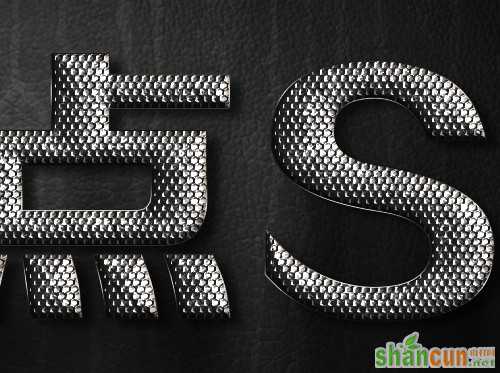
使用文字工具,打上我们要的字,我这里用的是P大点S四个字,然后复制P大点S文字图层两层,得到总共三层的文字图层,等会我们将通过对这三个文字图层设置图层样式来得到我们需要的金属感纹理文字。
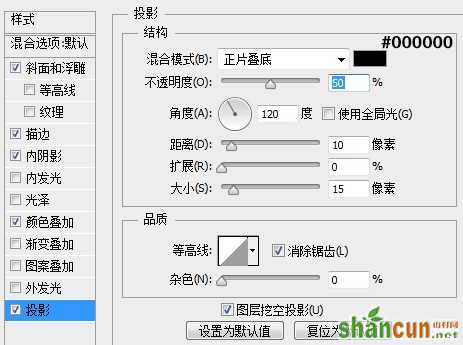
下面,我们首先设置P大点S文字图层的图层样式
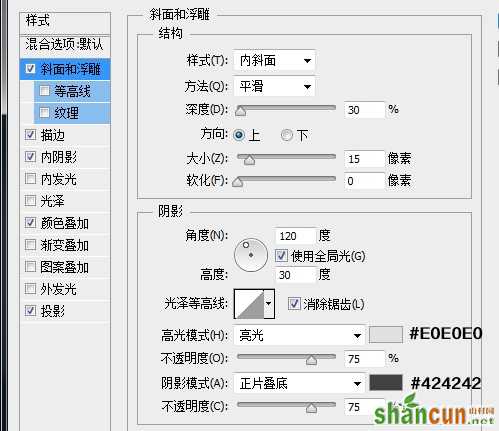
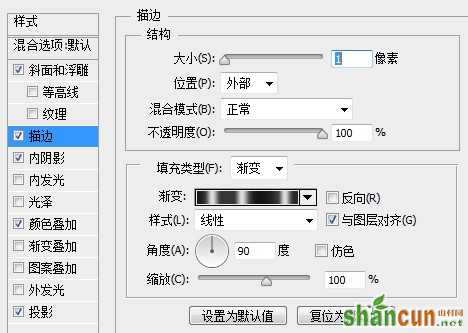
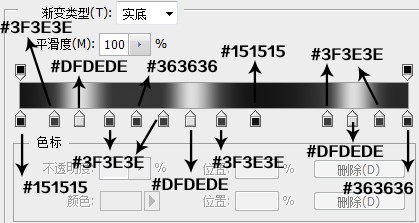
这里的渐变比较蛋疼,其实也不用非要根据我的数值来做,这里的这个渐变设置,是为了模拟文字外边的金属效果的,通过从白到暗灰的颜色渐变,来模拟金属的光泽感。
大家可以多自己试验几次,看看渐变设置中的各个颜色在文字显示上的各个位置,因为不同的文字,不同的字体,都有可能导致渐变的流畅性和美观程度,可以根据自己的需要,进行适当的调整,总之还是一句话,教程是死的,数值是死的,照抄照搬用处不大,通过理解来做,有了自己的想法,才能得到进步。
接下来,我们首先将P大点S拷贝图层的填充设置为0%,也许有人要问,填充和不透明度不是一样吗,其实,有很大的差别,从图层样式的设置你就可以清楚的看到区别所在。如果你对图层设置了图层样式,将填充改为0,图层样式会照样显示,而原图层本身不会显示,如果调整透明度的话,是连带图层样式的效果一起调整的,你设置的图层样式也会跟着变透明。这里用一张图来解释一下,直观一些

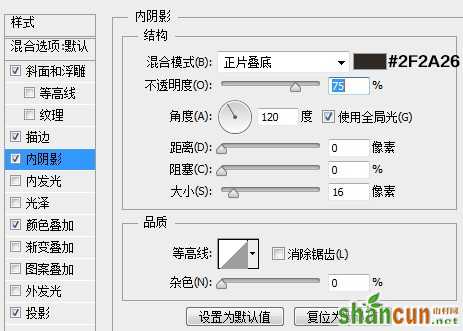
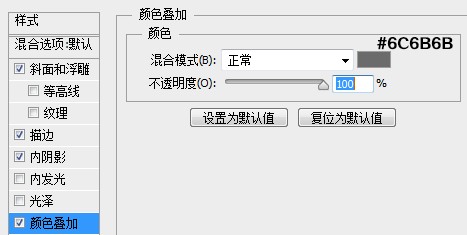
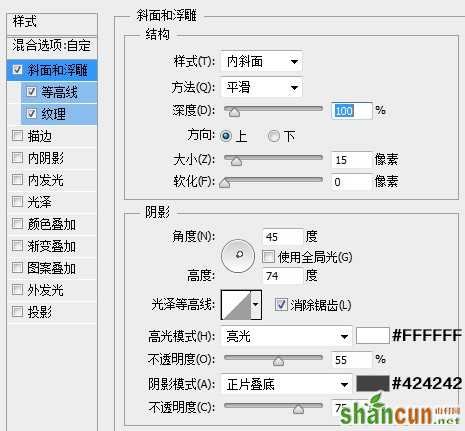
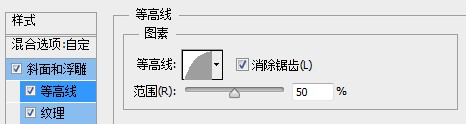
下面,我们设置P大点S拷贝图层的图层样式
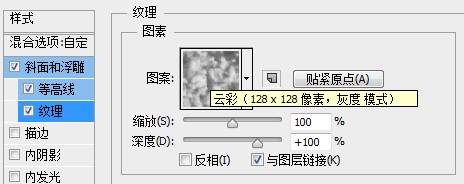
这里的这个云彩图案是PS自带的图案,为了怕有人还是说找不到,在素材包里,我也提供了这个图案,用预设管理器导入就行。
到现在我们应该得到如下的效果
接下来,我们来设置P大点S拷贝2图层的图层样式,一样的,首先先将填充改成0
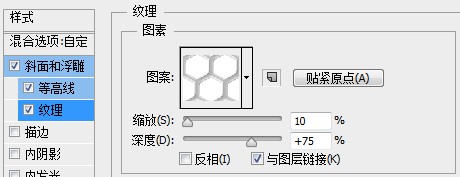
这个图案也在素材包里提供了。
OK,目前为止,我们得到如下的效果:
下面,我们复制一层P大点S文字图层,并将文字颜色改成黑色,置于所有文字图层的下层,并下移一定的尺寸,这个下移多少像素说不清楚,自己把握吧,我们将使用这个图层来做阴影。
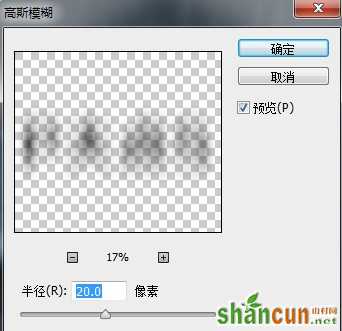
对这个黑色的文字图层执行动感模糊滤镜,设置如下图。

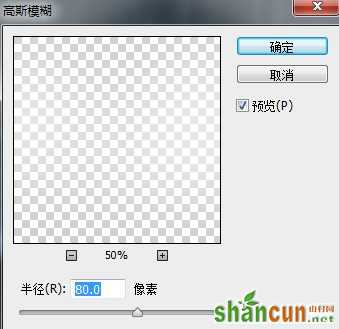
再执行一次高斯模糊,设置如下。
有了阴影明显好多了,我们再添加一个高光。同样的,再次复制一层P大点S的文字,将其置于阴影图层的上层,更改文字颜色为白色,执行一个高斯模糊,再将图层混合模式更改为柔光。
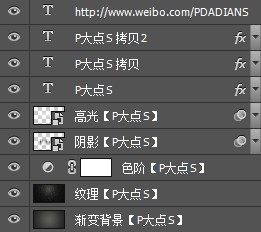
OK,到这里就算完工了,一个简单的图层样式的应用,希望能给大家带来一点帮助,做得不到位的地方,还请包涵,奉上所有图层关系图。