
教程主要是灵活运用图层样式来制作一些非常精美的文字效果,制作过程比较简单前题是自己要对图层样式非常了解!
最终效果

1、新建一个宽度为10厘米,高度为5厘米,分辨率为300像素,模式为RGB,内容为白色的文件。
2、设置前景色为黑色,选择工具箱中的文字工具,在文件窗口中输入大小为65,字体为方正粗倩简体文字,效果如图1所示。

<图1>
3、在图层控制面板中的文字层上单击鼠标右键,在弹出的菜单中选择“栅格化文字”命令,将文字层转换为图像图层。
4、单击图层面板下方的“添加图层样式”按钮,在弹出的菜单中选择“投影”命令,在弹出的对话框中,将不透明度设置为100,距离为0,扩展为19,大小为13,其他默认,如图2所示,单击好,图像效果如图3所示。
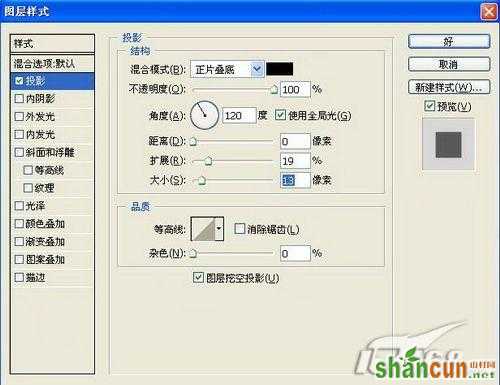
<图2>

<图3>
5、单击图层面板下方的“添加图层样式”按钮,在弹出的菜单中选择“内阴影”命令,在弹出的对话框中,将不透明度设置为50,距离为21,大小为25,其他默认,如图4所示,单击好,图像效果如图5所示。
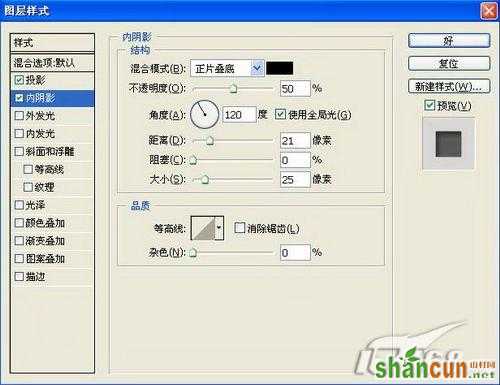
<图4>

<图5>
6、单击图层面板下方的“添加图层样式”按钮,在弹出的菜单中选择“斜面和浮雕”命令,在弹出的对话框中,将大小设置为17,高度为70,将光泽等高线设置为环形,将高光模式的不透明度设置为100,将暗调模式选项设置为颜色加深,其不透明度设置为26,其他默认,如图6所示,单击好,图像效果如图7所示。
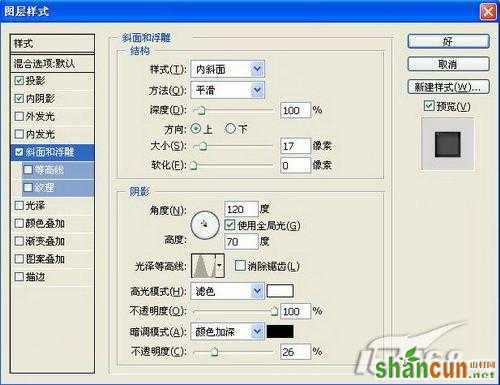
<图6>

<图7>
7、单击图层面板下方的“添加图层样式”按钮,在弹出的菜单中选择“颜色叠加”命令,在弹出的对话框中,将颜色设置为白色(也可以其它颜色,例如绿色,最终效果将完全不同),其他默认,如图8所示,单击好,文字的最终效果如图9所示。
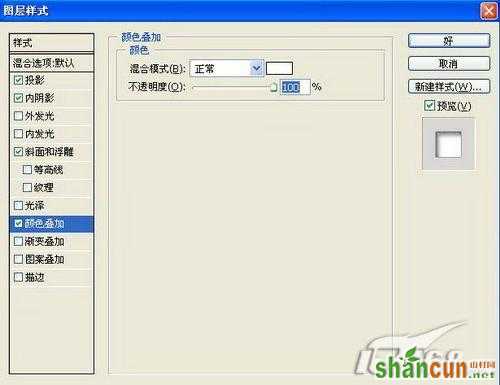
<图8>
<图9>

<图10>


