photoshop教程最终效果

1、新建一个500 * 375像素的文件,背景填充黑色,然后打上白色文字,如下图。

2、按Ctrl点图层面板文字缩略图调出文字选区,然后点路径面板,选择“从选区建立工作路径”。

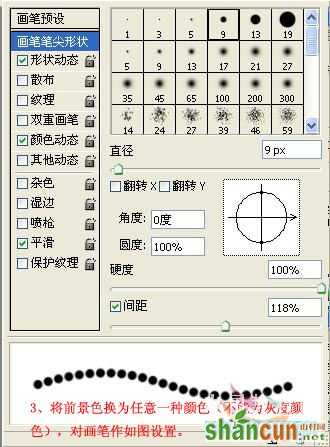
3、把前景颜色设置为红色,然后选择画笔工具,打开画笔设置面板,对画笔进行设置。
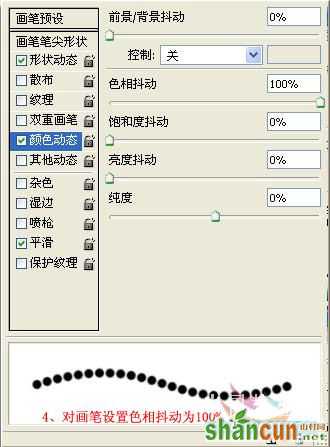
4、对画笔设置色相抖动为:100%。
5、新建三个新图层,确保当前操作图层为图层1,然后对路径进行描边。

6、用相同的方法,对图层2和图层3进行路径描边,然后将文字图层与背景层合并。

7、将背景层复制两层,调整好图层顺序。

8、分组合并。
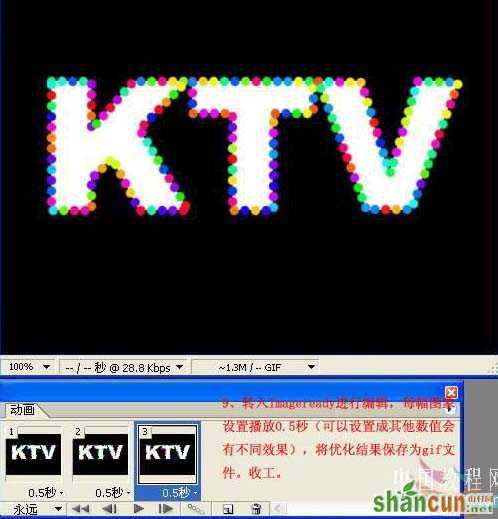
10、转入IR里面,进行设置,新建三个帧分别放置三张图片,每幅图片的时间设置为0.5秒,然后选择菜单:文件 > 将优化结果保存为GIF文件即可。