
这是一个简单的字效教程,之前透明字效果的教程也有一些,这种效果也有些像陶瓷质感,一般制作字效都离不开图层样式的设置,
喜欢的话你可以试试,用时只需要15分钟。
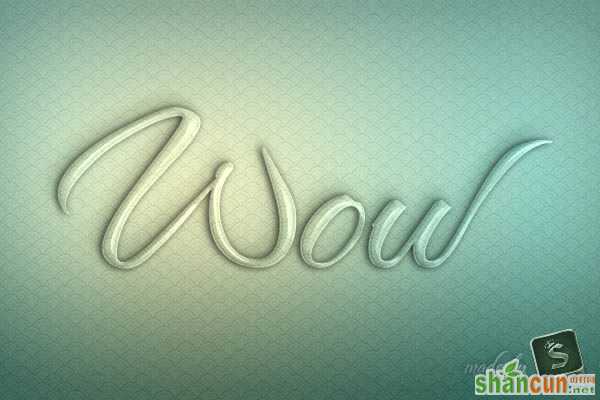
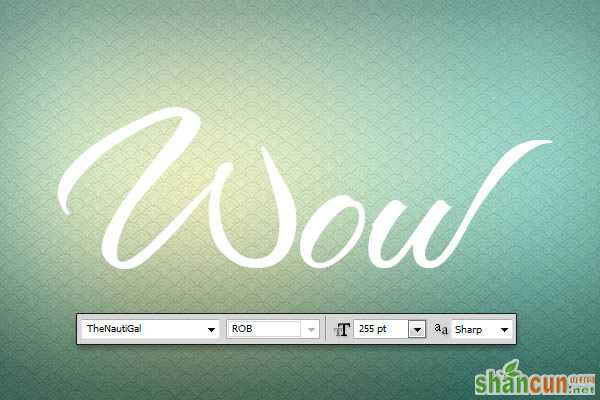
教程效果图:
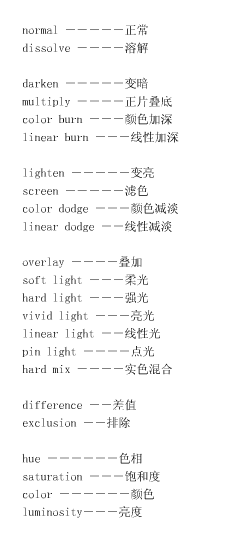
注:PS图层混合模式的中英文对照
Step 1新建白色文档
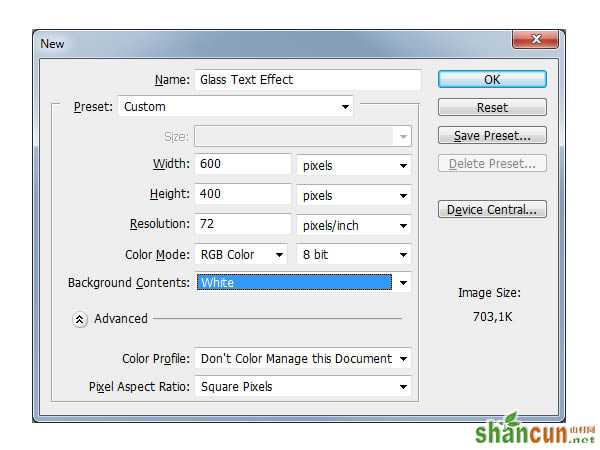
Step 2背景设置如下
相关教程:
Photoshop制作破碎裂纹的玻璃文字
PS制作质感玻璃字
Photoshop制作漂亮的透视玻璃立体字
PhotoShop图层样式制作透明玻璃字体效果教程
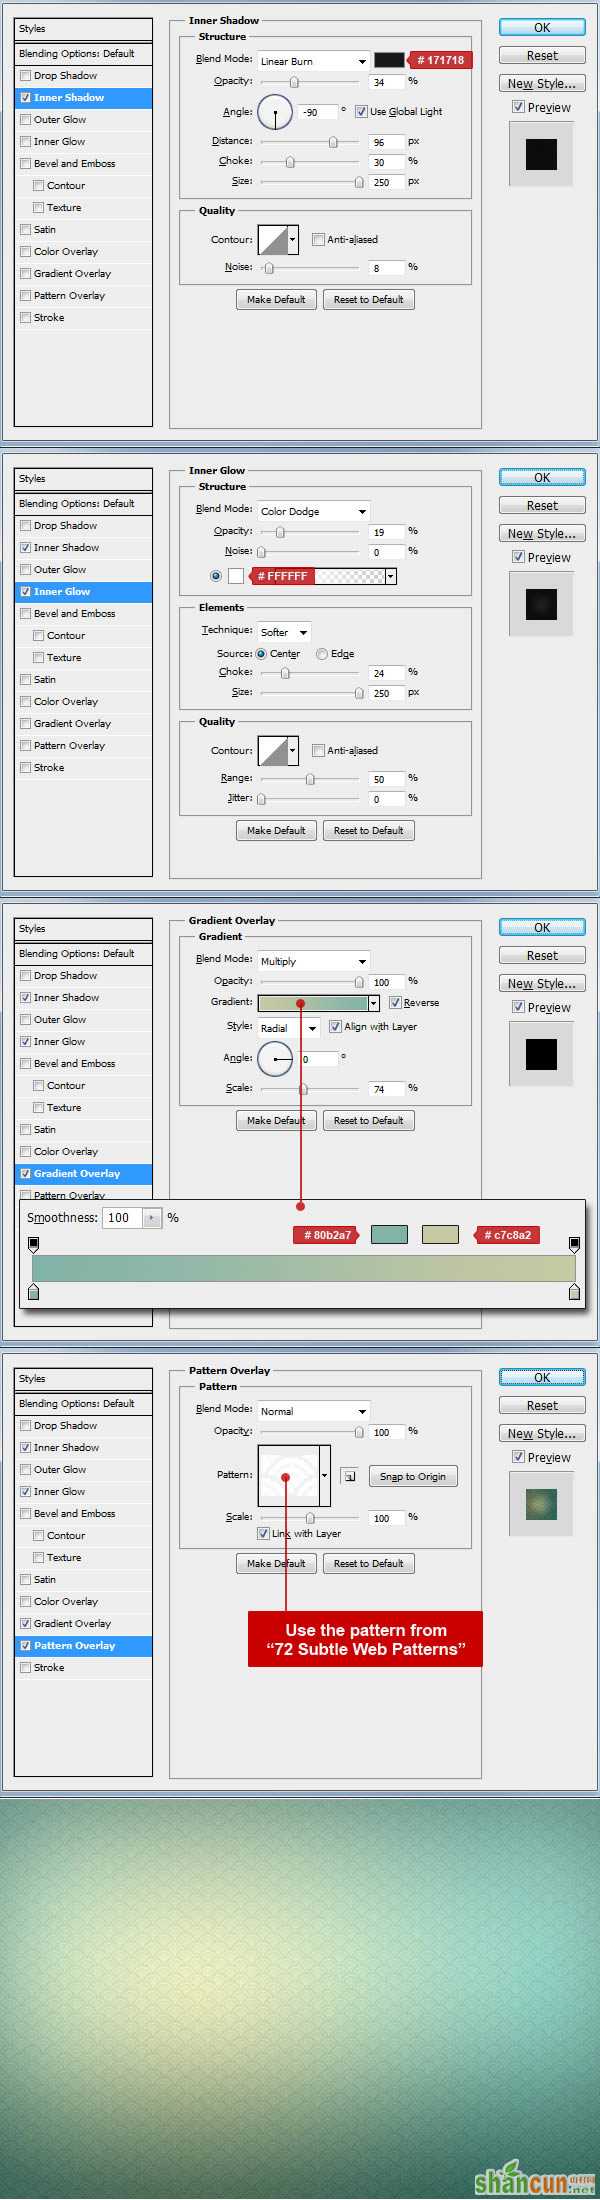
Step 3任意字体,此字体为TheNautiGal ROB(点此下载) ,大小255pt
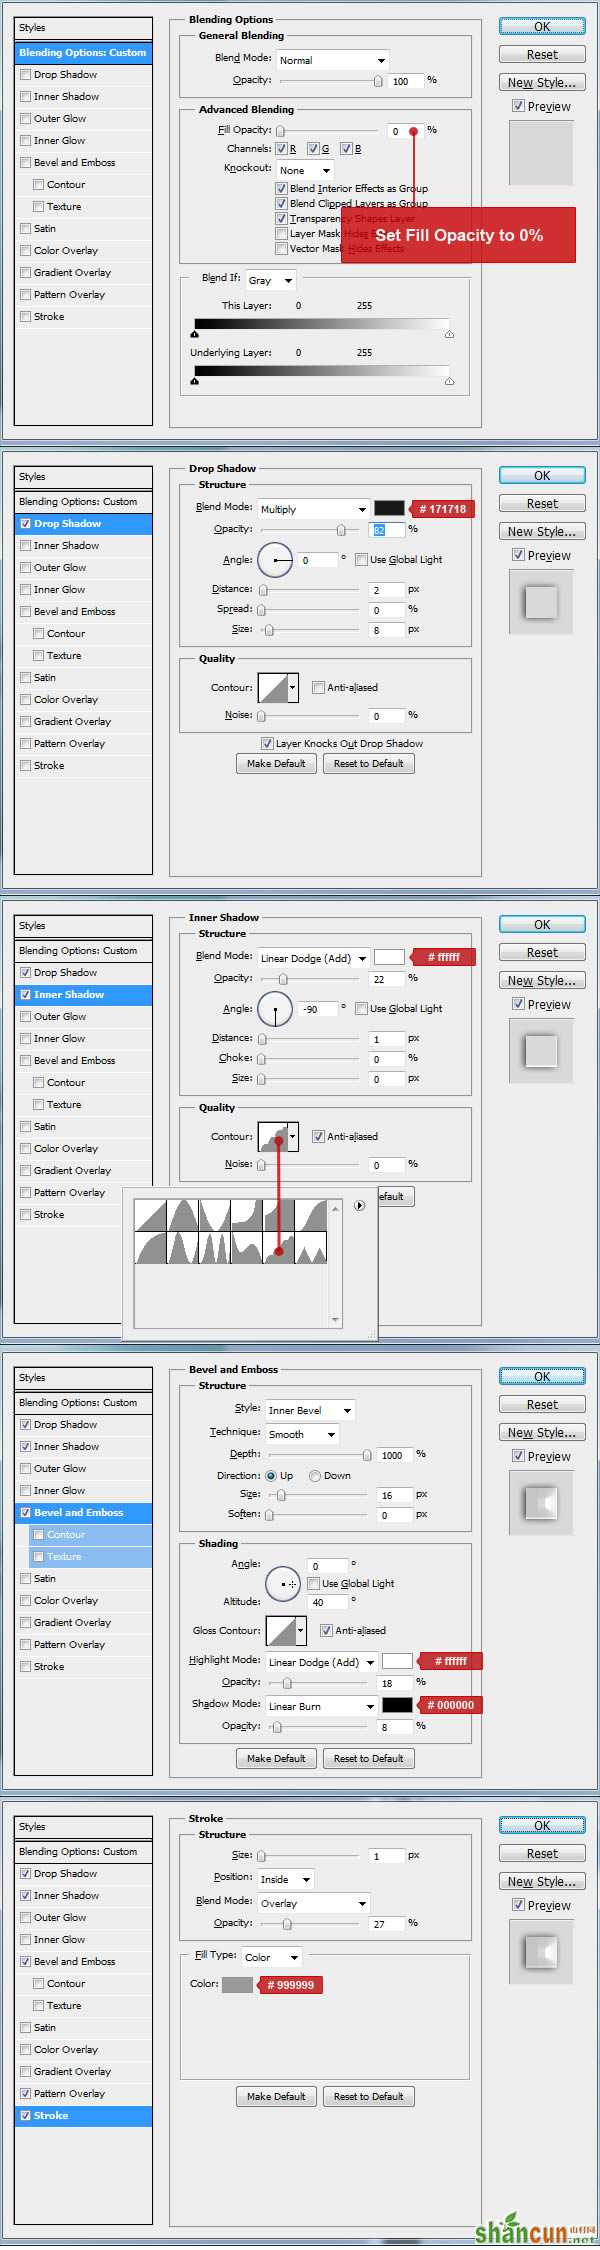
Step 4字体填充0%,应用下列样式
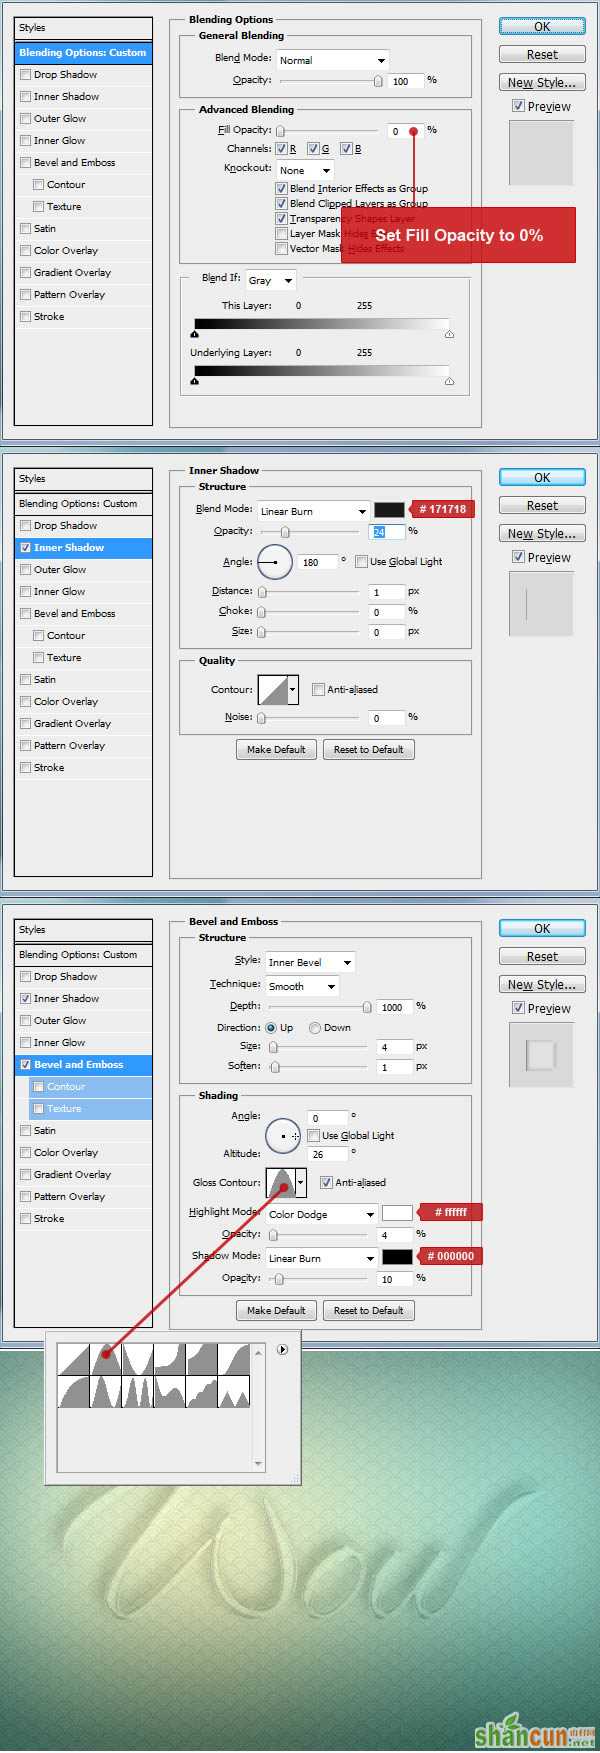
Step 5复制文字图层,应用下列样式
Step 6再复制一层,应用下列样式
Okay!完成
相关教程:
Photoshop制作破碎裂纹的玻璃文字
PS制作质感玻璃字
Photoshop制作漂亮的透视玻璃立体字
PhotoShop图层样式制作透明玻璃字体效果教程


