
主要给大家讲的是文本工具和图层样式的基本应用和技巧,本文对每个基本操作都有做了详尽的说明,如果你是初学者,可以一步步按教程操作,对你的技能会有很大的提升。
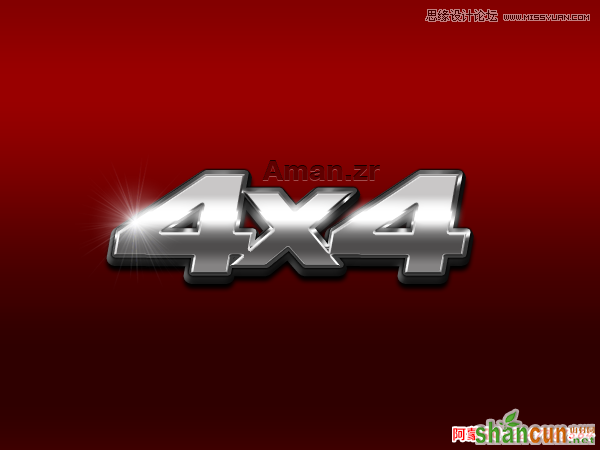
最终效果图
photoshop教程具体的制作步骤如下:
第一步 1、按ctrl+N,新建一个文档,大小600x500px,命名为"金属车标"
2、双击背景层,设置图层样式--渐变叠加
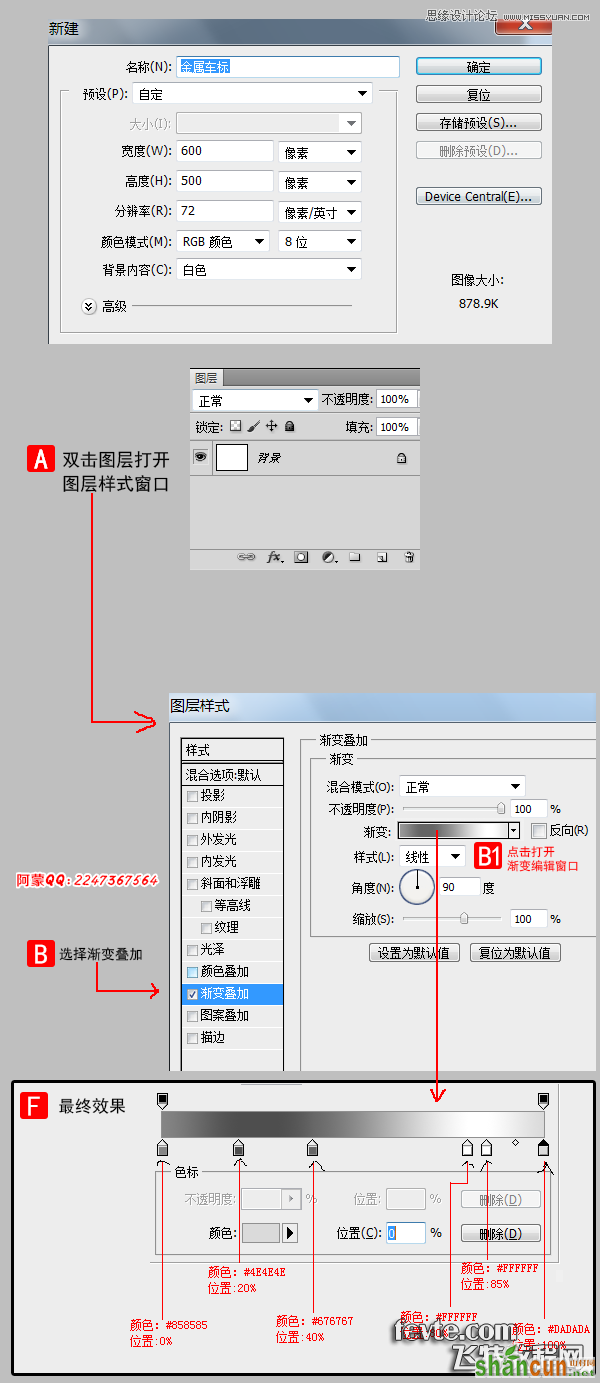
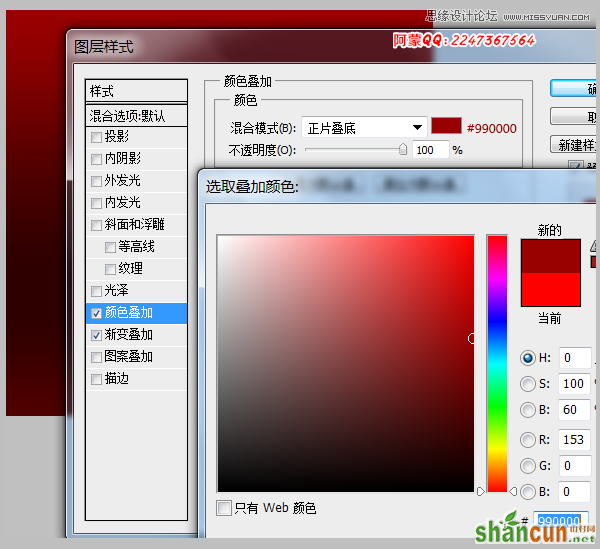
第二步 继续添加颜色叠加样式,颜色 #990000,图层混合模式为"正片叠底"
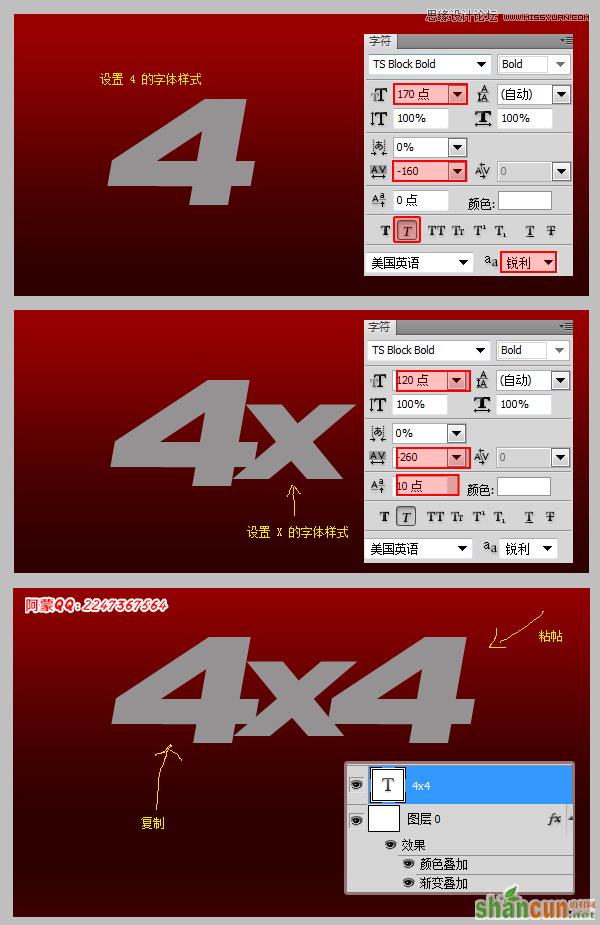
第三步 1、添加文字"4",这里用的到字体是 TS BLOCK 下载设置文字样式,接着加入文字"x"并设置文字的样式,复制文字"4"并粘帖在"x"后面,如下图
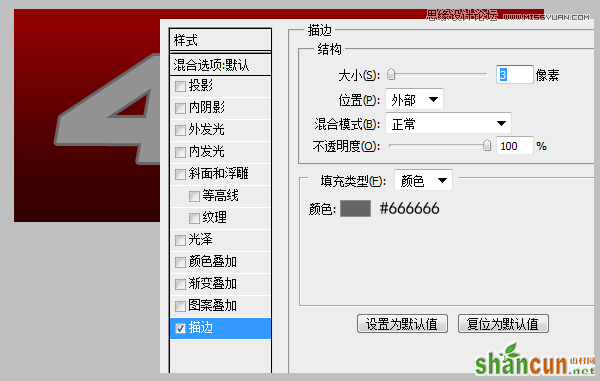
第四步 1、给文字层,添加描边样式,描边大小为3,颜色为 #666666
第五步 1、把文字层的描边样式分离出来,作为一个独立的层;右键点击文字层的样式,选择"创建图层"
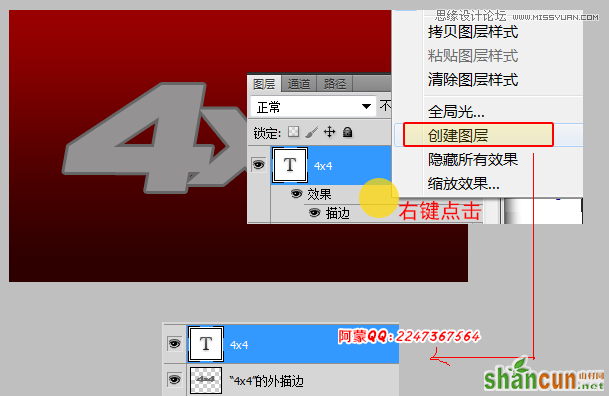
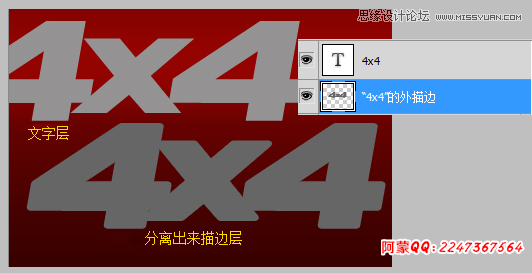
第六步 1、分离后的效果如下图,描边层将作为车标斜面
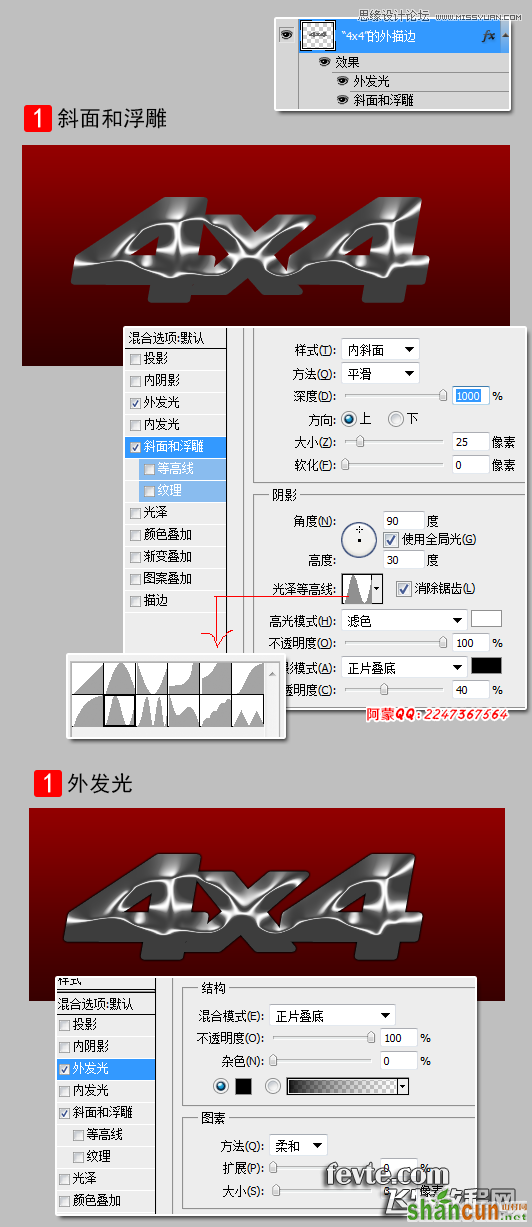
第七步 1、选择文字层,添加图层样式,使其有金属的效果
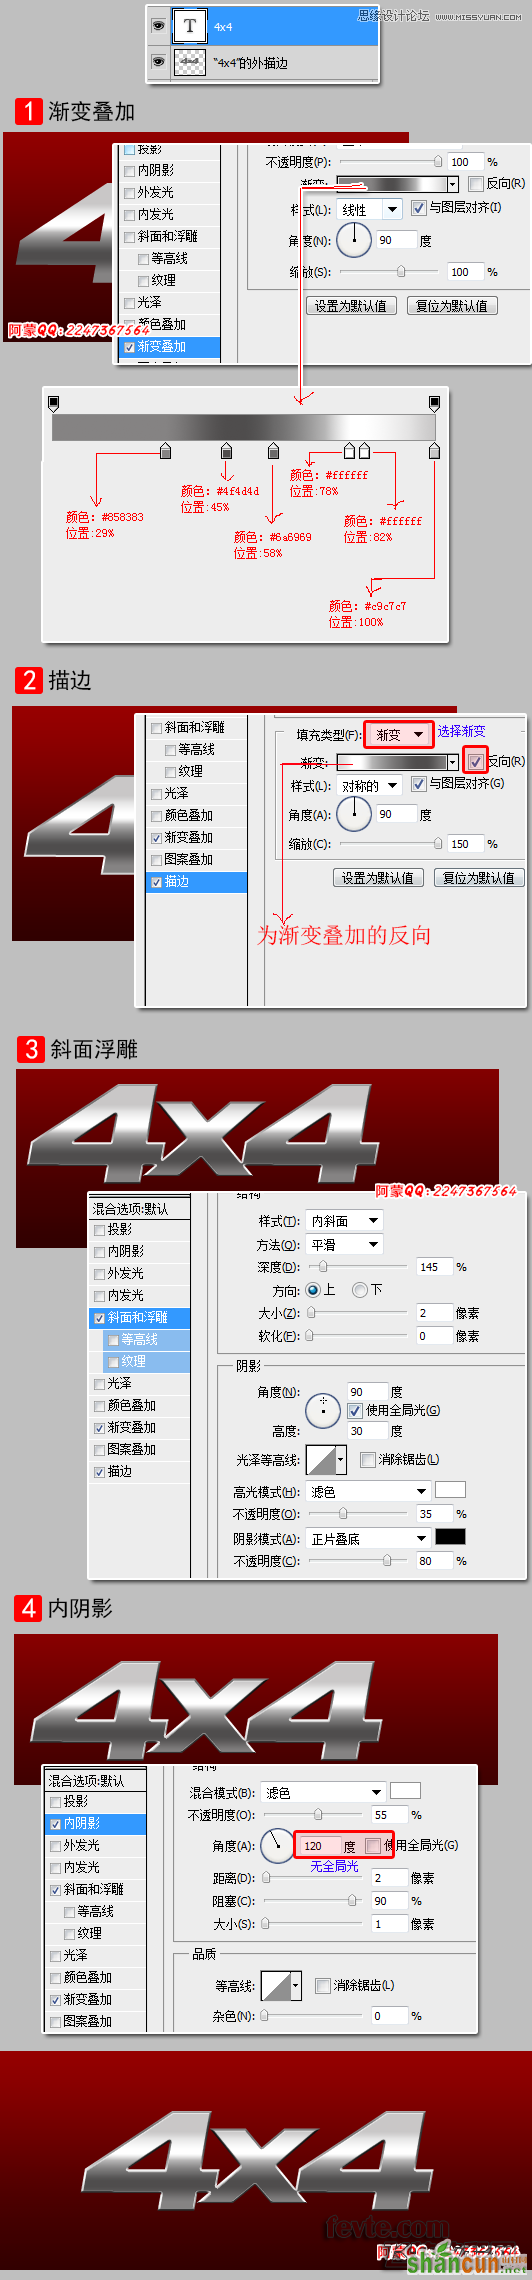
第八步 1、选择图层"4x4的外描边",添加斜面浮雕和外发光,具体设置如下图
第九步 这一步我要做个车标的黑色塑料外壳,可以固定在车上; 1、复制文字层,并清除图层样式,接着添加投影,最后把投影样式分离出层(操作同第五步)
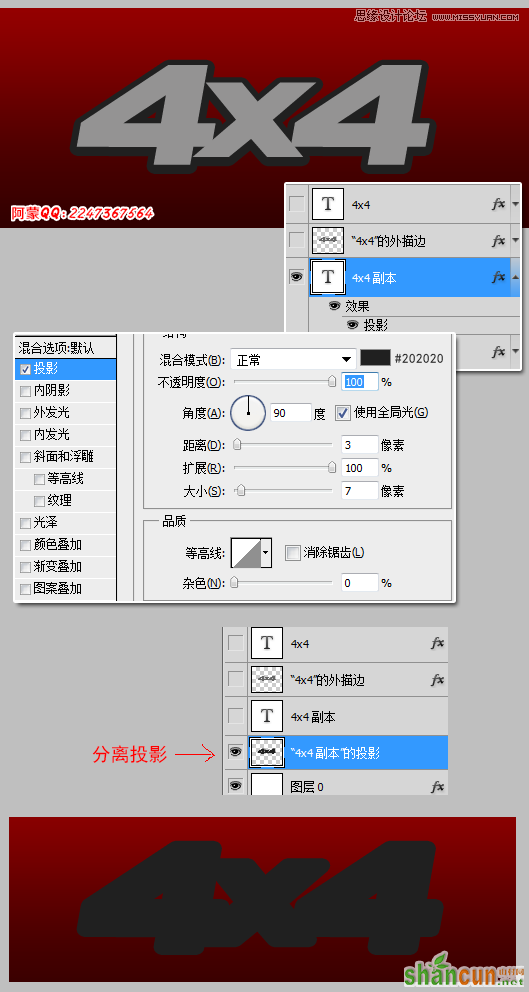
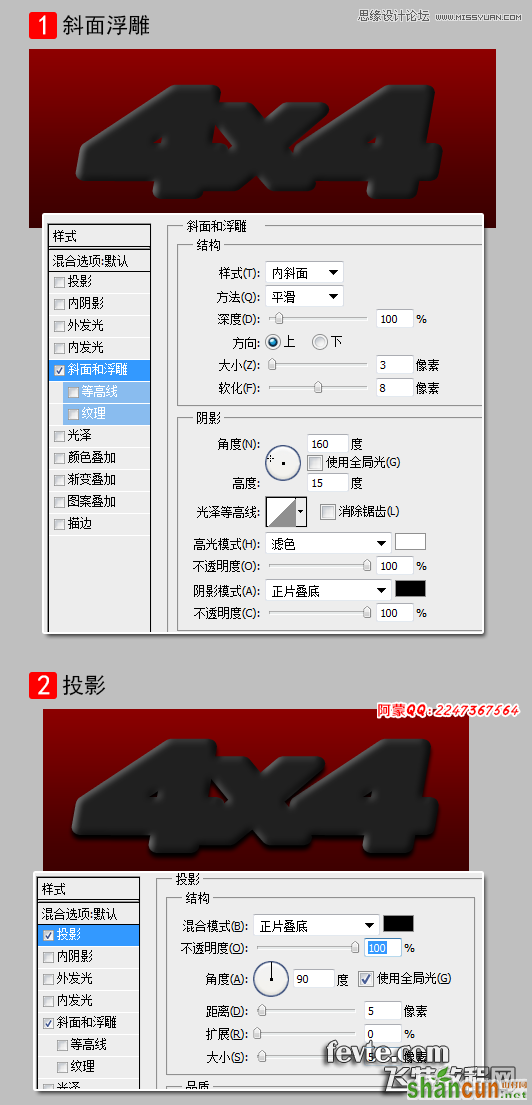
第十步 1、选择图层"4x4 副本的投影",添加斜面浮雕、投影样式
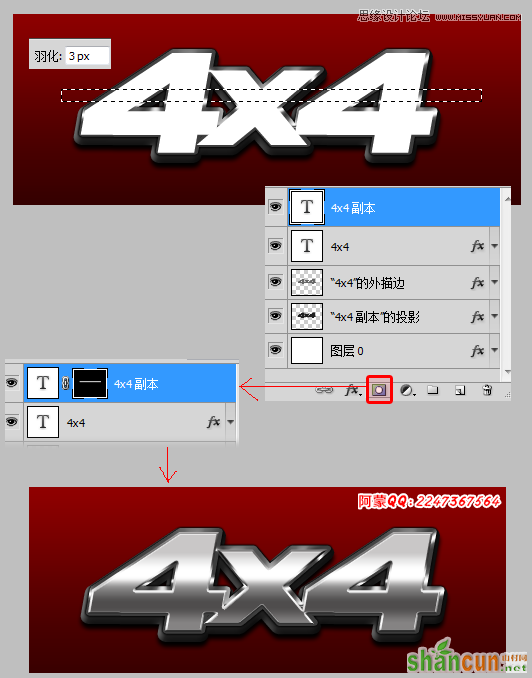
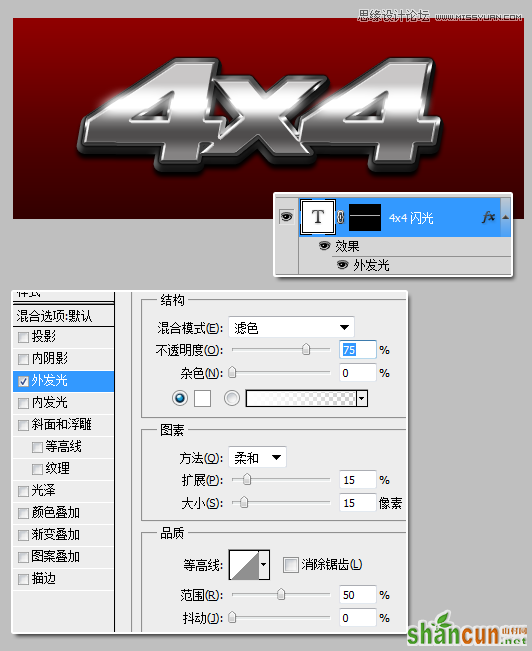
第十一步 1、复制"4x4"文字层,清除图层样式,把文字颜色改为白色,并命名为"4x4闪光";然后用矩形选区工具(M),羽化 3个像素,绘制一个矩形选区,然后点击图层面板上的"添加图层蒙版"按钮
第十二步 1、选择图层"4x4闪光",添加外发光样式
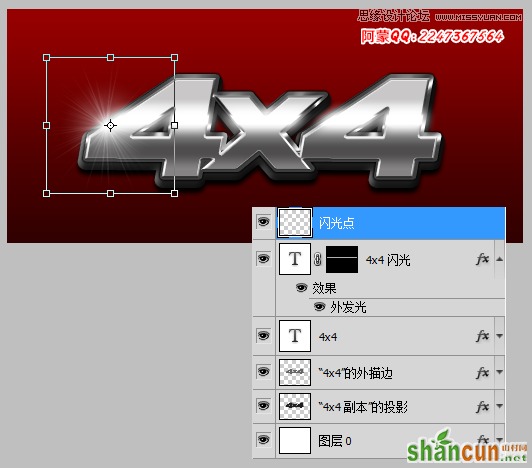
第十三步 1、添加光晕在车标的边缘,打开光晕.png 下载 ,复制一个光晕到金属车标的左边,如下图
最终效果 最后你可以加上你的logo,让车标看起来更加真实。


