Photoshop制作亮晶晶的字体
效果字制作分为三部分:首先是黄金字部分制作,直接用图层样式完成;然后是文字的纹理制作,用到了多组滤镜;最后就是光斑部分的制作,用画笔来完成。
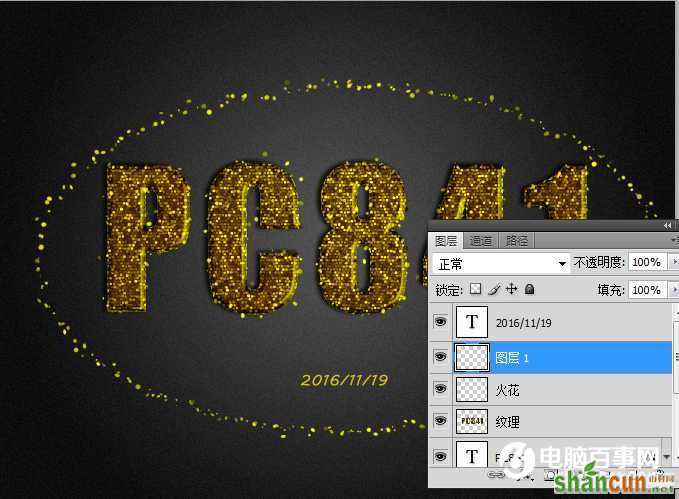
最终效果

1、创建一个新文档为:1350 * 1000像素。选择渐变工具,颜色设置为:#525252至#0d0d0d,然后由中心向边角拉一个径向渐变作为背景。

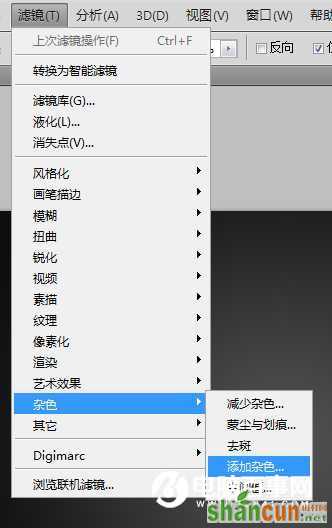
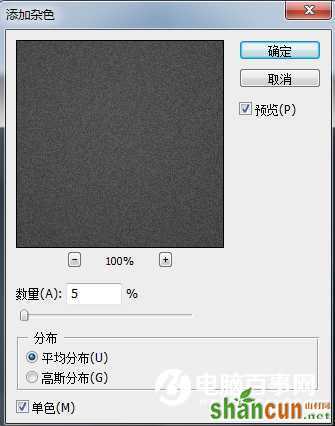
2、执行:滤镜 > 杂色 > 添加杂色,数值为5,选平均分布,勾选单色,具体设置如下图。
3、把前景颜色设置为:#ffeb0f,选择文字工具,字体选择比较粗一点的字体,打上文字,并设置好文字大小。

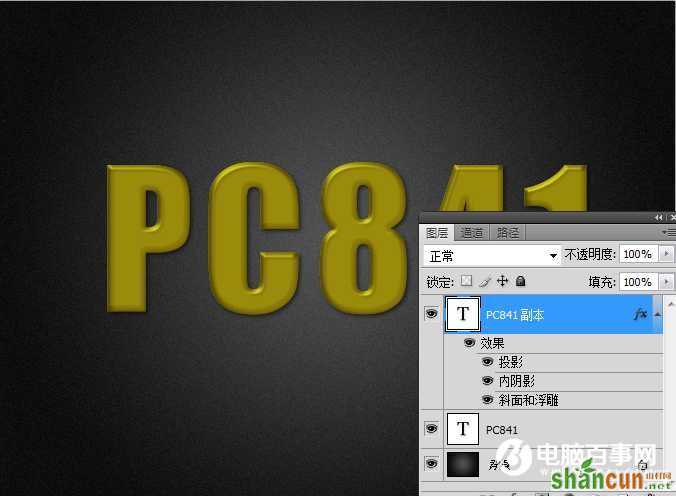
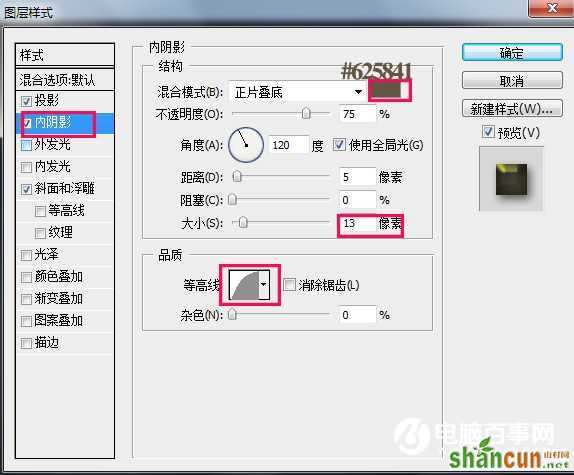
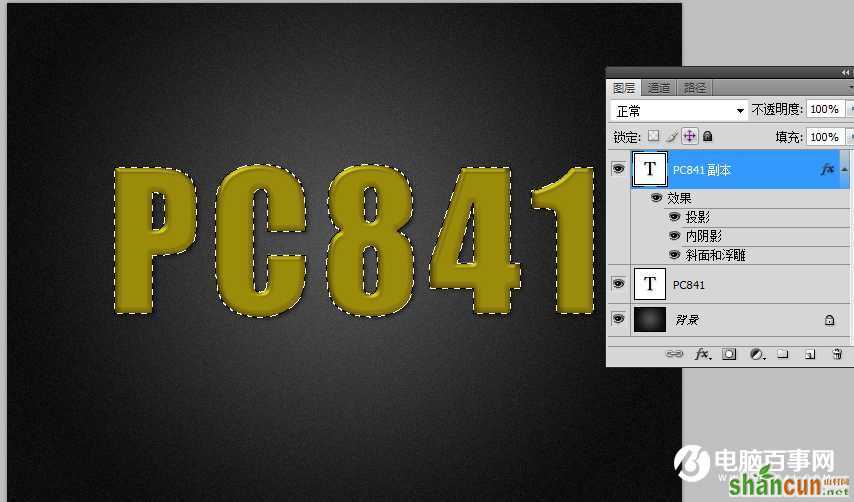
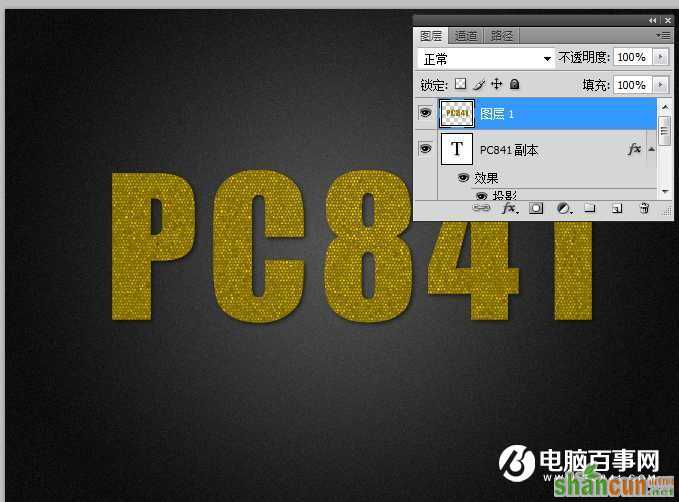
4、把文字图层复制一层。然后双击图层面板文字缩略图调出图层样式。
投影:颜色改为:#383838,大小为10。
Photoshop制作亮晶晶的文字
内阴影:颜色更改为:#625841,大小13,等高线为半圆轮廓。
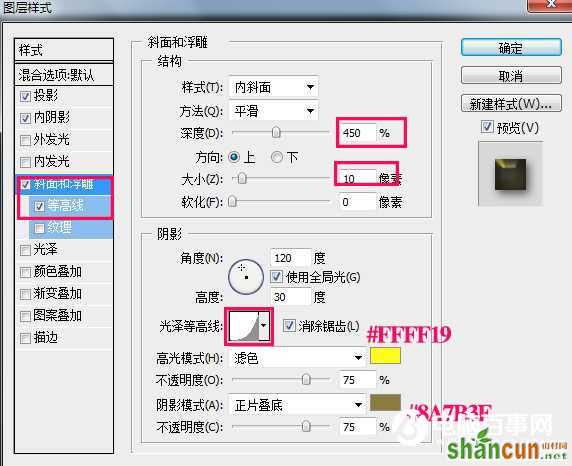
斜面和浮雕:深度为450,大小为10.光泽等高线自定义如图,并勾选消除锯齿;更改高光模式颜色:#ffff19,阴影模式颜色:#8a7b3e。等高线只要勾选消除锯齿。
5、加好图层样式后的图层及效果如下图。
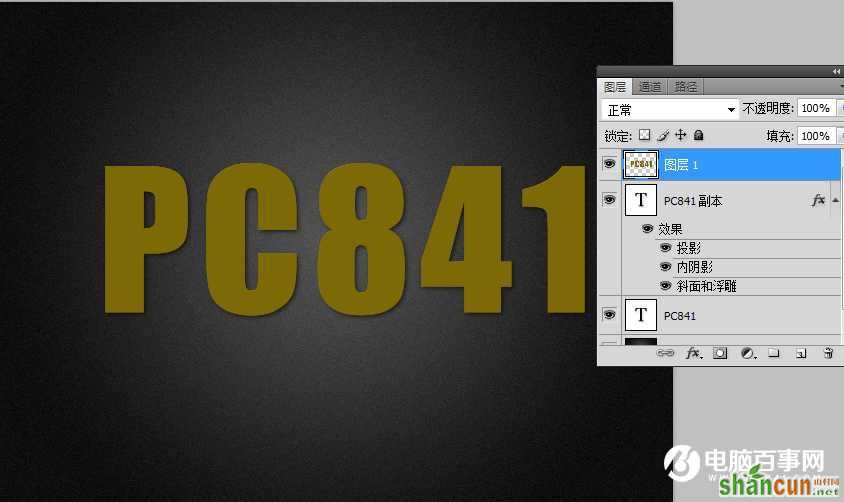
6、前景色和背景色设置为:#7d6905和#d3c614。按Ctrl 键同时点击字体图层载入选区。
7、在所有图层上面新建一个“纹理”图层,选择前景色:#7d6905填充,然后按Ctrl + D 取消选区。
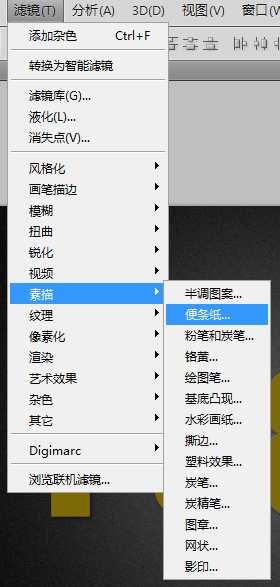
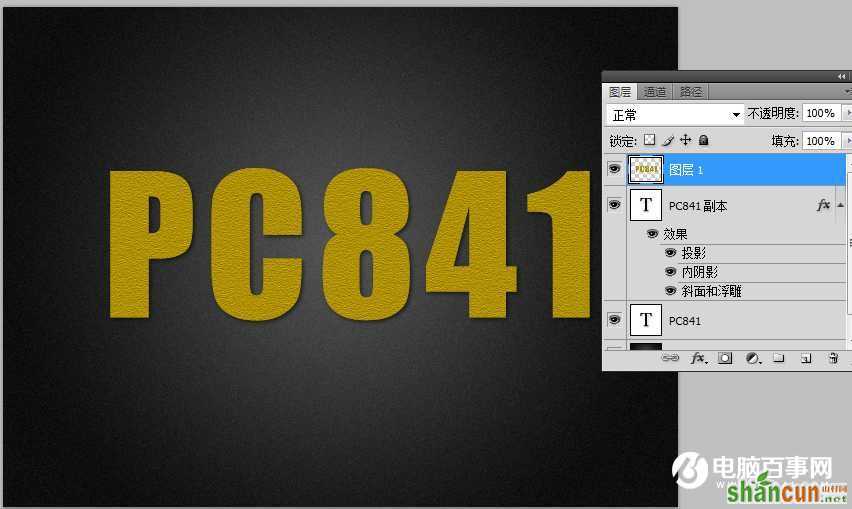
8、对“纹理”图层执行:滤镜 > 素描 > 便纸条。

Photoshop制作亮晶晶的文字
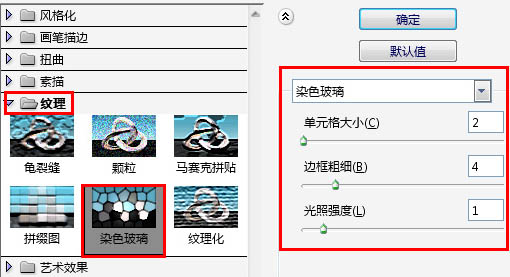
10、执行:滤镜 > 纹理 > 彩色玻璃,参数及效果如下图。
11、执行:滤镜 > 风格化 > 照亮边缘,参数及效果如下图。

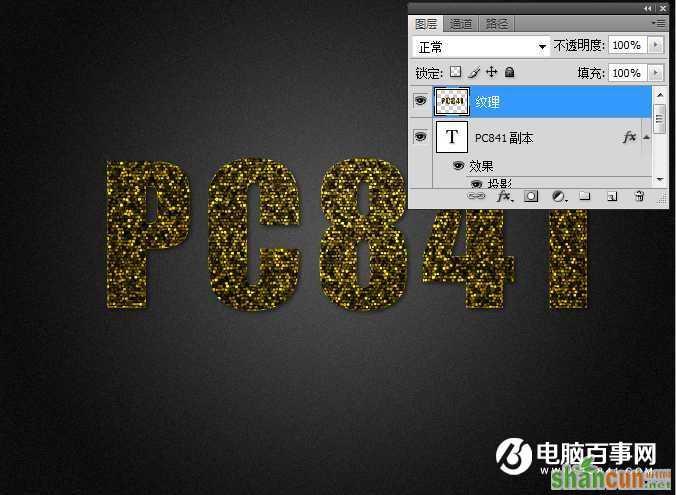
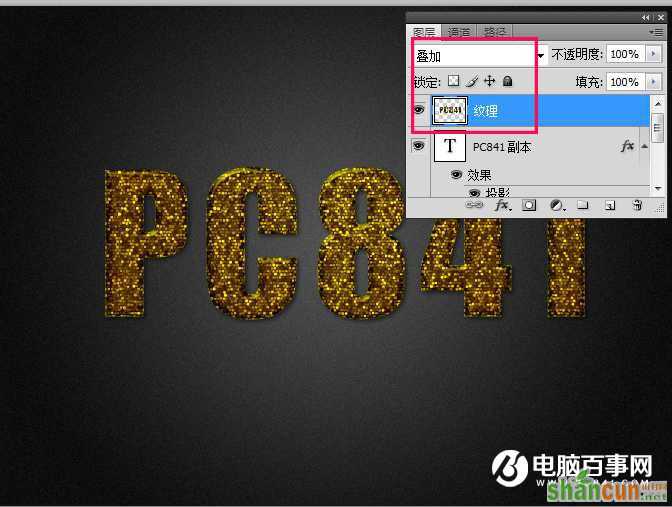
12、把“纹理”图层混合模式改为“叠加”,效果如下图。
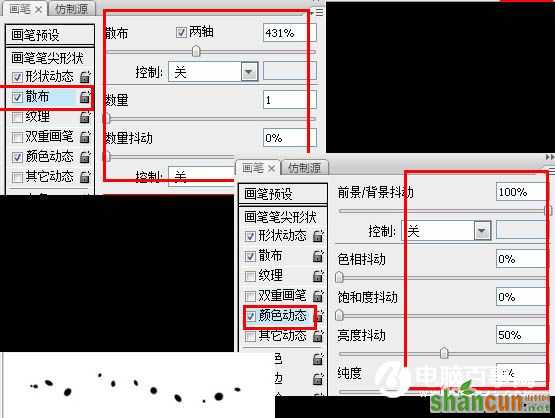
13、选择画笔工具,打开画笔面板(窗口 > 画笔,快捷键F5),然后分别设置:画笔笔尖形状、形状动态、散布、颜色动态,具体参数设置及画笔预览图如下图。

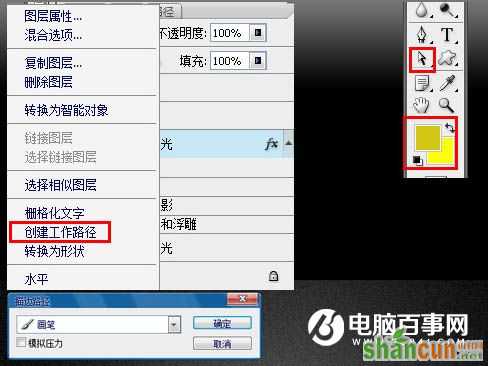
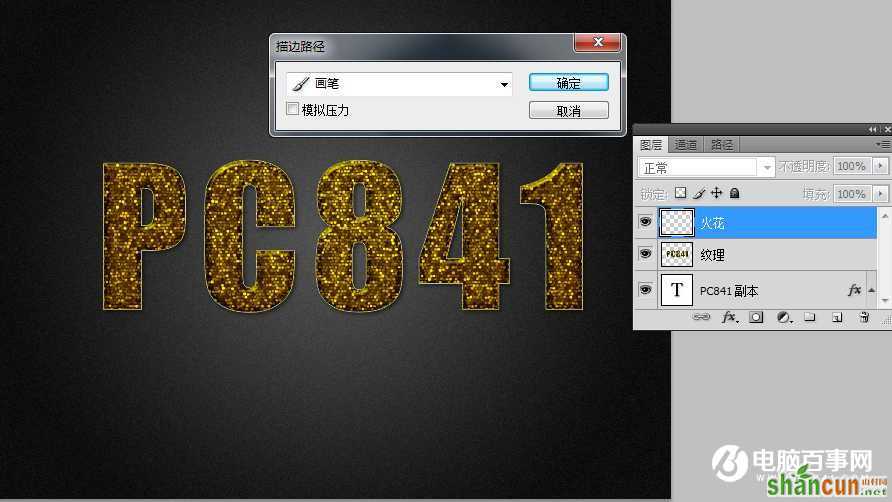
14、右键单击文字图层,选择“创建工作路径”。把前几颜色设置为:#d3c614,背景颜色设置为:#ffff08。在所有层上新建一个图层,命名为”火花“,选择钢笔工具,右键单击路径,选择“描边路径”。从下列菜单中选择画笔,不框选模拟压力。
Photoshop制作亮晶晶的文字
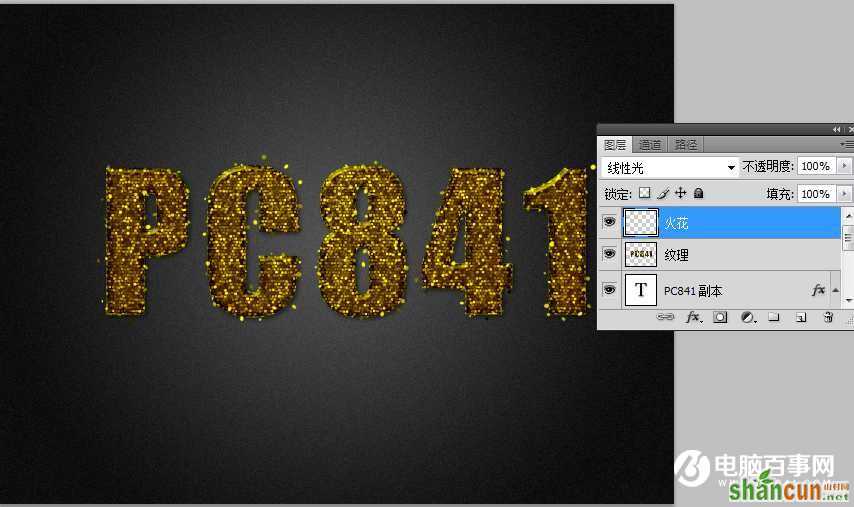
15、隐藏路径,更改“火花”图层混合模式为“线性光”,效果如下图。
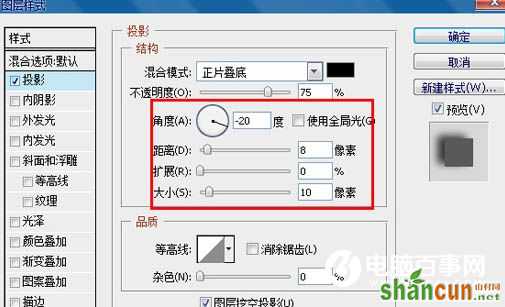
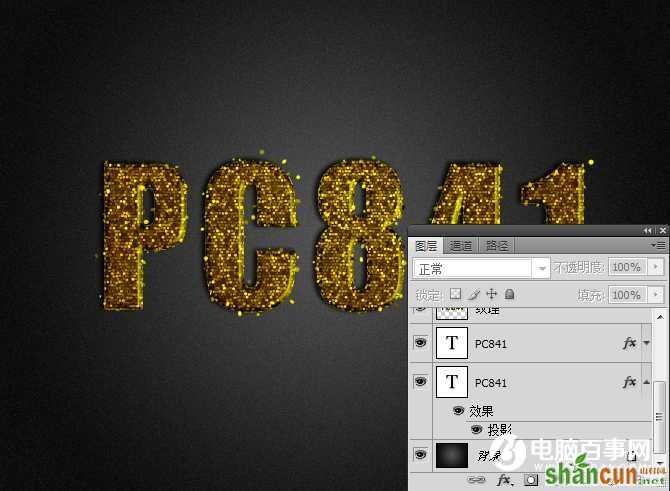
16、给之前复制的文字图层添加图层样式,选择投影,参数设置如下图。
17、用形状工具画出一个椭圆工作路径,新建一个图层, 选择钢笔工具,右键单击路径,选择“描边路径”,并打上日期,如图。
最终效果